SECTION 1
GETTING ACQUAINTED
6
SECTION 1 – Getting Acquainted
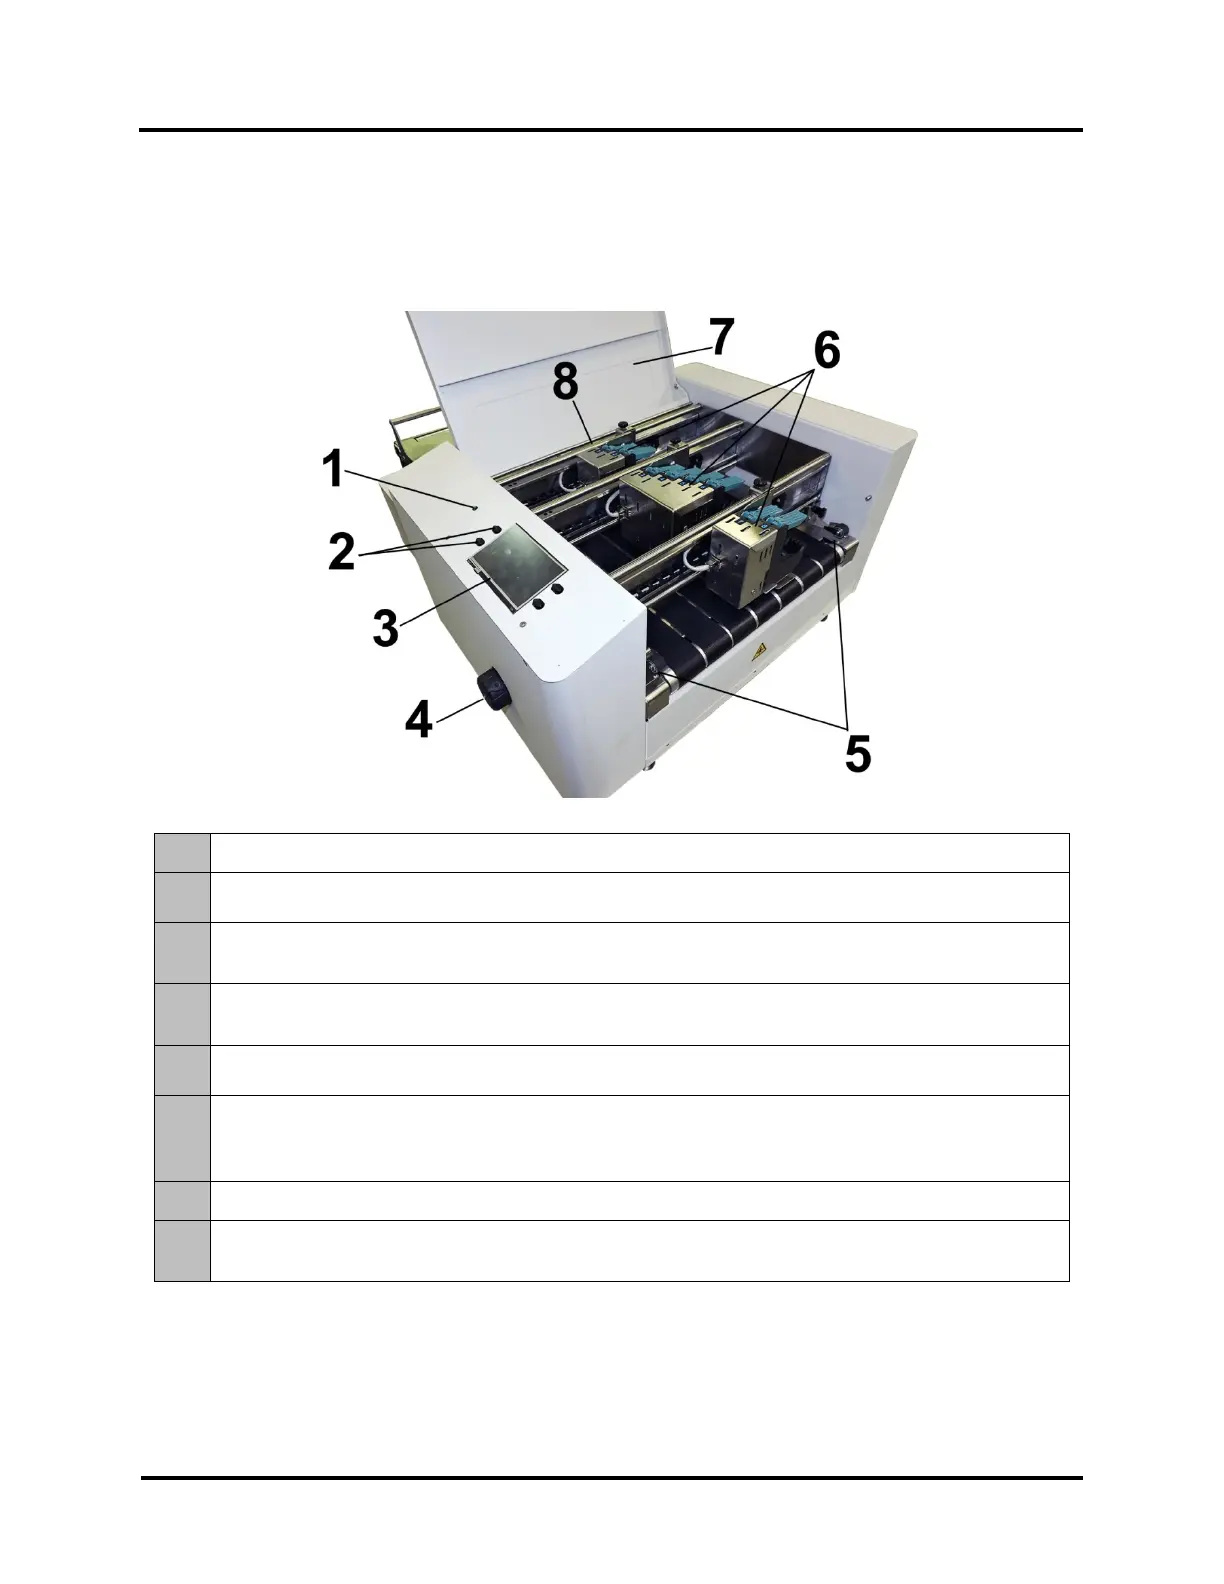
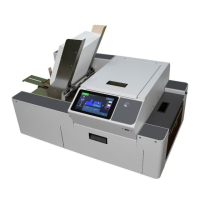
Front View
1.
POWER INDICATOR LIGHT – ON (illuminated) when Main Power Switch is ON.
2.
CONTROL PANEL KEYS – Used to access commonly used Printer functions.
Quick Menu, Shutdown/Restart Menu, Transport Control Menu, Pause/Resume Job.
3.
CONTROL PANEL TOUCHSCREEN – Provides access to Printer Menus and controls to set up and
operate the Printer.
4.
MEDIA THICKNESS ADJUSTMENT KNOB – Adjusts height of Printhead Carriage to compensate for
different media thicknesses.
5.
EXIT PRESSURE ROLLER ASSEMBLY – Can be used to help media exit Printer. Assembly is
repositionable. Position so it provides media drive but is out of the print-area.
6.
PRINT UNITS – Contains three repositionable Print Units. Two of the Print Units can accommodate
two Printheads (ink cartridges) and one can accommodate four Printheads. A continuous image up to
~4 inches high can be printed when all Print Units are combined.
7.
TOP COVER – Encloses the Print Area.
8.
MEDIA SENSOR – Senses media as it enters the Printhead area. Sensor is located between the first
Print Unit (Heads 1, 2) and the Feed Rollers.