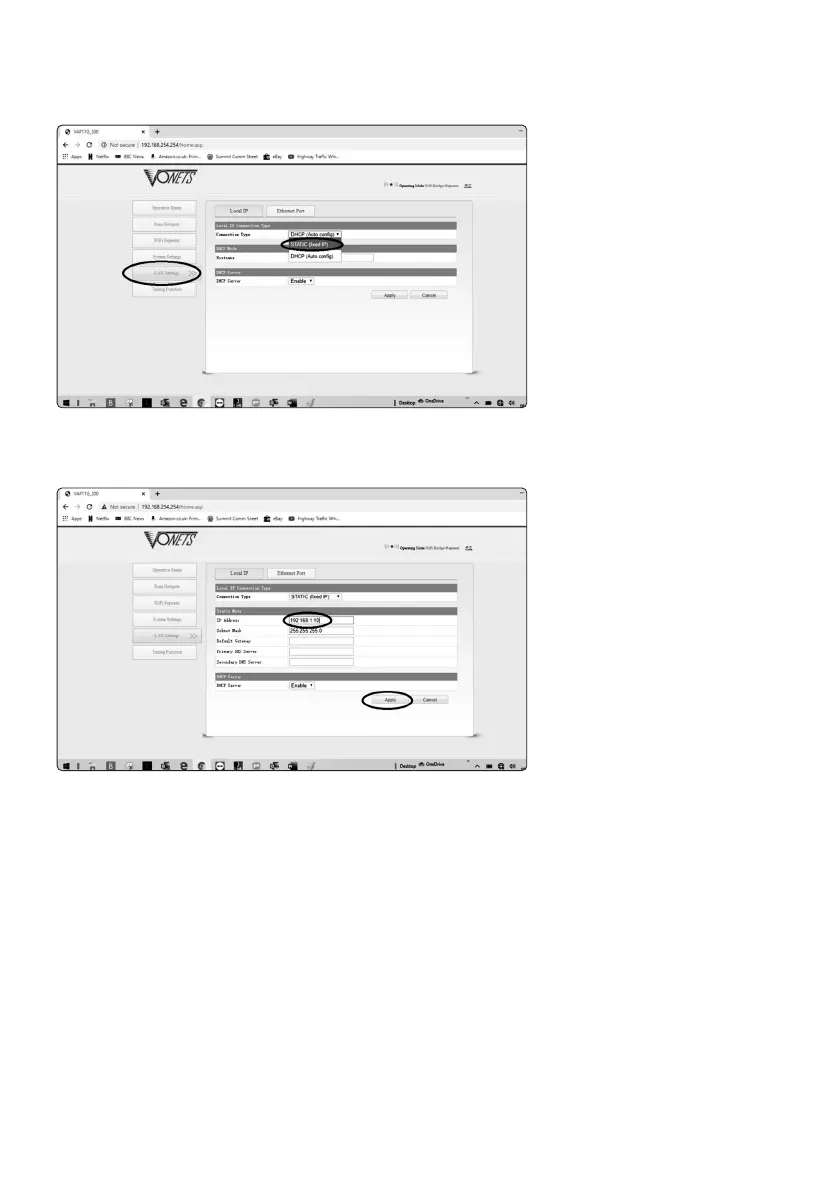
5. On the next menu, select ‘LAN settings’ then ‘Static IP’
6. In the IP address box, change the address to ‘192.168.1.10’ and click ‘Apply’
7. The device will now say ‘Please wait’; once this is finished (approximately 10 seconds), unplug the
USB from your laptop.
To use the wireless adaptor, you will need a power supply or battery pack to power the unit, a
standard USB charger power supply or battery pack will suffice. Once powered, plug the RJ45 into the
Pro9 base and open a web browser. Type ‘192.168.1.115’ into the browser and the Quail API will open
for you to make alterations to the settings.
Now this device is setup. See Step 18 in the main manual for details of the API.
page 19