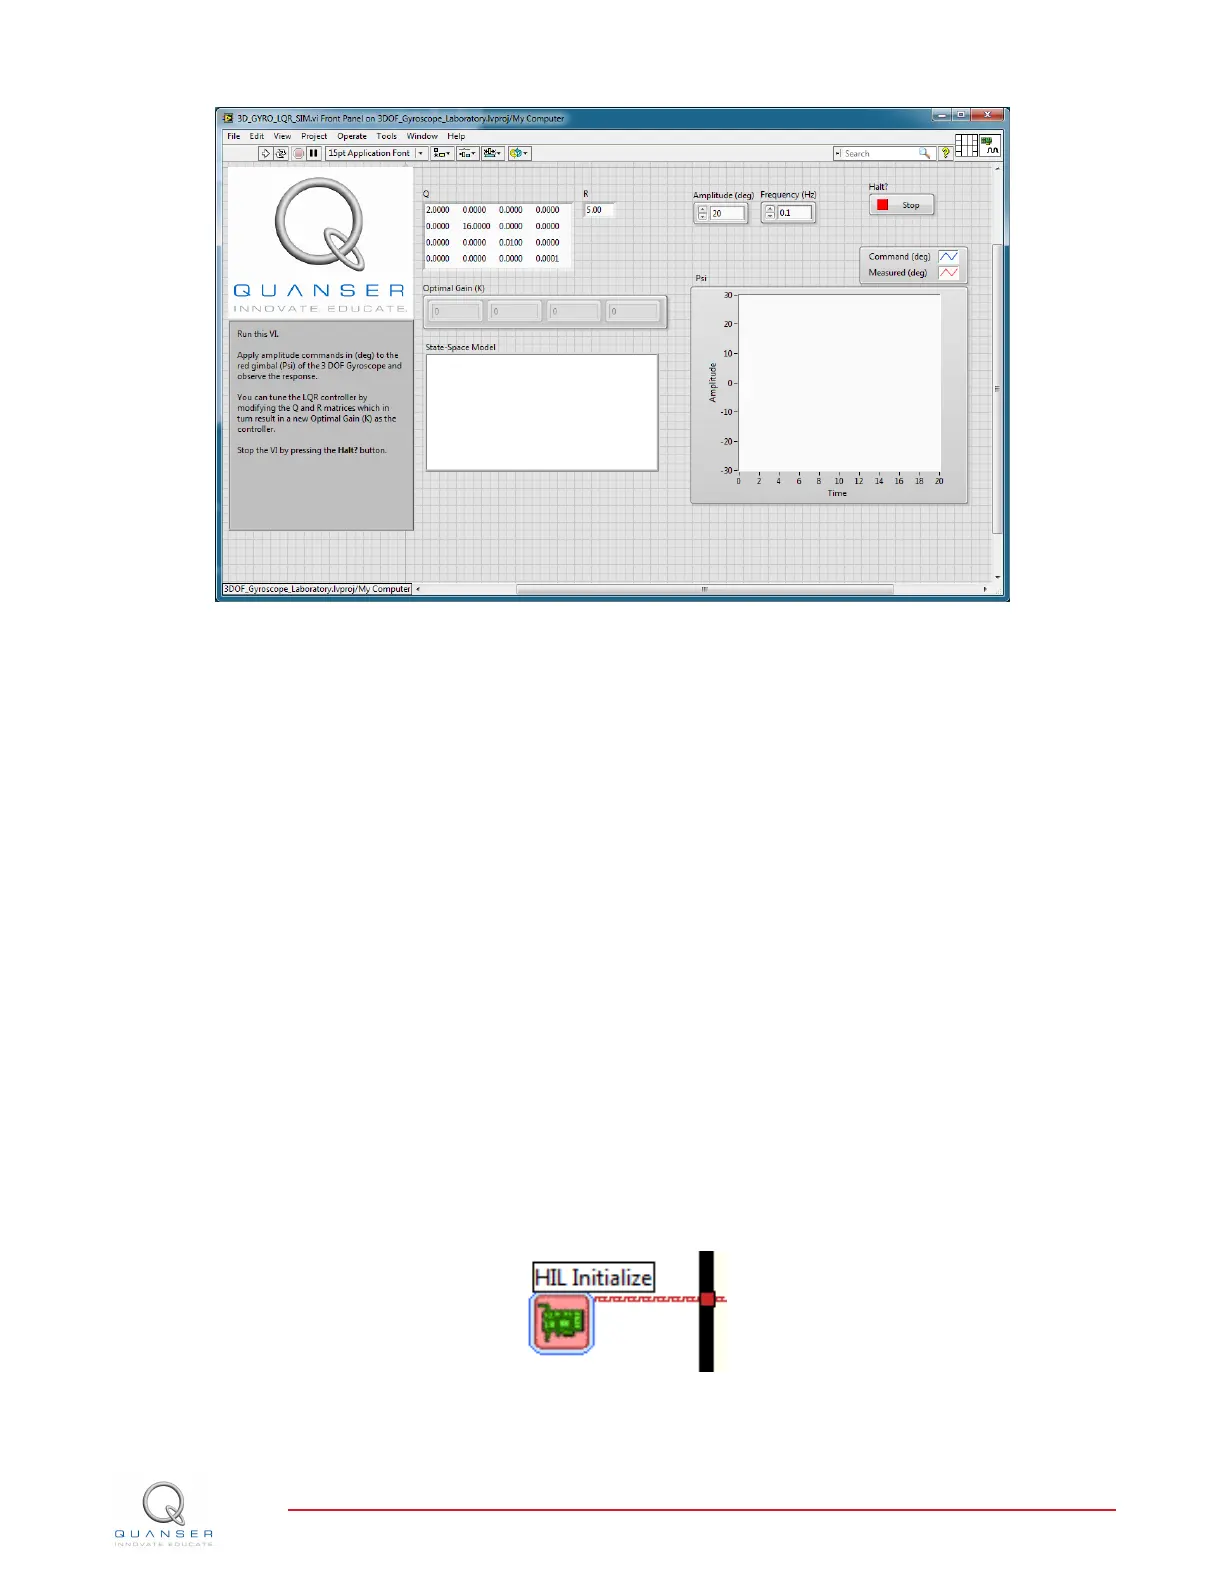
Figure 4.2: 3DOF Gyroscope Simulation VI
4. The state space matrices are already loaded. The Q and R matrices are also set to the original values men-
tioned in Section 3.1.1.
5. Run the VI. You are now ready to design your LQR control and simulate the closed-loop response.
4.3 Setup for Running on 3D GYRO
Before performing the in-lab exercises in Section 3.2, the 3D GYRO system and the 3D_GYRO_LQR.vi must be
configured properly.
Follow these steps to get the system ready for this lab:
1. Lock the silver rectangular frame of the 3D GYRO in place as detailed in the 3D GYRO User Manual [2].
2. Open the 3D_GYRO_LQR.vi, shown in Figure 3.3.
NI CompactRIO Users: Open the 3D_GYRO_LQR (cRIO).vi under the NI-CompactRIO device in the Lab-
VIEW Project. Make sure the NI CompactRIO in the project is configured for the cRIO you will be using (e.g.,
correct IP address). See the example in the RCP Installation Guide for NI CompactRIO for more information.
3. Configure DAQ: Ensure the HIL Initialize block is configured for the DAQ device that is installed in your system.
To do this, go to the block diagram (CTRL-E) and double click on the HIL Initialize Express VI shown in Figure
4.3.
Figure 4.3: HIL Initialize Express VI
3D GYRO Laboratory Guide
v 1.1