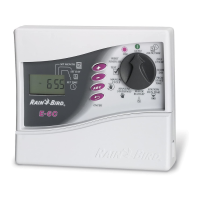
21Ec Controller
NOTE: If you want to test only one (or more)
stations, follow the procedure in Manually Run a
Station(s) on p. 19.
2. The number 2 appears in the display, representing a two-
minute test run per station.
3. Press + or - to increase or decrease the test run time. You
can set the test run time anywhere between 1 and 10
minutes. Each station will run for the time you set here.
4. Press ENTER to start the all-stations test.
5. Then turn the programming dial back to the AUTO position.
During the test, the number of each operating station appears in
the display, along with the stations remaining run time. Any
station set for zero run time in all of the automatic programs
(A, B, or C) will be skipped in the all-stations test.
NOTE: At any time during the all-stations test, you
can press ENTER to manually advance to the next
station.
When the all-stations test is complete, the controller returns to
AUTO mode and awaits the next scheduled program start time.
INSTALLING THE CONTROLLER
Although this manual provides directions for connecting the
wiring to the controller, local electrical codes may vary in their
requirements for proper and safe installation.
NOTE: This controller must be installed in full
compliance with local electrical codes.
The Ec controller must be installed indoors only.
Choose a Proper Location
Choose a secure location where you can easily reach the
controller. We recommend mounting the controller at eye level
in a utility room (garage, laundry room, etc.).
1. The mounting location must be within 5 feet (1,5m) of the
electrical wall outlet.
NOTE: To minimize electrical interference, select a
location at least 15 feet (4,6 m) away from high-
draw motors such as air conditioners, refrigerators,
or pool pumps.
2. When selecting a location, choose a flat, stable vertical
surface to mount the controller on. Allow enough clearance
for electrical conduit and connections at the bottom of the
controller case.

 Loading...