7
The Ovens
Before using the ovens for the rst time and to dispel
manufacturing odours turn them to the maximum
temperature setting and run them empty for 45 minutes.
To clear the smell make sure the room is well ventilated to the
outside, by opening windows or turning on a cookerhood.
We recommend that people with respiratory problems
should vacate the area for this brief period.
Both ovens are conventional ovens. They are tted with a
special safety device which stops the ow of gas if the ame
goes out.
If, when you release the control knob the burner goes out,
then the safety device has not held in. Turn the oven control
knob to the o (0) position and wait for one minute. Repeat
the operation but hold the control knob in for slightly longer.
‘S’ (Slow) Cooking Function
Both ovens feature an ‘S’ setting. This is a low temperature
setting for cooking food over a long period. The oven centre
is set at 100 ºC. The ‘S’ setting can also be used for keeping
food warm.
The approximate temperature for each position is displayed
in Table 2.1 Preheating.
Operation
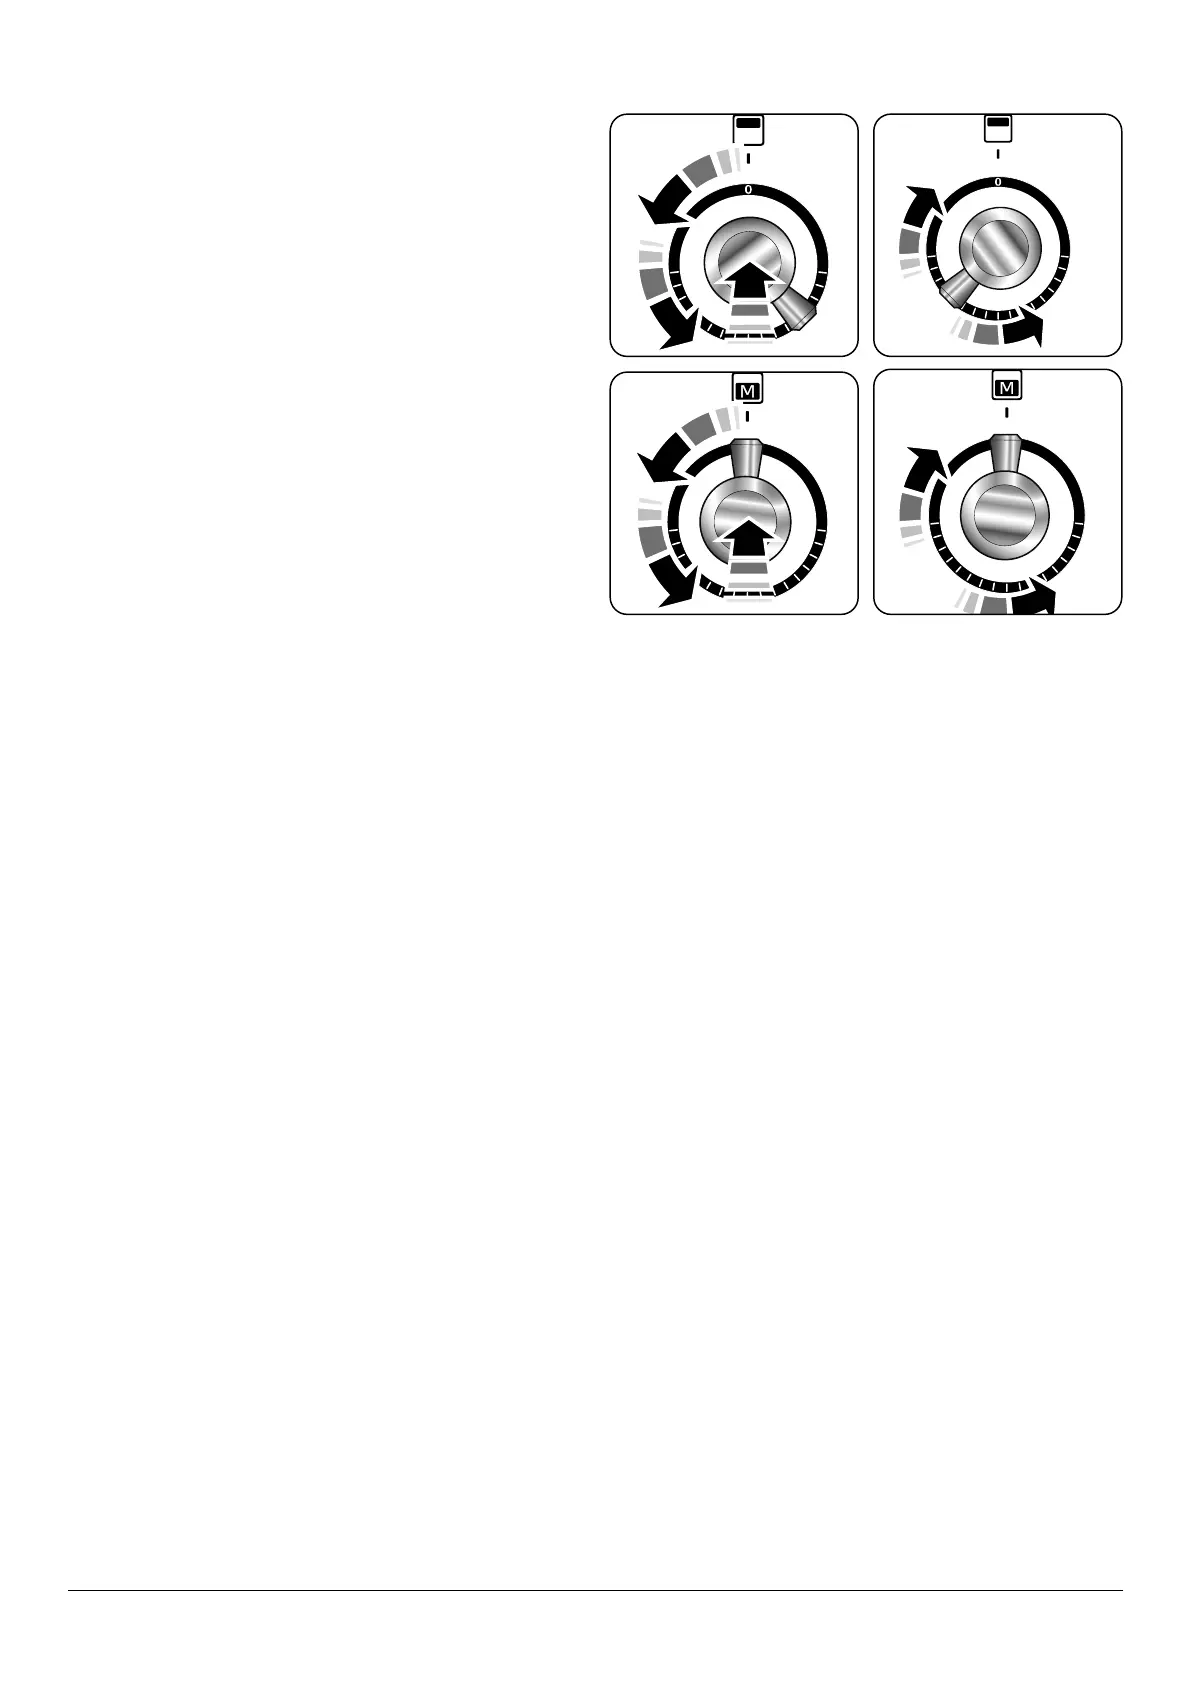
The Top Oven
(Gas)
Push in and turn the control knob counter clockwise to
select the ‘MAX’ position as indicated on the knob (Fig.
2.10). Continue pressing the knob until the oven ignites and
you see a stable ame. Adjust control knob to the required
setting.
Top Oven Grilling Function (Electric)
Push in and turn the control knob clockwise to switch on the
GRILL function using the function selector knob (Fig. 2.11).
The grill indicator light will illuminate, and the grill heating
element will switch on. Use this function for grilling. When
you have nished grilling, switch the top oven o.
n
Keep children away from the oven during grilling
and until the oven has fully cooled after use.
n
Warning: The top oven door must be kept open
when using this function.
The Main Oven (Gas)
Push in and turn the control knob counter clockwise to select
the ‘9’ position as indicated on the knob (Fig. 2.12). Continue
pressing the knob until the oven ignites and you see a stable
ame.
Adjust the control knob to select the desired setting using
the graphics located around the knob (Fig. 2.13).
Fig. 2.10 Fig. 2.11
Fig. 2.12
Fig. 2.13