function, and run until that breakpoint is hit.
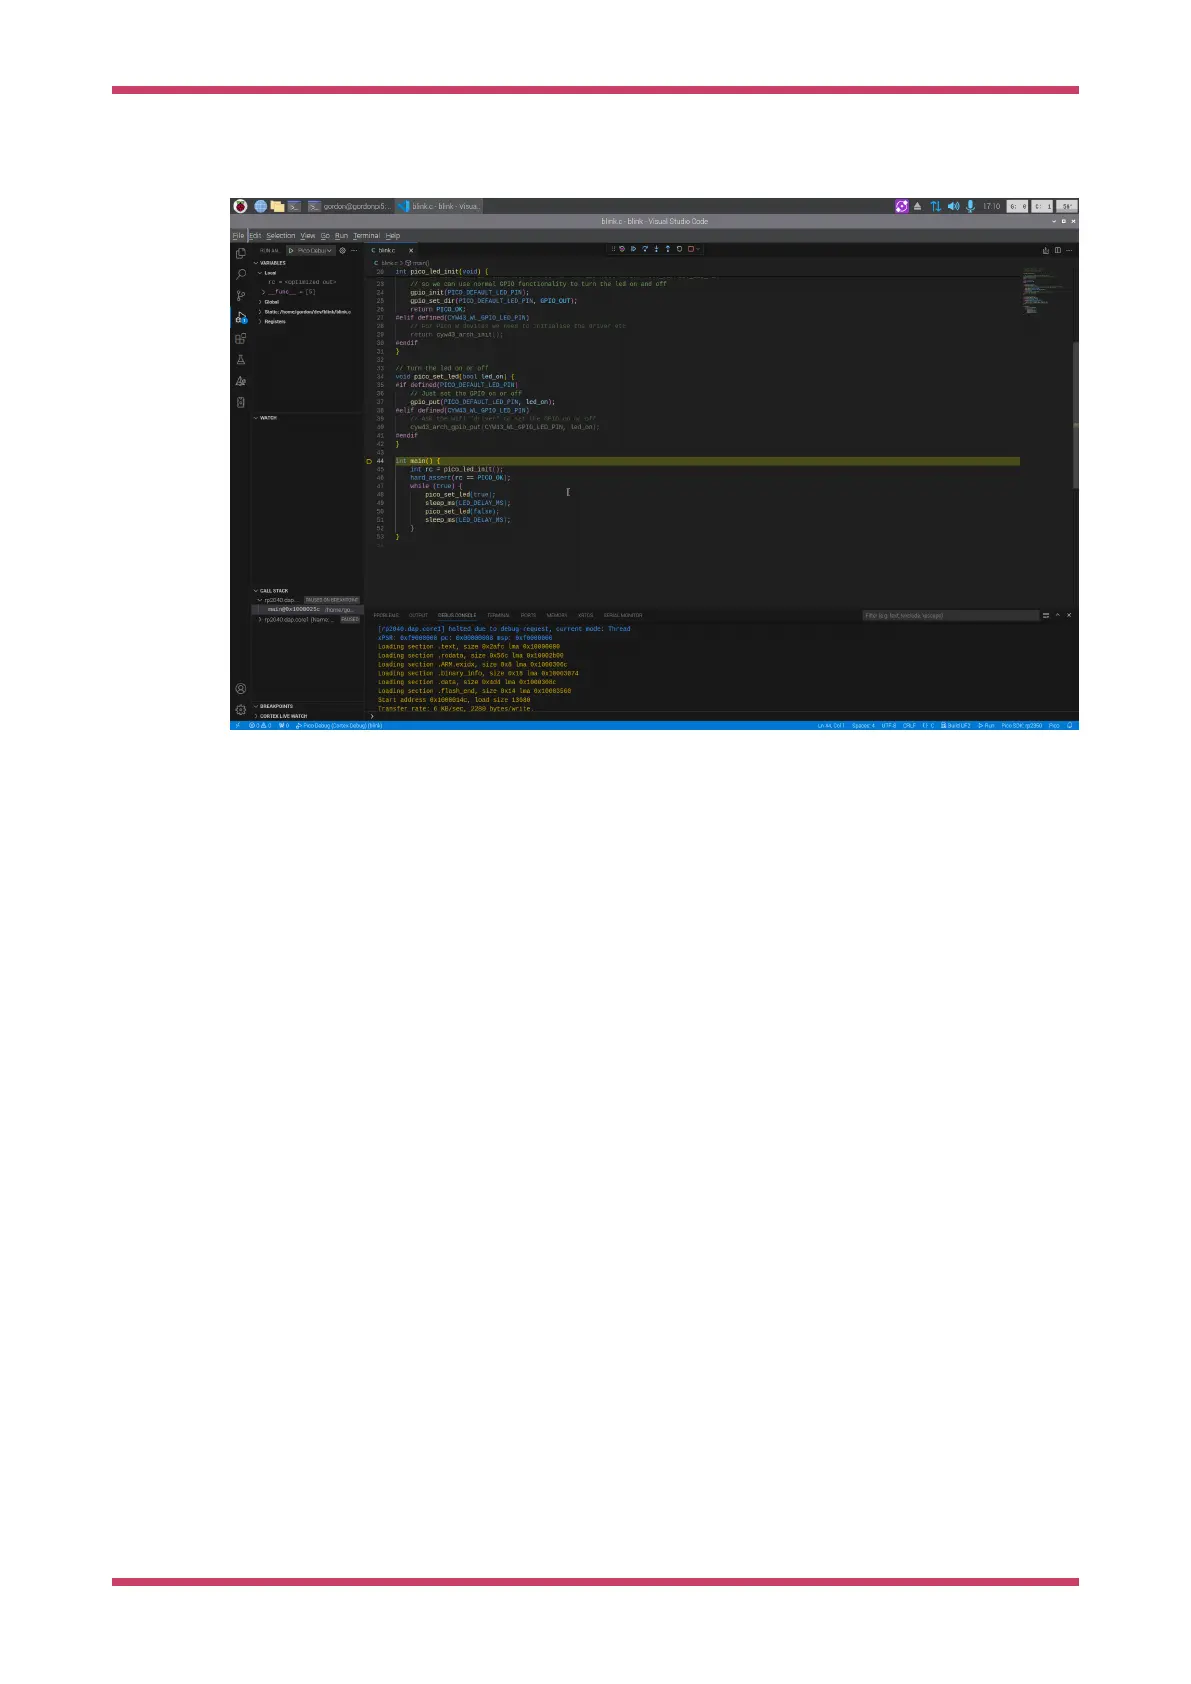
Figure 4. Debugging in
VS Code.
Once in debugging mode, the sidebar has a number of windows displaying useful information about the current state of
the device. At the top, a small control bar contains buttons that control code execution. Hover over the buttons to
identify them. You’ve already used Run (F5).
Press Step-over (F10) once. The highlighted line, which indicates the next line to be executed, will advance to the
pico_led_init function call. To step into this function, press Step-into (F11). The source window will update to indicate
execution is now at the beginning of the function. You can either continue to step over code until the function returns to
main, or select Step-out (Shift+F11) to finish executing the function.
After returning to the main function, check the Local Variables window to see that the value of rc is 0 (PICO_OK).
Press Restart (Ctrl+Shift+F5) to go back to the beginning of main. Then move the cursor down to the pico_set_led line
and press F9. When you create the breakpoint, you’ll see a red dot indicating the breakpoint location:
Getting started with Raspberry Pi Pico-series
4.3. Debug 11