automatically generated the .vscode directory for you. Select yes.
5.3. Build your project
To run the "Hello world" example:
1. Hold down the BOOTSEL button on your Pico-series device while plugging it into your development device using a
micro USB cable to force it into USB Mass Storage Mode.
2. Press the Run button in the status bar or the Run project button in the sidebar.
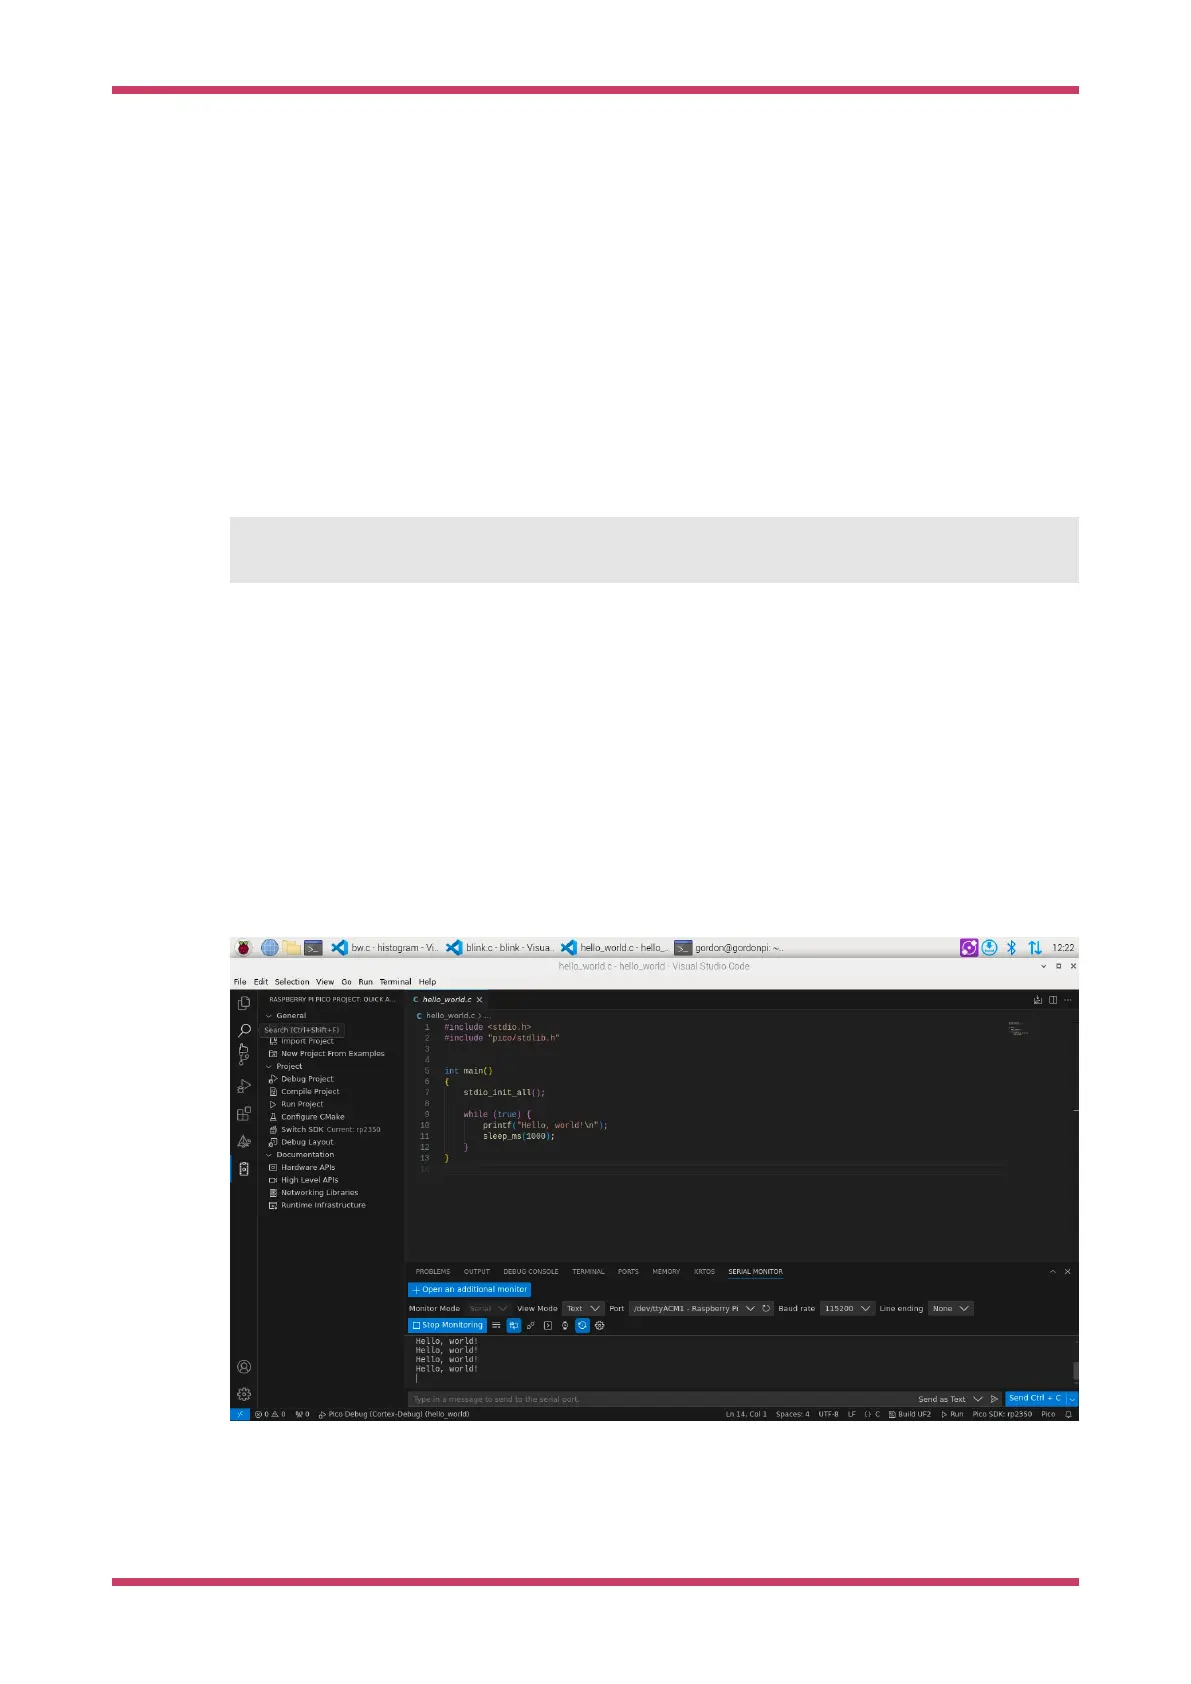
You should see the terminal tab at the bottom of the window open. It will display information concerning the upload of
the code. Once the code uploads, the device will reboot, and you should see the following output:
The device was rebooted to start the application.
Your "Hello world" code is now running.
Although the "Hello World" example is now running, we cannot yet see the text.
5.4. See console output
If using STDIO UART make sure you have wired it up first. STDIO USB does not need any wiring other than being
connected to your computer.
In VSCode. Go to the view menu, and select "Terminal" to open the bottom pane. In this pane, you will find the "Serial
Monitor" tab. Select the serial port. There may be more than one. The baud rate should be 115200. Select "Start
Monitoring" to see the output.
Figure 7. VSCode
serial monitor
Getting started with Raspberry Pi Pico-series
5.3. Build your project 15