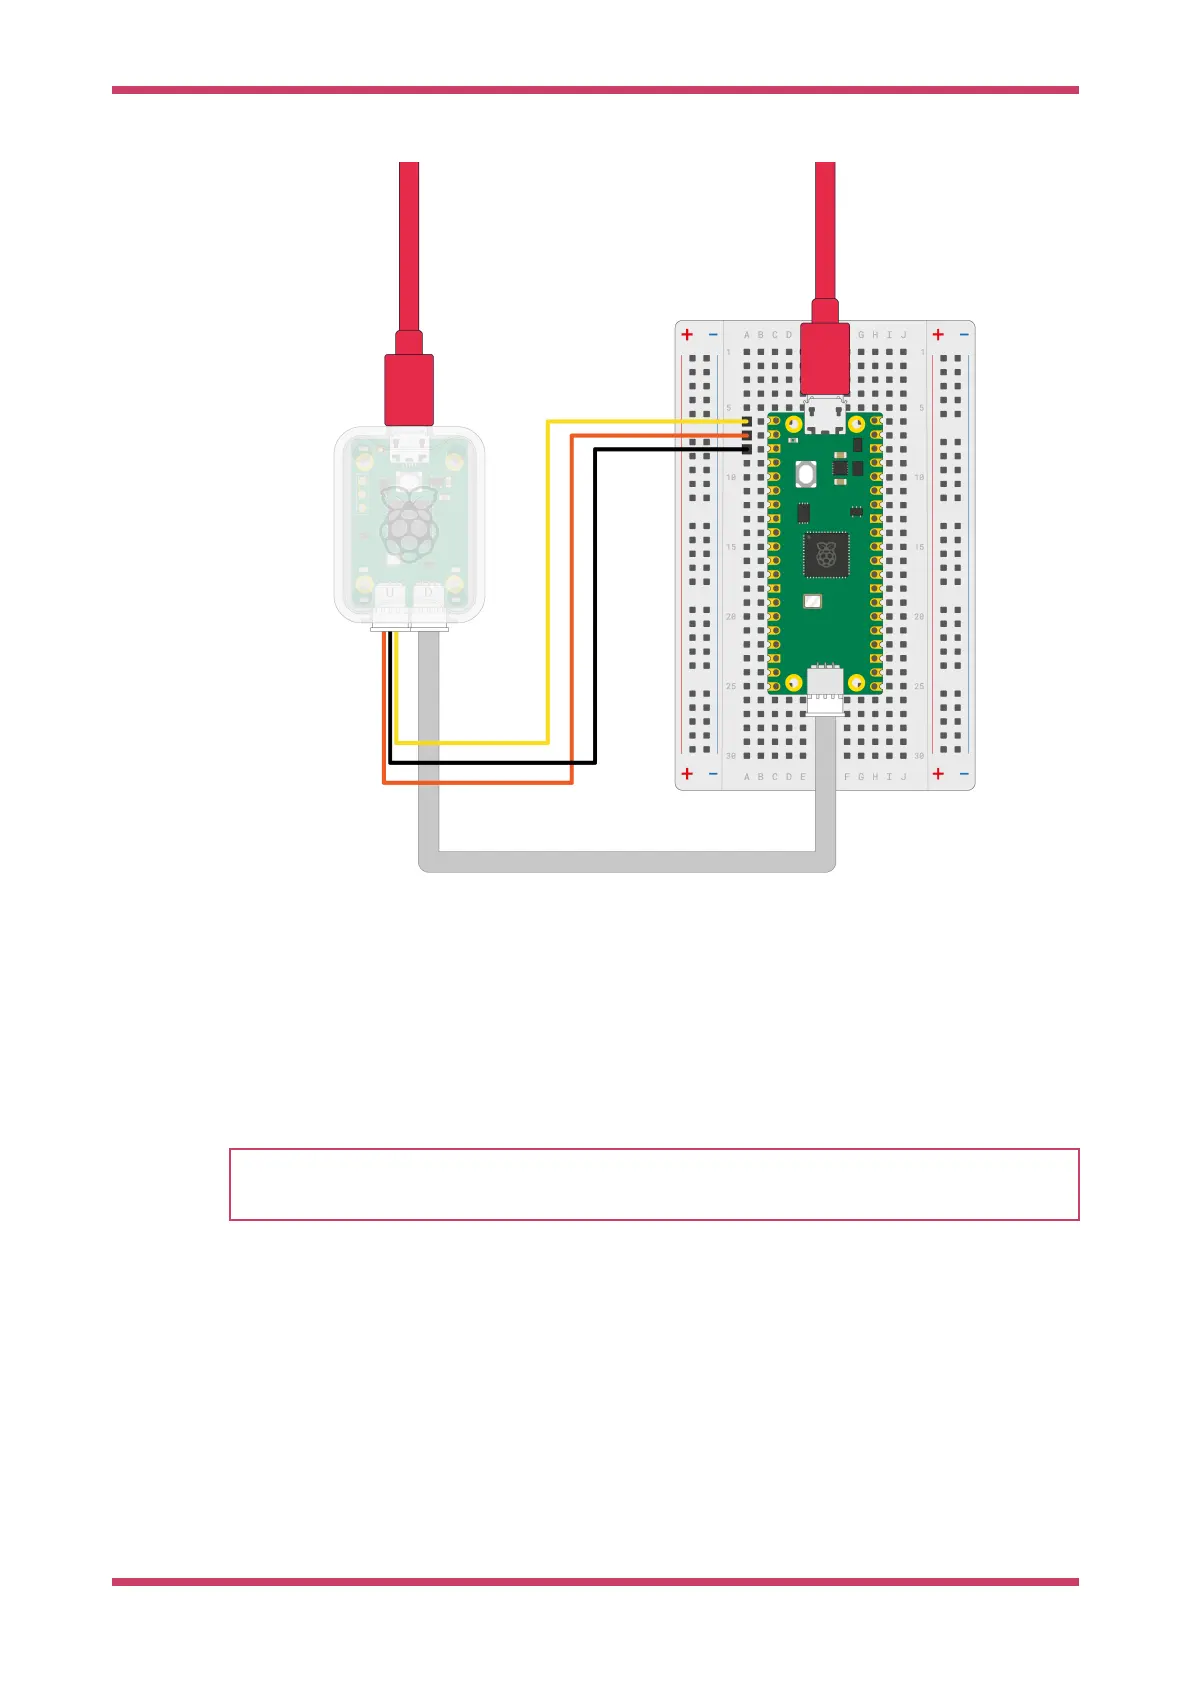
Figure 6. Debug Probe
wiring
5.2. Create a project
NOTE
The SDK makes use of CMake to control its build system, see Manually Create your own Project if you don’t want to
use the VSCode extension
1. In the VSCode left sidebar, select the Raspberry Pi Pico icon, labelled "Raspberry Pi Pico Project".
2. Select New Project.
3. In the Name field, name your project. For example "hello_world".
4. Choose the board type that matches your device.
5. Specify a folder where the extension can generate files. VS Code will create the new project in a sub-folder of the
selected folder.
6. Under "STDIO support", select which consoles you would like (you can select both)
7. Click Create to create the project.
The extension will now generate the new project. VSCode will ask you whether you trust the authors because we’ve
Getting started with Raspberry Pi Pico-series
5.2. Create a project 14