4.3. Debug
The Raspberry Pi Debug Probe is a debug solution for any Arm-based computer. You can use other debug hardware
with Pico-series devices, but we recommend the Debug Probe to make configuration as simple as possible. If you’d like
to use a Pico-series device as a Debug Probe, see Debug with a second Pico or Pico 2.
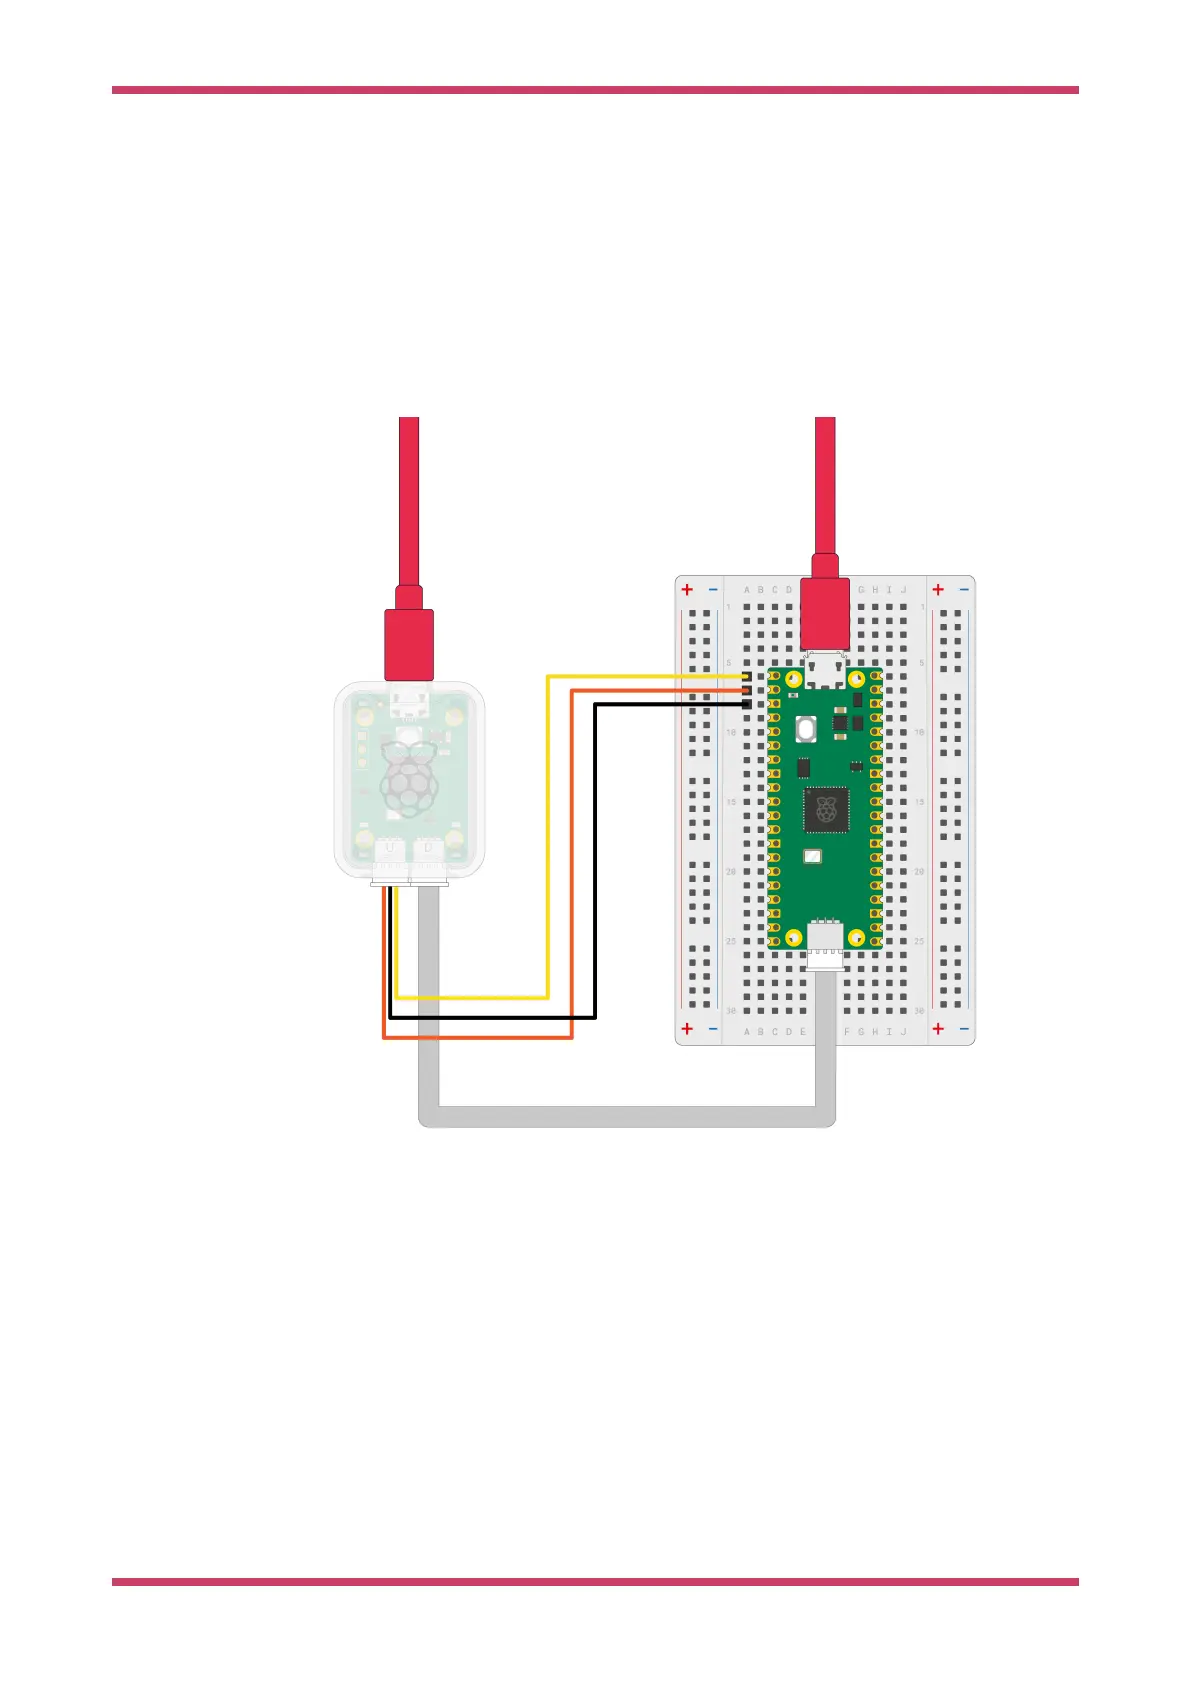
First, connect the Debug Probe to your Pico-series device through the debug connector on the board. Depending on
which Pico device you have, different connectors will be required. For Pico, Pico W, and Pico 2, use a soldering iron to
solder the Debug Probe connectors onto the board. For Pico H, Pico WH, and Pico with headers, the debug header is
already added. Just connect the Debug Probe with the supplied cable.
Figure 3. Debug Probe
wiring
For more information, see the Debug Probe documentation.
Now, plug the Debug Probe USB into your computer. The Debug Probe does not power the Pico device, it must be
powered separately.
To start the debugger:
1. Open the extension sidebar by clicking on the Pico icon.
2. Select Debug Project or press F5.
3. If prompted to select a debugger, choose pico-debug
The debugger will automatically download the code to the device, insert a breakpoint at the beginning of your main
Getting started with Raspberry Pi Pico-series
4.3. Debug 10