INSTRUCTION, USE AND
MAINTENANCE MANUAL
EN
Page 19 of 91
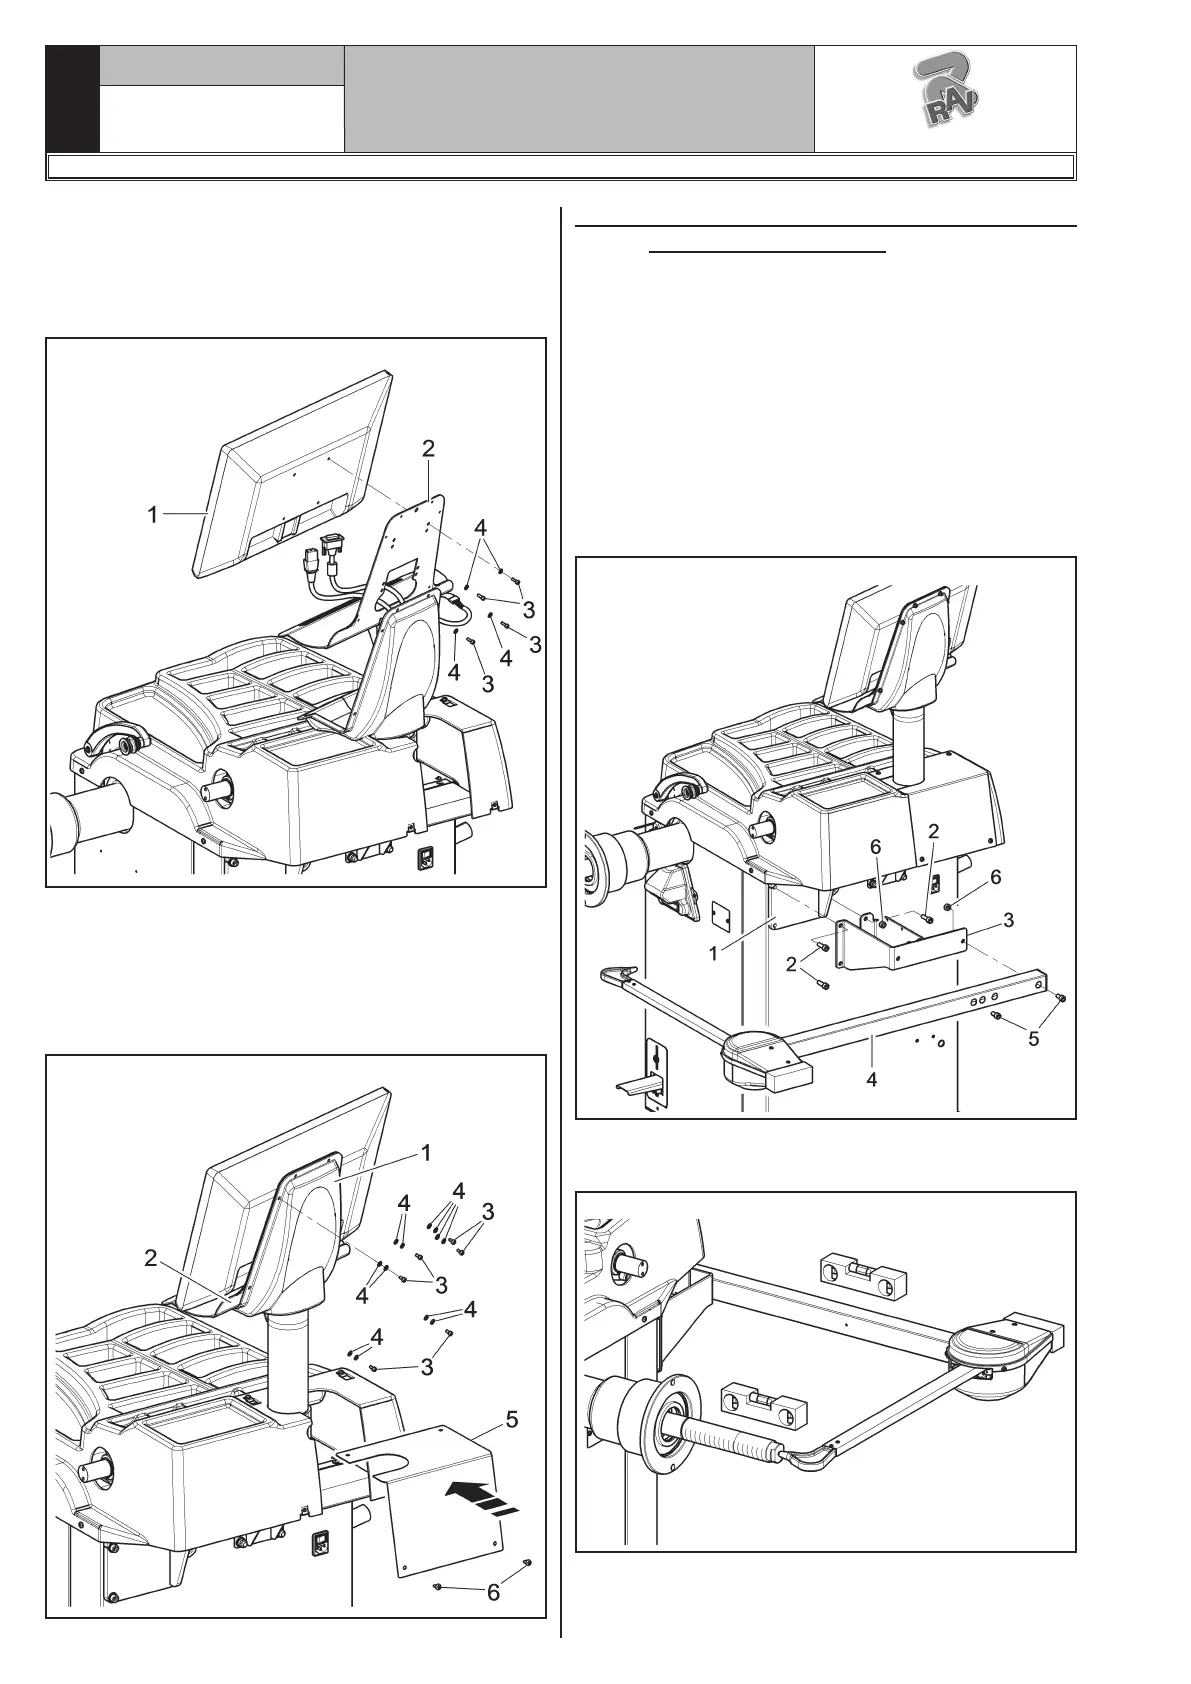
9.2.4 Fitting of external data gauge (stand-
ard on some models)
1. Unscrew the fastening screws of the equalizer
support (Fig. 15 ref. 1), being very careful about
holding the same support.
2. Screw the 3 screws (Fig. 15 ref. 2) to the gauge
bracket (Fig. 15 ref. 3) and to the equalizer sup-
port (Fig. 15 ref. 1).
Lock the gauge arm (Fig. 2 ref. 4) to the bracket
(Fig. 2 ref. 3) using the 2 appropriate screws
(Fig. 15 ref. 5). Lock these screws with the nuts
(Fig. 15 ref. 6), so that the chuck and the gauge
arm are levelled out (see Fig. 16).
Fig. 15
3. Also make sure the gauge tip (Fig. 16 ref. 1) is
positioned at the centre of the chuck.
Fig. 16
3. Fix the monitor (Fig. 13 ref. 1) to the support
(Fig. 13 ref. 2) with the screws (Fig. 13 ref. 3)
and the washers (Fig. 13 ref. 4) supplied.
4. Connect the plugs on the power supply sockets and
monitor signal. Connect the wiring of the keyboard.
Fig. 13
5. Fix the guard (Fig. 14 ref. 1) to the support
(Fig. 14 ref. 2) with the screws (Fig. 14 ref. 3)
and the washers (Fig. 14 ref. 4) supplied.
6. Reassemble the plate (Fig. 14 ref. 5), previously
unscrewed, with the screws (Fig. 16 ref. 6), sup-
plied.
Fig. 14
1297-M058-00
G3.150 - GP3.150 - G3.150S - GP3.150S - G3.150WS - GP3.150WS - G3.150WSPLUS - GP3.150WSPLUS - G3.150SA - G3.150WSA
RAVAGLIOLI S.p.A.
 Loading...