EN
Page 18 of 91
INSTRUCTION, USE AND
MAINTENANCE MANUAL
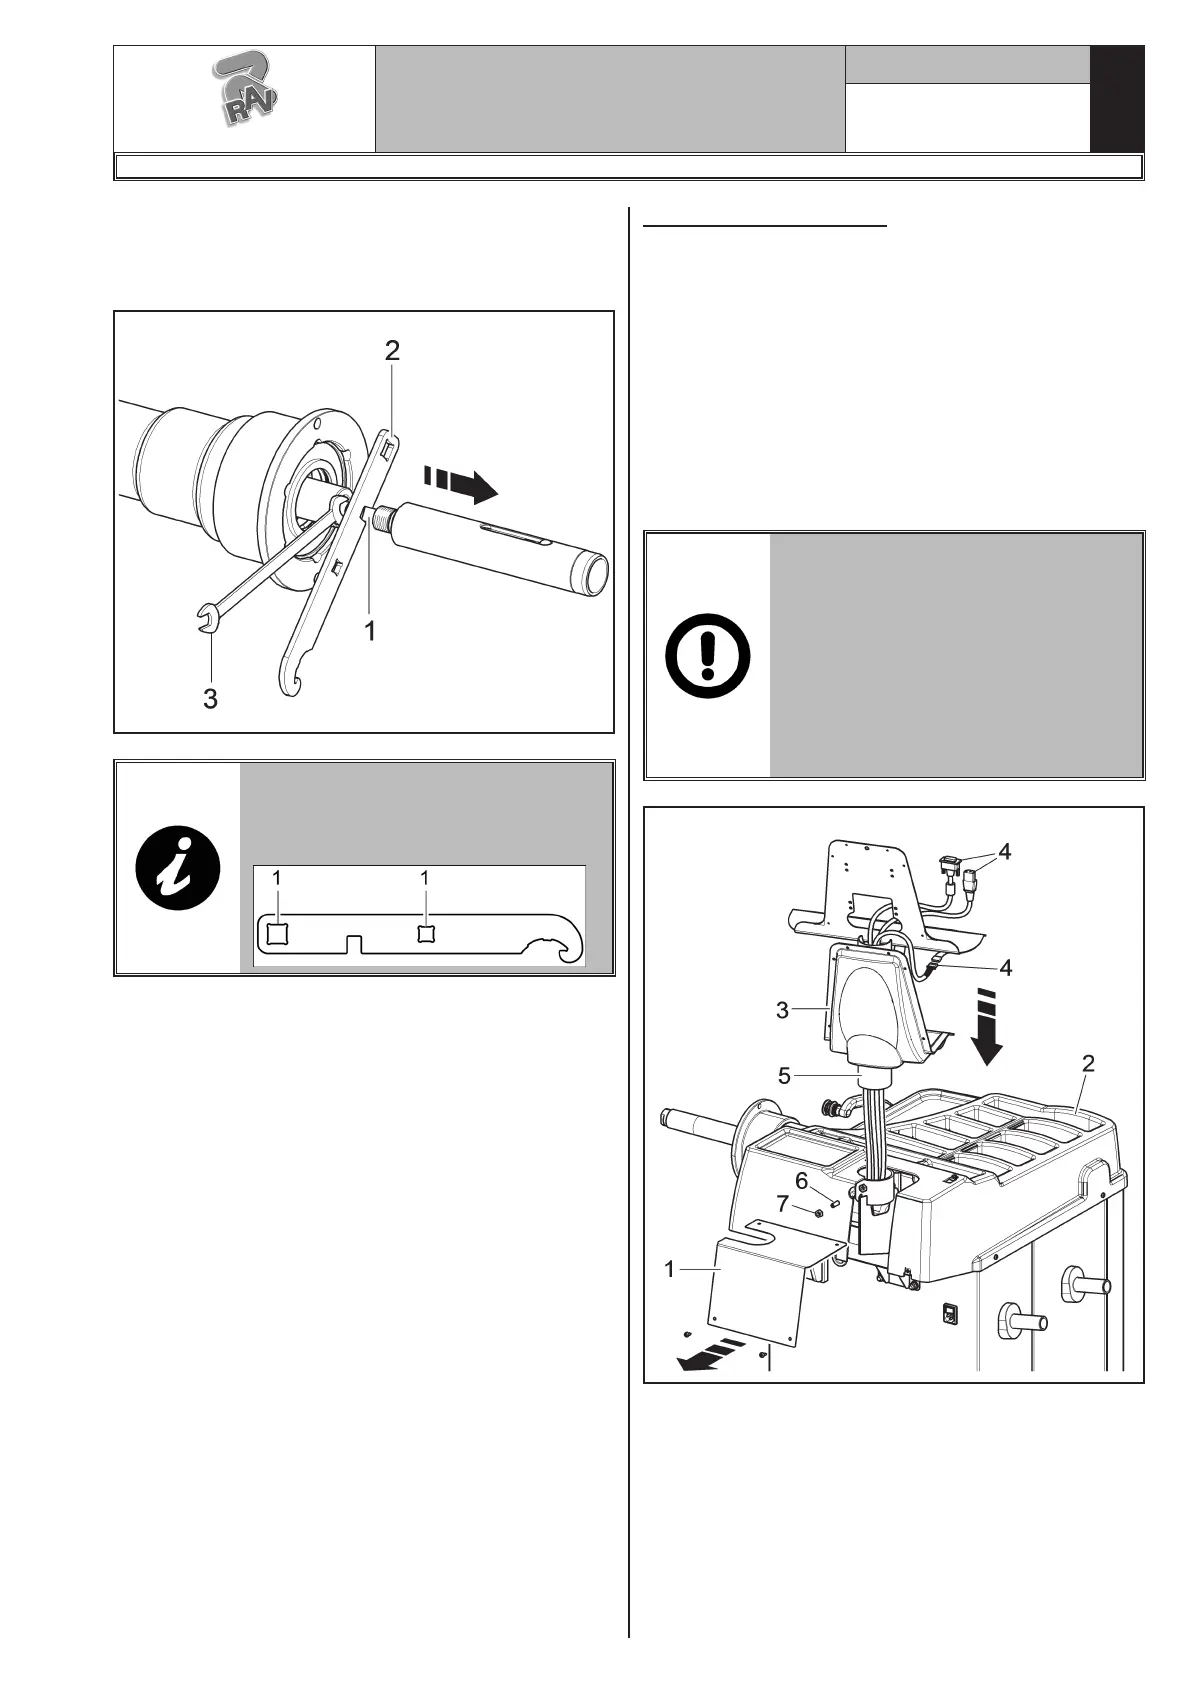
3. Unscrew pneumatic shaft screw (Fig._11 ref. 1) and
release the two inner rods with the special wrench
provided (Fig._11 ref. 2) and a 12 mm wrench
(Fig._11 ref. 3).
Fig. 11
FIT THE TORQUE SPANNER INTO
THE PROVIDED HOLES (REF. 1)
OF THE SUPPLIED SPANNER AND
TIGHTEN TO 30 NM.
9.2.3 Monitor fitting
1. Unscrew the plate (Fig. 12 ref. 1) from the bridge
(Fig. 12 ref. 2). Place the monitor with its support
in the immediate vicinity of the mounting location.
Support the casing (Fig. 12 ref. 3), as shown in the
figure, and insert the monitor and keyboard cables
(Fig. 12 ref. 4) through the support pipe (Fig. 12
ref. 5).
2. Fit the support (Fig. 12 ref. 5), complete with cas-
ing (Fig. 12 ref. 3), in the provided seat. Block the
support with the dowel (Fig. 12 ref. 6) and the nut
(Fig. 12 ref. 7), supplied.
DURING THIS OPERATION, PAY
PARTICULAR ATTENTION TO
THE POWER SUPPLY CABLE, TO
THE HDMI CABLE AND TO THE
KEYBOARD CABLES (FIG. 12
REF. 4) IN ORDER NOT TO DAM-
AGE THEM.
MAKE SURE THEY HAVE BEEN
INTRODUCED IN THE SUPPORT
PIPE, AS SHOWN IN FIG. 12.
Fig. 12
G3.150 - GP3.150 - G3.150S - GP3.150S - G3.150WS - GP3.150WS - G3.150WSPLUS - GP3.150WSPLUS - G3.150SA - G3.150WSA
RAVAGLIOLI S.p.A.
1297-M058-00
 Loading...