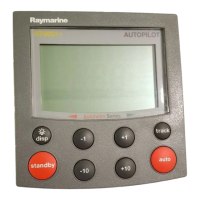
5.2Mounting
Pre-mountingcheck
Theproductisdesignedtobesurfacemounted.Before
mountingtheunit,ensureyouhave:
•Selectedasuitablelocation.
•Identiedthecableconnectionsandroutethatthecableswill
take.
•Detachedthefrontbezel.
•Removethekeypadmat.
Mountingdiagram
Mountinginstructions
1.Checktheselectedlocationfortheunit,aclear,atareawith
suitableclearancebehindthepanelisrequired.
2.Fixthemountingtemplatesuppliedwiththeproduct,tothe
selectedlocation,usingmaskingorselfadhesivetape.
3.Ifpossibleuseanappropriatesizeholecuttingsawandcut
outthecentreholecutoutareaasindicatedonthemounting
template,or
4.Usingasuitableholecuttingsaw,makepilotholesineach
cornerofthecutoutareaandusingajigsawcutalongthe
insideedgeofthecutoutline.
5.Ensurethattheunittsintotheremovedareaandthenle
aroundthecutedgeuntilsmooth.
6.Drillanyrequiredholesasindicatedonthemounting
templateforthesecuringscrews.
7.Connecttherelevantcablestotheunit.
8.Peelthebackingoffofthesuppliedgasketandplacethe
adhesivesideofthegasketontothedisplayunitandpress
rmlyontotheange.
9.Slidetheunitintoplaceandsecureusingthescrews
provided.
10.Retkeypadmatandfrontbezel.
Note:Drill,tapsizeandtighteningtorquesaredependant
uponthematerialtypeandthicknessofthemountingsurface.
Note:Thesuppliedgasketprovidesasealbetweentheunit
andasuitablyatandstiffmountingsurfaceorbinnacle.
Thegasketshouldbeusedinallinstallations.Itmayalso
benecessarytouseamarine-gradesealantifthemounting
surfaceorbinnacleisnotentirelyatandstifforhasarough
surfacenish.
5.3Frontbezel
Removingthefrontbezel
Note:Usecarewhenremovingthebezel.Donotuseany
toolstoleverthebezel,doingsomaycausedamage.
1.Usingyourngerspullthebezelawayfromtheunitatthe
topandside,asshownin2.
Thebezelwillstarttocomeawayfromtheunitatthetop
andside.
2.Nowpullthebezelawayfromtheunitontheoppositeside,
asshownin3.
Thebezelwillnowcomefreefromtheunit,asshownin4.
Locationandmounting
27
 Loading...
