5.4Bracketmountingusing
theDeckmountingkit
TheDeckmountingkit(A80437)canbeusedtowall
mountyourproduct.
TheRiserpieceisnotrequiredforbracketmounting
theproduct.
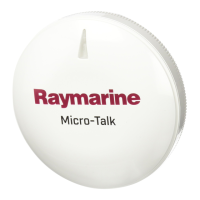
1.Placethesmallsealingringinthegroovelocatedon
thebottomofthemountingtray.
2.Securethetraytothebracketusingthesupplied
xingsin3positions.
3.Placethelargesealingringintothegrooveonthe
uppersideofthemountingtray.
4.Securethebrackettothemountingsurfaceusing
thesuppliedmountingtemplate.Securethebracket
usingthesuppliedxingsin3positions.
5.PulltheSeaTalkng®cablethroughthemounting
bracketholeandthemountingtray.Pluginthecable
connectorontheundersideoftheunitandsecure
byrotatingthelockingcollarclockwise2clicks.
6.SecuretheunittotheMountingtraybypositioning
theunitwiththeLEDfacingforwardandinserting
theunitintothegroovesintheMountingtray.
7.PlacetheMountingtrimovertheunitslightlyoffset,
andthentwisttheMountingtrimclockwiseuntilit
locksintoposition.
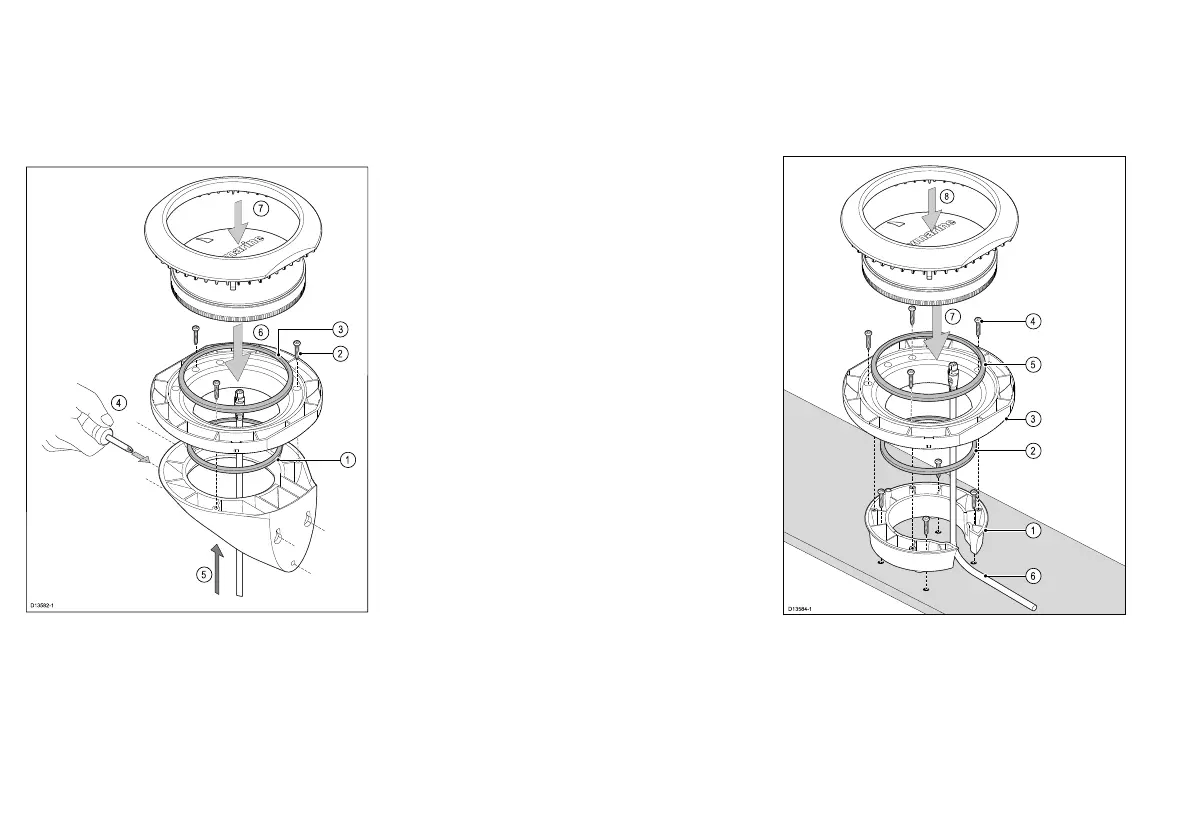
5.5Surfacemountingusing
theRiser
TheDeckmountingkit(A80437)canbeusedtoraise
theproductfromthemountingsurface.
TheWallbracketisnotrequiredwhenusingtheRiser.
1.UsethesuppliedDeckmountrisertemplatetodrill4
holesinthemountingsurface.SecuretheRiserto
themountingsurfaceusing4xsuppliedxings.
2.Placethesmallsealingringinthegroovelocatedon
thebottomofthemountingtray.
3.PositiontheMountingtrayontopoftheRiser.
4.SecuretheMountingtraytotheRiserusing3x
suppliedxings.
28