ProductDescription
T112Multifunctionwireless
analoguedisplay
T113Multifunctionwireless
remotedisplay
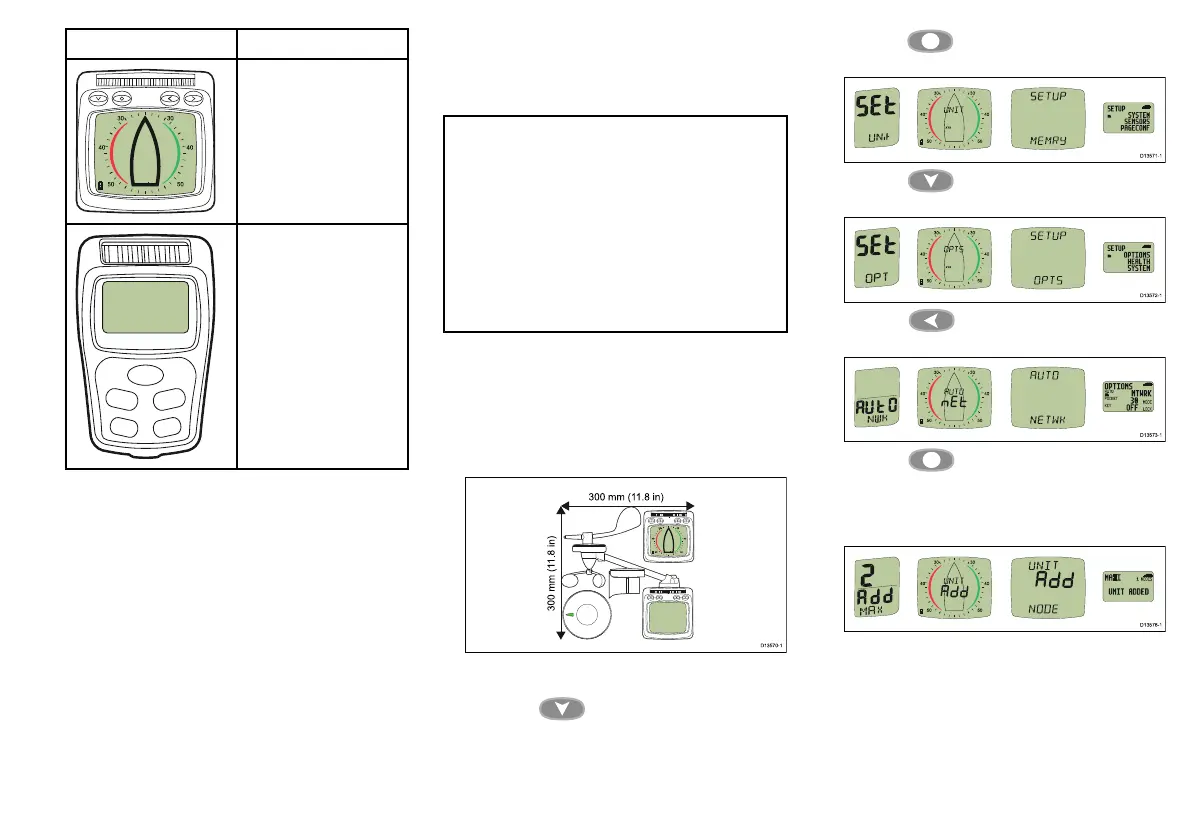
PerformingAutonetworking
FollowthestepsbelowtoaddnewMicronetproducts
toanexistingsystem,orcreateanewsystemfrom
multipleboxes.
Note:
•Autonetworkingshouldbeperformedbeforenew
productsaremounted.
•ThefollowingprocedureisNOTrequiredwhen
creatinganewsystemwithproductsthathave
beensuppliedinasinglebox.
•Youwillneedtochooseadisplaycapableof
initiatingAutonetworking.
•Ifyouhaveanexistingsystemthenacapable
displayfromthissystemshouldbechosen.
1.Connectproductsthatrequireanexternalpower
sourcetoa12Vdcpowersupply.
2.PlaceallNewproductswithin300mm(11.8in)ofthe
displayyouhavechosentoperformAutonetworking.
Existingnetworkedproductsdonotneedtobe
included.
3.Ensureallproductsarepoweredoff.
4.Poweronthechosendisplay,bypressingand
holdingthe Down/Powerbuttonfor2
seconds.
5.Ensurethechosendisplayisnotshowinga‘Racer
Timer’or‘WindShift’page.
6.Pressthe SetUpbuttonfor2secondsto
displaytheSetupmenu.
7.Pressthe Down/Powerbuttonuntilthe
Optionspageisdisplayed.
8.Pressthe Leftbuttontodisplaythe
Autonetworkingpage.
9.Pressthe Setupbuttontobeginthe
Autonetworkingprocedure.
Acountdownwillbeginandthechosendisplay
shows‘WAIT’andthen‘JOIN’asdevicesjointhe
network.
10.Inthelast30secondsofthecountdownsome
displaysmayswitchonand‘JOIN’willash
onscreen,toallowthesedisplaystojointhenetwork
followthestepsbelow:
Cablesandconnections23