3.4T
ransducermounting
Themountingprocedurebelowshouldbereadthoroughlybeforeattemptingtomountthe
transducer.
Important:
•TheR
V-4xxseriestransducersarerecommendedforvessel’swithmetalhulls.,wheninstalling,
ensurethatthetransducerisisolatedfromthemetalhullusingALLofthesuppliedisolatorparts
•DoNOTinstallstainlesssteeltransducersonvesselswithapositivegroundsystem.
Important:
•Onlyperformtheinstallationwithyourvesseloutofthewater .
•DoNOTliftorsuspendthetransducerusingitscable.
•Ensurethatthetransducerbodyissupportedduringinstallation.
•DoNOTremovethelabelattachedtothetransducercable;asithelpstoensurecorrect
connection.
•DoNOTovertightenthehullnutoranti-rotationbolt.Overtighteningcancausedamagetothe
hullwhichmayresultinwaterleakingintothevessel.
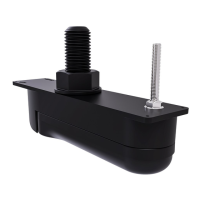
Drillingholesinthehull
T oinstallaThru-hulltransduceryoumustdrillholesinthehullofyourvesselforthetransducer
stemandanti-rotationbolt.
1.Ensurethatyouareusingthecorrecttransducer(i.e.:port/starboard,0°,12°or20°tiltedelement)
foryourchosenmountinglocation.
2.Usingself-adhesivetape,attachthesuppliedmountingtemplatetoyourchosenmounting
location.Ensurethatthe‘Bow’arrowonthetemplateispointedtowardsthevessel’sbowand
thatthetemplateisflatandnotcreased.
3.Marktheholecentersforthetransducerstemandanti-rotationboltholesonthehullbypiercing
throughthetemplateandusingapencilormarker.
4.Removethetemplatefromthehull.
5.Drillapilotholeforthetransducerstemhole.
6.Drilla70mm(2
3
/
4
inch)holeforthetransducerstem,usingaholecutter.
(1)
Important:
(1)Ifthespecifiedsizeholecutterisnotavailable ,useaslightlysmallersizeholecutterandthen
carefullyfiletheholetothecorrectsize.Alternativelyyoucoulduseajigsawtocuttheholeand
thencarefullyfiletheedgetocreateacircletherequiredsize.
7 .Usingahalfroundfileand/orsandpaper,ensuretherearenoroughedgesorburrsaround
thetransducerstemhole.
8.Guidethetransducercableandthenthetransducerstemupthroughthetransducerstemhole
andsupportfrombeneath.
9.Ensurethattheanti-rotationboltholeislinedupwiththemarkyoumadeonthehullandthatthe
transducerisparalleltothecenterlineofthevessel.
22

 Loading...