iii.allaroundandinsidethetransducerstemandanti-rotationholesonthee
xteriorofthehull.
10.Guidethetransducercablethroughthestemholeinthehull.
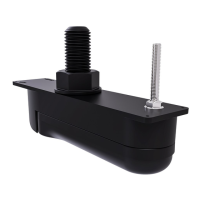
11.Guidethetransducerstemandanti-rotationboltupthroughtheholesinthevessel’shulland
supportfrombeneath.
12.Frominsidethevessel,applyacontinuous,thickbeadofmarine-gradesealantallaroundthe
baseoftheprotrudingtransducerstemandanti-rotationboltthreads.
13.Guidetherubberwasherdownthetransducercable,andoverthethreadedsectionofthe
transducerstem,ensuringthattherubberwashersitsflushonthehull.
14.Ifnecessary,applyadditionalmarine-gradesealanttothetransducerstem,abovetherubber
washer.
15.Withthetopfacepointingupwards,guidethelargeisolatorbushdownthetransducercableand
overthetransducerstem,ensuringitsitsflushontherubberwasher.
Largeisolatorbushtopface
16.Ifnecessary ,applyadditionalmarine-gradesealanttothetransducerstem,abovethelarge
isolatorbush.
17.Ensuringthecableprotectorisfittedtothehullnut,guidethenutdownthetransducercable,
restingthenutontopofthetransducerstem.
Cableprotectorfittingandremoval
•A—Fitting
•B—Removal
18.R emovethecableprotectorbypullingthe2tabsawayfromthebackofthehullnut.
19.Applyathickbeadofmarinegradesealanttothebottomfaceofthehullnut.
20.Screwthehullnutontothetransducerstemandfullytighten,usingasuitablesizedwrench
(spanner).
Ensurethatthehullnutisadequatelytightened.Y oushouldseethesealantprotrudingfrom
theedgesofallappliedsurfaces.
21.Placethesmallinternalisolatorsleeveovertheanti-rotationbolt,ensuringitsitsflushonthe
interiorofthehull.
Installation25

 Loading...