Chapter 3: Installation
23
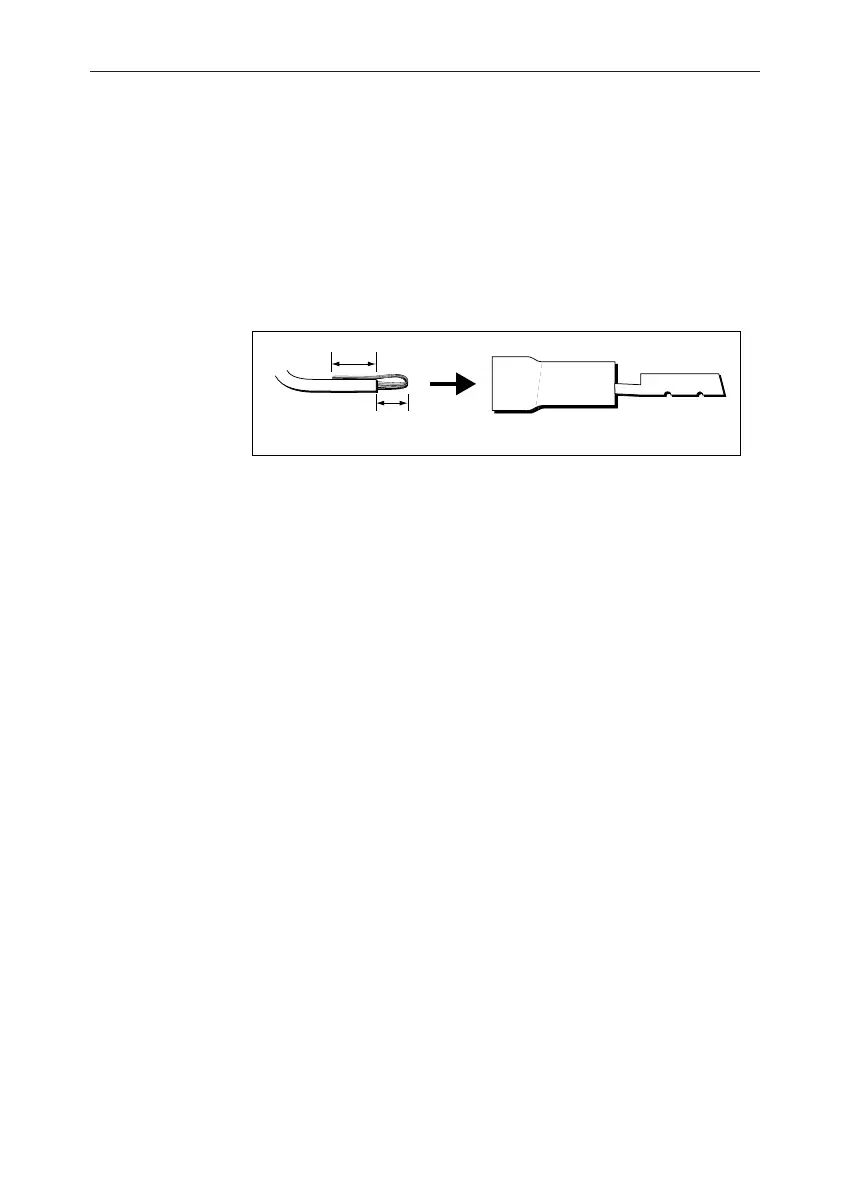
• It may be necessary to remove the spade connectors from the
transducer cable, to facilitate installation, e.g. if the cable has to be
routed through narrow apertures. Extra spade connectors are
provided, to replace any that are removed when running the cable.
In order to ensure a secure connection when fitting spade
connectors, fold back the wire strands as shown in the following
illustration, before inserting the wire in the spade connector. Ensure
the wire strands do not extend beyond the rear of the spade
connector insulation.
D4467-2
Preparing wire for connection
3 mm
4 mm
Observing the above guidelines, run the transducer cable to the ST60
Tridata instrument.
Connecting the instrument
Types of connection
The ST60 Tridata instrument, can be connected:
• As a stand-alone, master instrument connected directly to a Speed
and/or Depth transducer.
• As a SeaTalk repeater.
• To fulfil both repeater and master roles by being connected both to
the transducer and to SeaTalk.
Instruments connected to SeaTalk derive their power directly from
SeaTalk and no separate power connection is necessary. Where a
SeaTalk system includes an autopilot, the power for the system is
provided by the autopilot.
A range of Raytheon SeaTalk extension cables is available to connect
separated instruments. These cables are supplied with a SeaTalk
connector fitted to each end. A junction box can be used to join cables.
Signal connections
Make the necessary connections to your ST60 instrument (see the
Connection to ST60 Tridata instrument illustration).
040_2c03.p65 09/08/99, 09:3223