RTL87x2x Quick Start User Guide
Copyright 2023 Realtek Semiconductor Corporation.
All Rights Reserved. 16
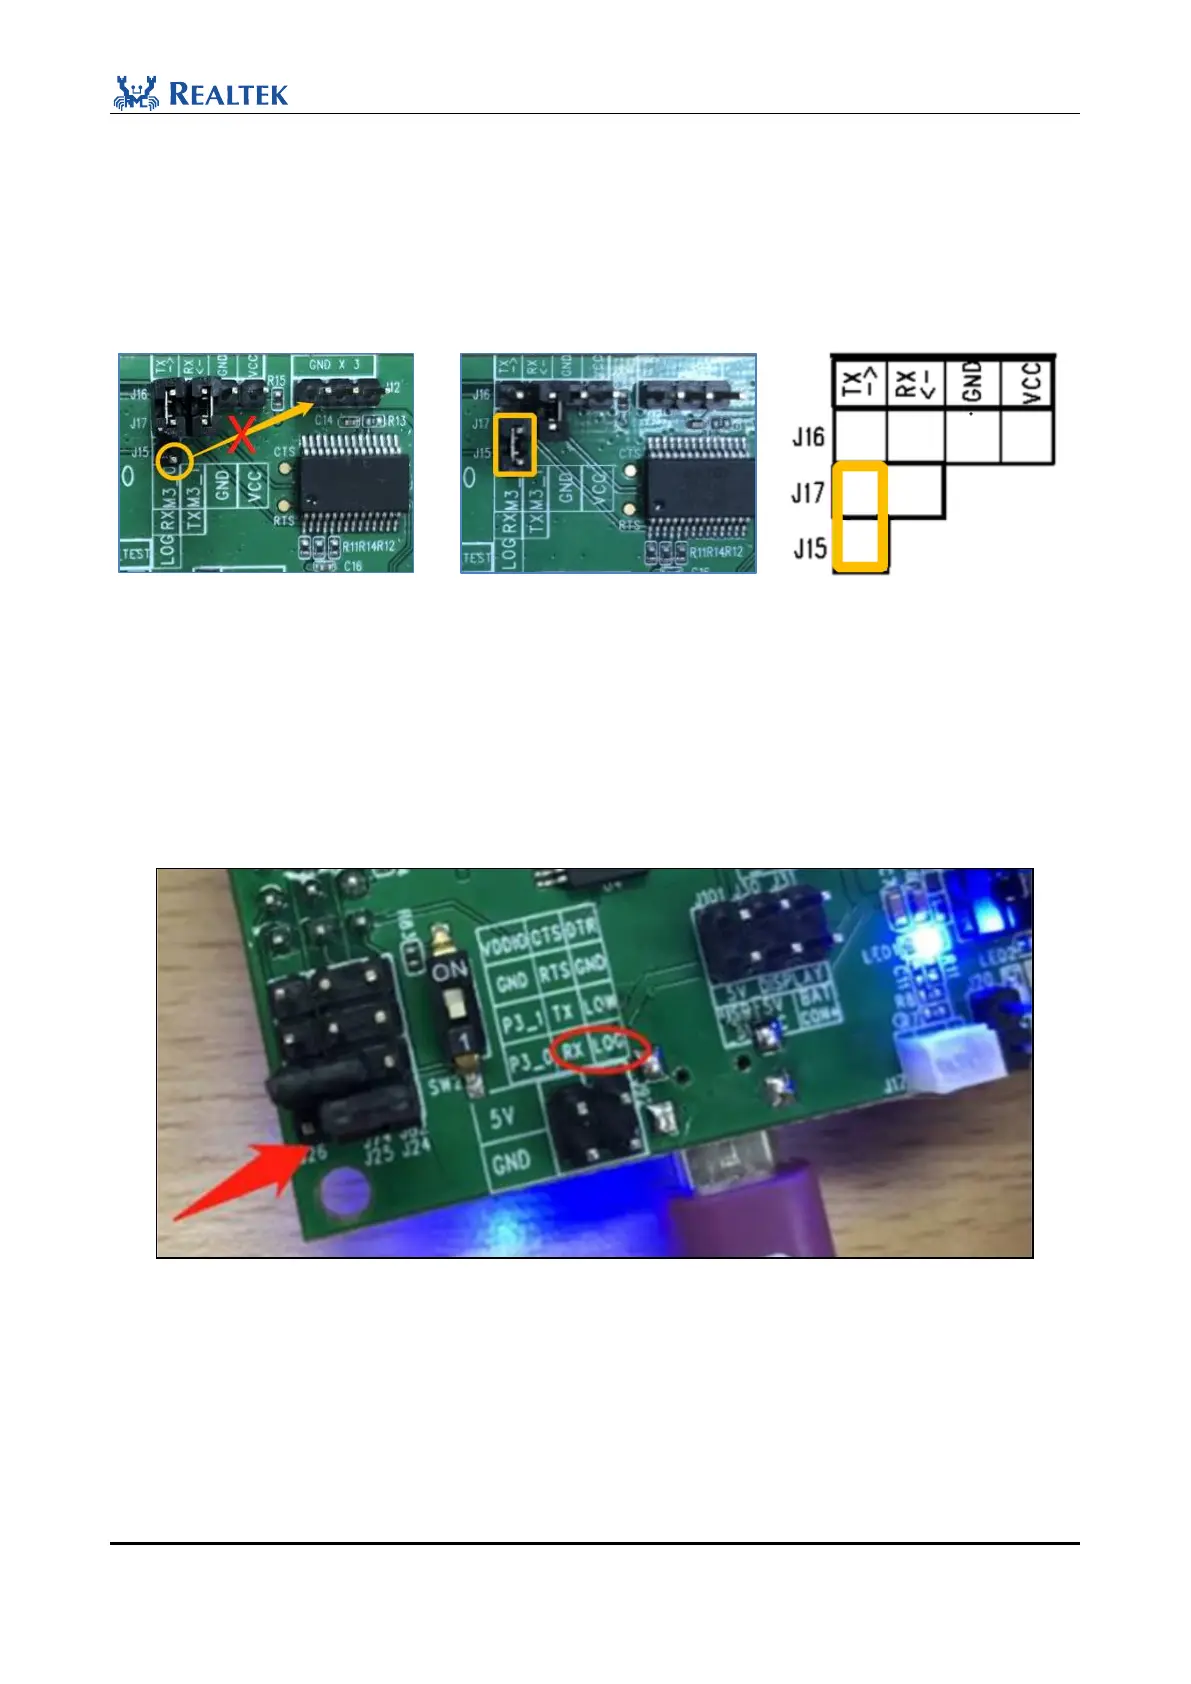
2.4 Print Logs
After the firmware is burned, users can print the Log to confirm whether the EVB is running properly. Disconnect
the Log pin from GND, switch the position of jumper cap (J17&J15 are shorted), and press the red Reset button to
reset and power on the EVB board.
Figure 2-27 EVB connection
NOTE:
Because the packages of the BEE4 ic are different, different versions of the daughter board and mother board may
be used together. Refer to the print cable of the output Log based on actual conditions. The following Log wiring
diagram uses the EVB in Section 2.2. There are two dip switches on the front and back sides of the EVB. Both
switches to the "1" end and connect RX and GND with jumper caps, as shown in Figure 2-28.
Figure 2-28 Log wiring
Users need to use DebugAnalyzer Tool to view logs. It is a special debugging tool developed by Realtek. The tool
runs on the Window platform (Win10 is recommended) and prints logs through P0_3.
By default, the LOG pin is P0_3 (P0_3 cannot be pinmux). LOG can be printed only through DebugAlalyzer, and
the baud rate is 2M by default (cannot be changed). If Log is printed through an external serial port board, FT232
is recommended.
 Loading...