"Dehumidification" mode
Make sure that the indoor unit is connected to the
power supply
, and is switched on.
The operating mode indicator on the display of the
indoor unit begins to flash.
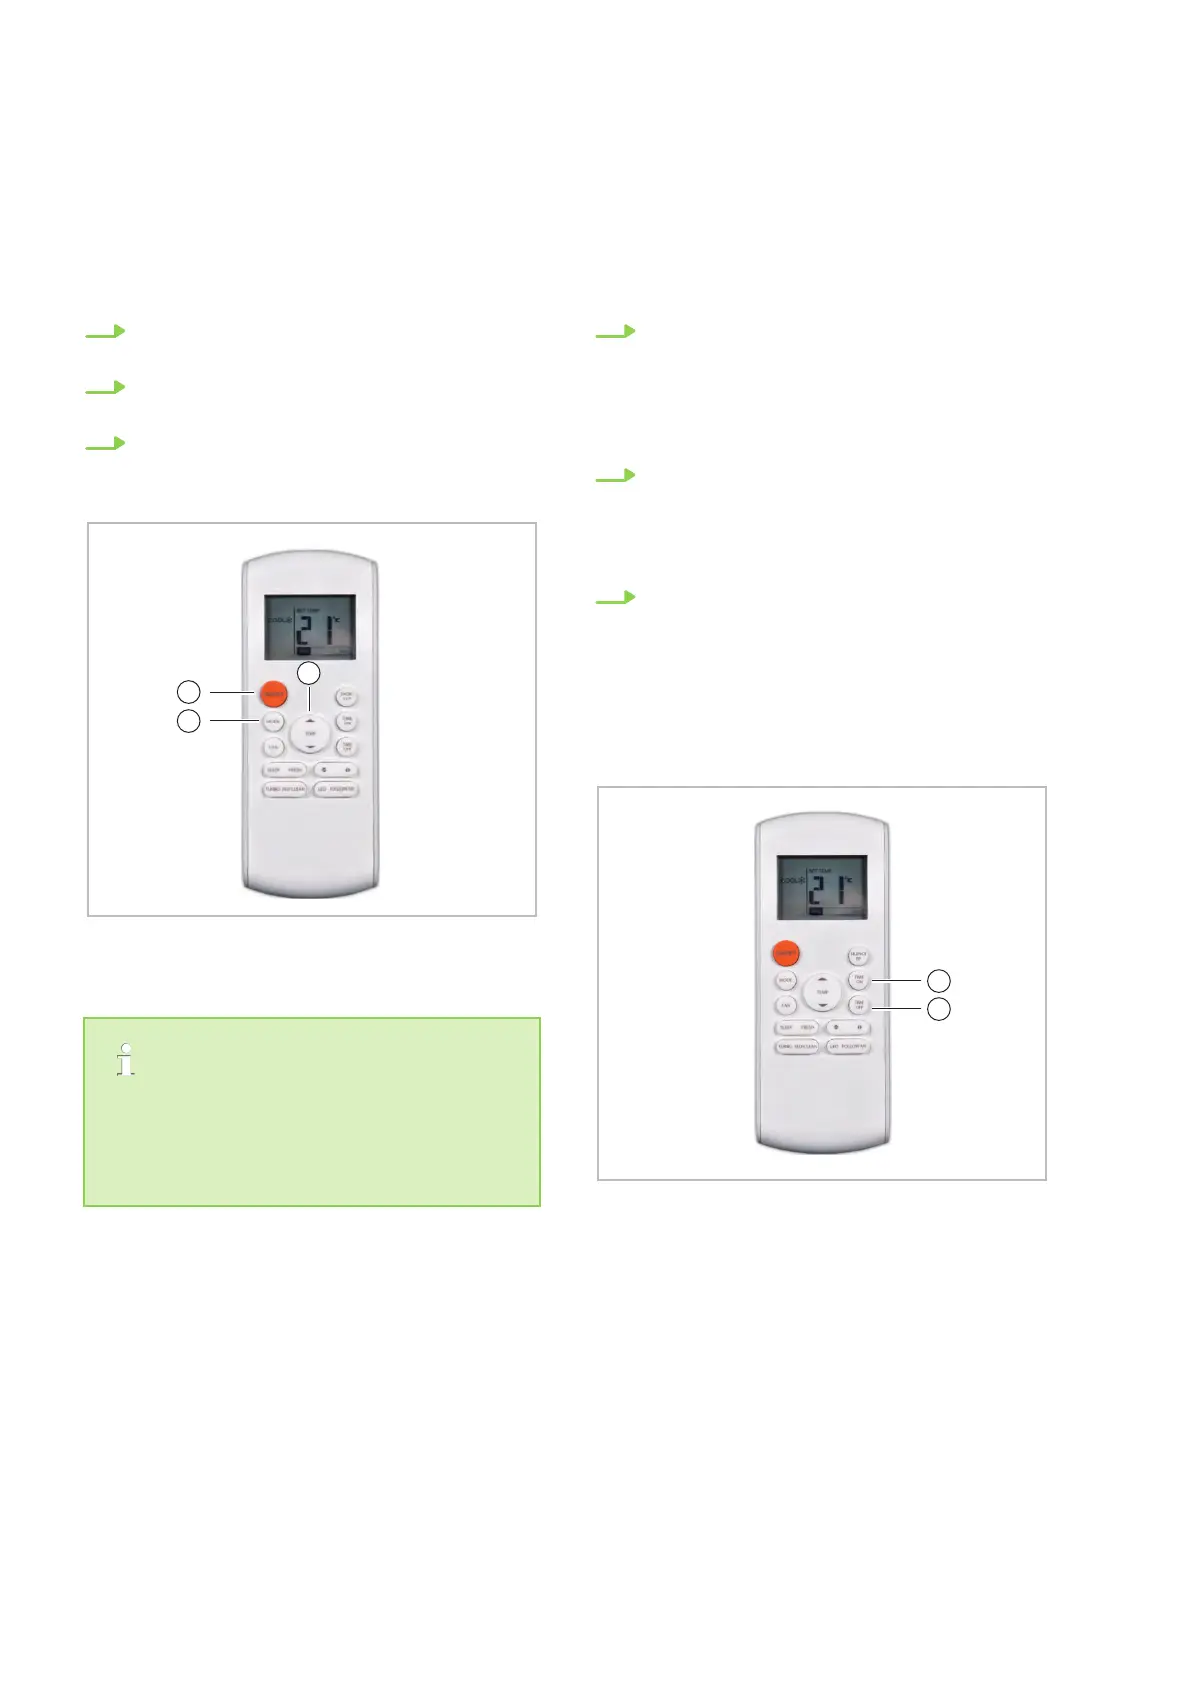
1. Press the "MODE" key to select "Dehumidifi-
cation" mode.
2. The temperature setting on the remote con-
trol has no ef
fect on unit operation.
3. Press the "ON/OFF" key to switch on the air
conditioning unit.
Fig. 12: "Dehumidification" mode
In the “Dehumidification” mode, manual selec-
tion of the fan speed is not possible! Please
note that temperature pre-selection is not pos-
sible and the dehumidified room can cool dra-
matically!
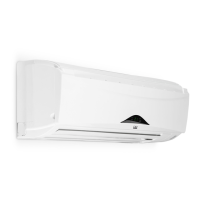
"Timer" mode
Press the "TIMER ON" key to set the "switch-on
time" and the "TIMER OFF" key to set the "switch-
of
f" time for the unit.
Setting the “switch-on time”
1. Press the "TIMER ON" key
. The remote con-
trol shows "TIMER ON", the last "switch-on
time" setting and the symbol "H" appear on
the display. The unit is now ready to reset the
"switch-on time" and to start "TIMER ON"
mode.
2. Press the "TIMER ON" key again to set the
desired "switch-on time". Each time the key
is pressed, the time is increased by half an
hour between 0 and 10 hours, and by an
hour between 10 and 24 hours.
3. Once these settings have been made, there
is a one second delay before the remote con-
trol transmits the signal to the indoor unit.
Then, after approx. two seconds, the "H"
symbol disappears from the LCD display
, and
the set temperature appears again on the
display.
Fig. 13: "Timer" mode
REMKO ML series
18