casting
(P-SC01-0412)
4 off
has been placed
Side view of V-seal
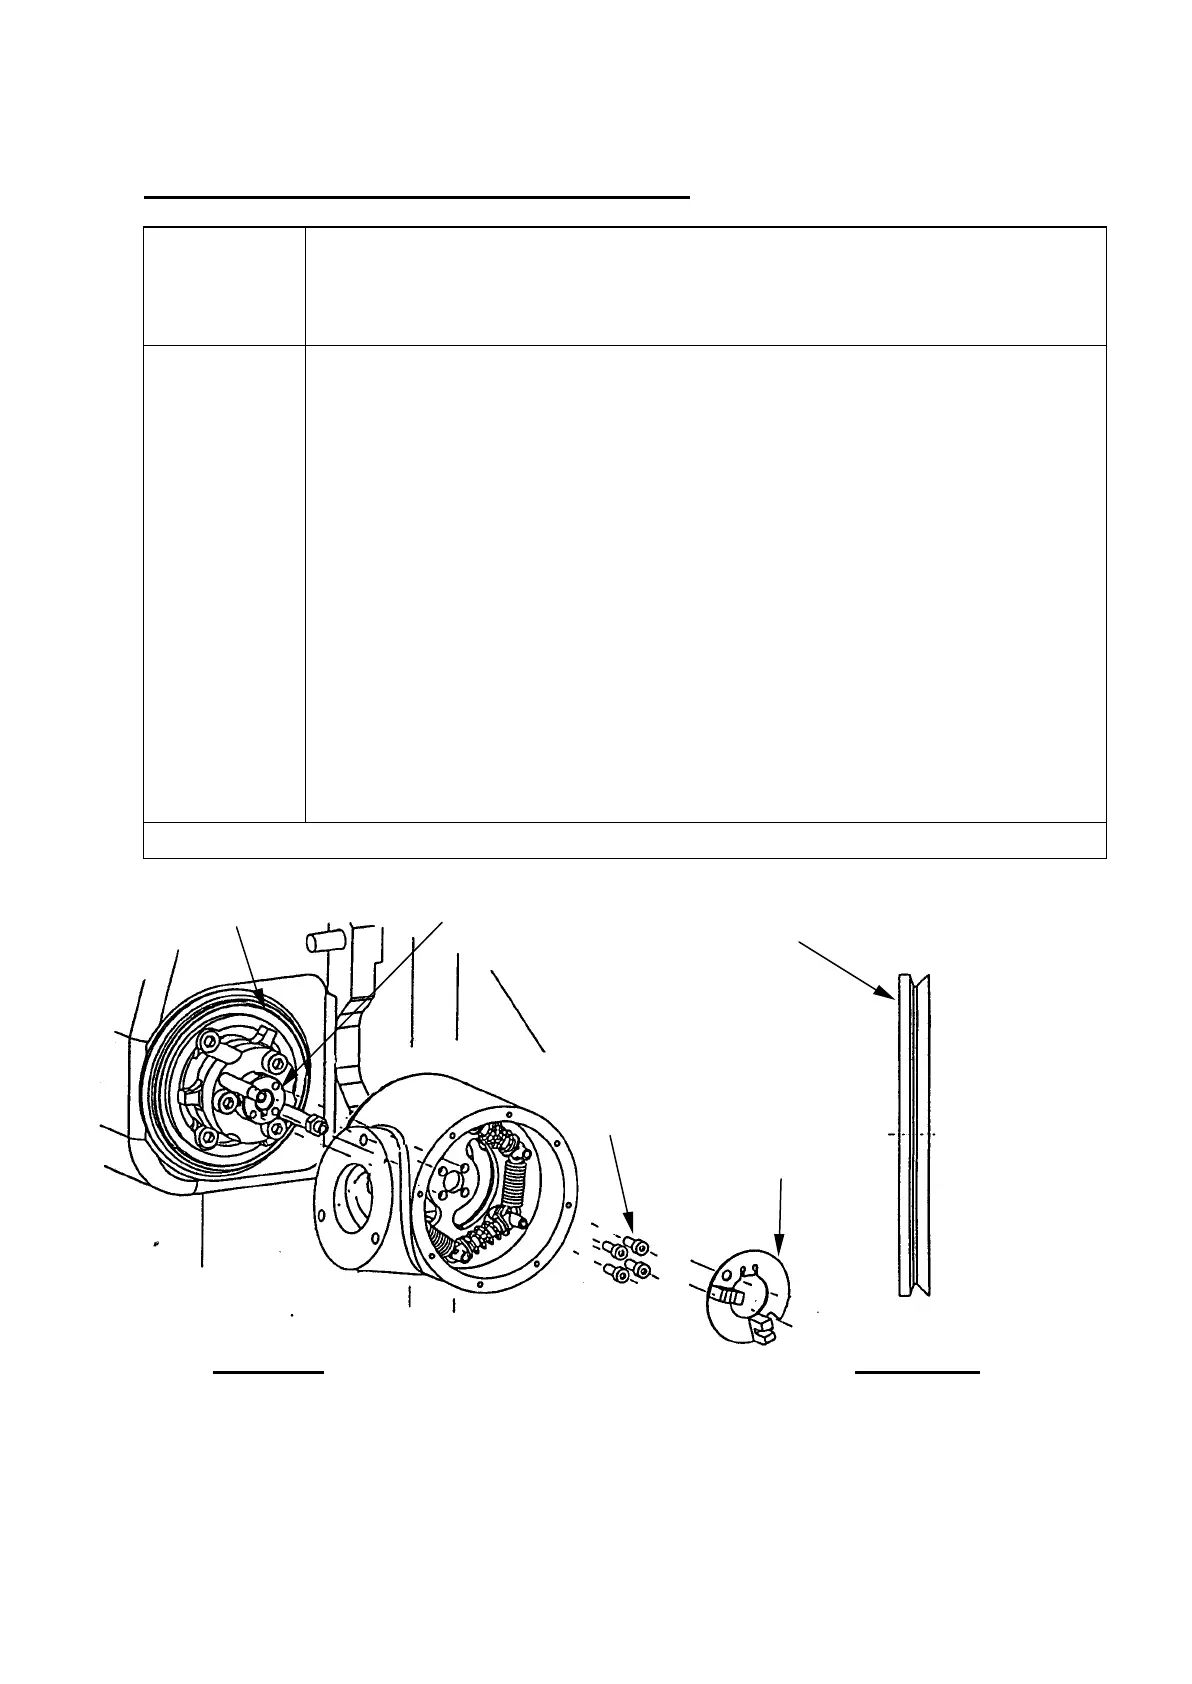
3.3 HUB ASSEMBLY AND HARD LIMITS PCB.
Strip
Unplug 8-way connector from Hard Limits PCB. Undo 2 off M5 nuts.
Hard Limits PCB is now free to remove.
Undo 4 off M4 screws in centre of hub plate and remove hub.
Rebuild
Apply grease to front kinematic spools and lugs on structure.
Renew face seal (P-RS05-0006) as per figure 3.3a. Ensure the lip stands
up evenly all the way around.
Locate hub assembly onto bearing end face and check for free rotation
of hub in both directions. If this rotation is restricted to less than 90° of
rotation and a repair or replacement is required, then the TSA must be
returned to Renishaw.
To secure hub to bearing as per Figure 3.3, apply thread locking
compound to 4 off M4 screws and torque to 2 Nm.
Place Hard Limits PCB (A-2116-0560) onto locating tubes and secure
with 2 off M5 nuts. Plug in 8-way connector and push excess wire back
down tube. Stretch 1 off O-ring (P-RS01-0093) over hub and locate into
groove instead of the garter spring.
To continue rebuild go to section 3.2
Figure 3.3 Figure 3.3a
Bearing
V-seal
(A-2116-0560)
8