(M-2116-0085)
Serial Number
(P-SC17-0308)
8 off
3.0 DISASSEMBLY/REASSEMBLY.
Disconnect power before commencing work. Observe anti-static
handling precautions.
A proprietary thread locking compound must be applied to screws
where stated, to prevent loosening during operation of the TSA.
Molybdenum disulphide grease must be applied, where stated, to
maintain smooth running of sealing surfaces.
A spare O-ring (P-RS01-0041) is supplied in the Repair Kit for re-assembly of the
Arm to the Hub. Heatshrink (P-CA57-0032) is also supplied to provide additional
strain relief for the Arm/Probe Cable if required.
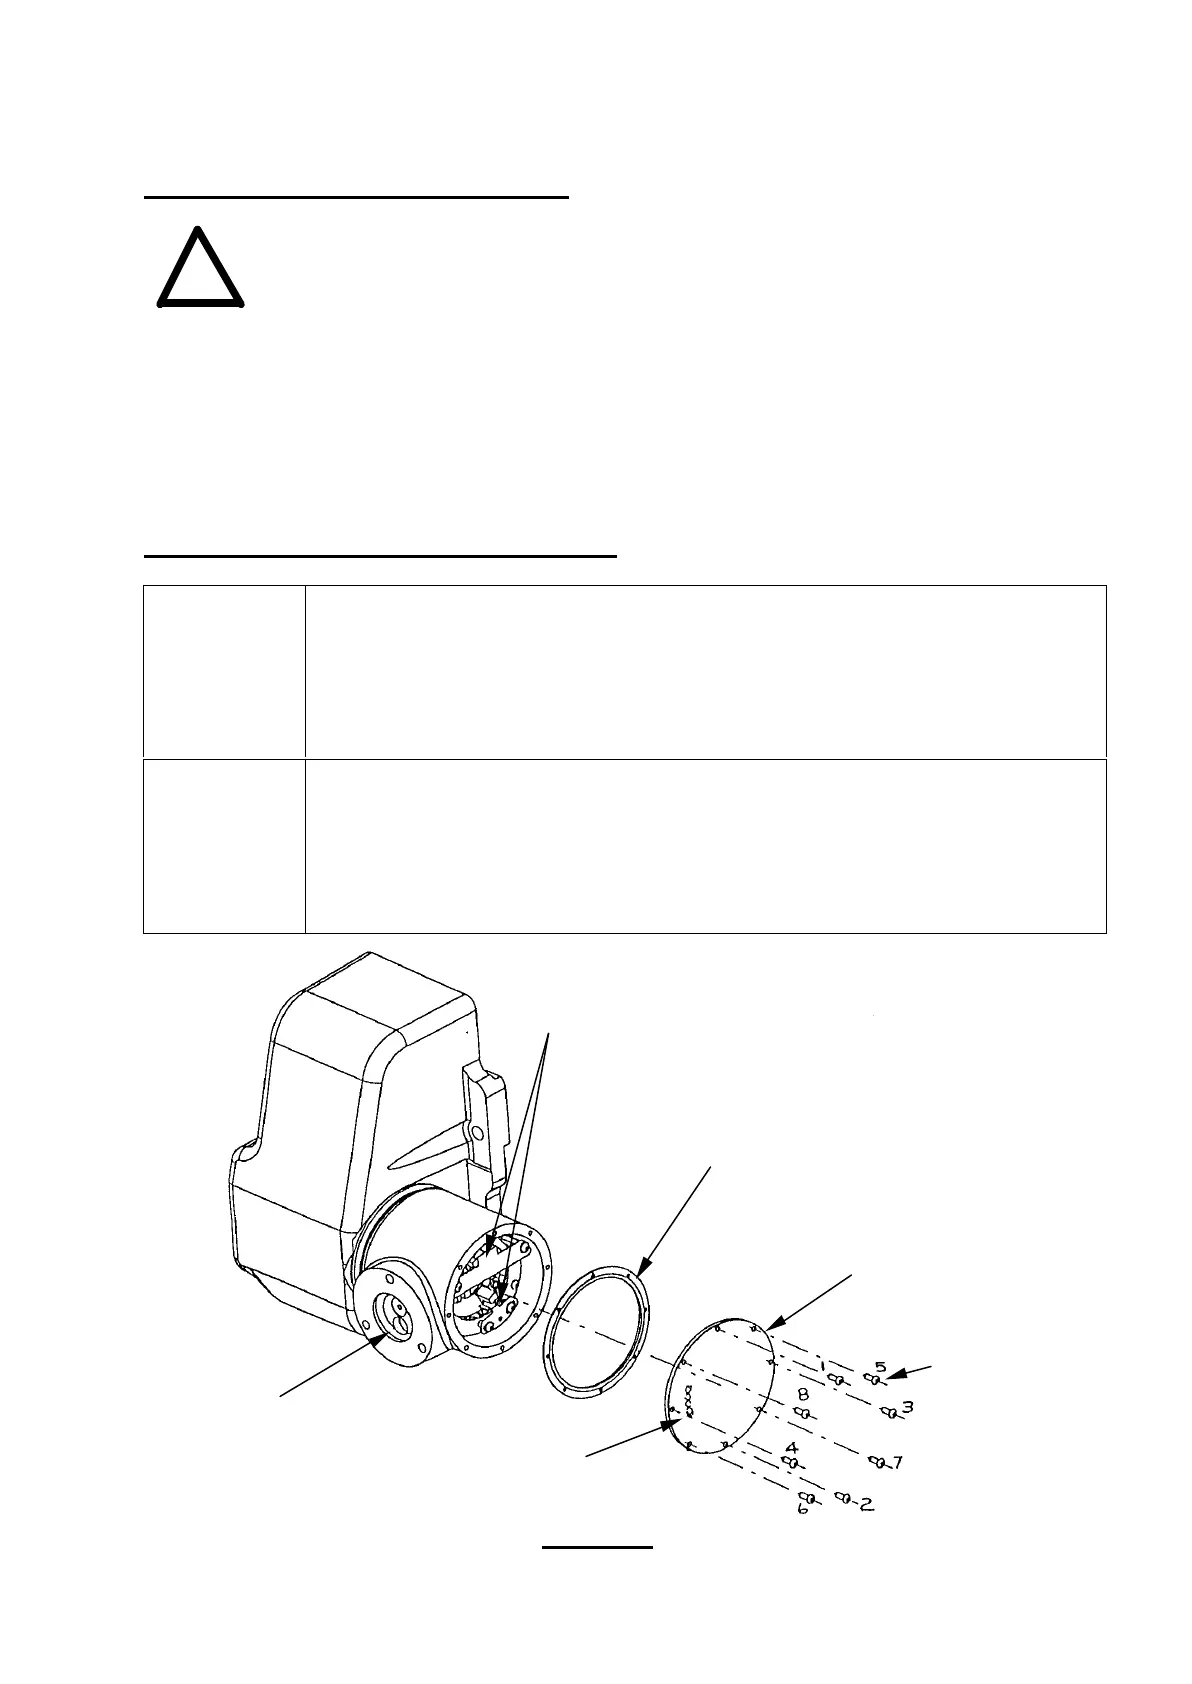
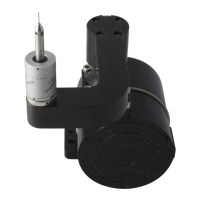
3.1 HUB COVER PLATE AND GASKET.
Strip
Remove cover plate and gasket.
Inspect gasket for any damage, and any evidence of coolant ingress.
Ensure both opto switch vanes are securely in place, and screws are
tight.
Rebuild
Renew gasket (M-2116-0085).
Replace cover plate with serial number nearest to arm attachment face.
Tighten all 8 M3 screws (P-SC17-0308) to 0.7 Nm following the
sequence shown in figure 3.1.
Figure 3.1
Opto switch vanes
5