40
b) Setting up the software (Windows
®
)
Connecting the 3D printer
• Connect the 3D printer to a USB port on your computer using the USB cable provided. Switch the 3D printer on.
Keep the 3D printer switched on when it is connected to the computer.
• When you connect the 3D printer to your computer for the rst time, the operating system will automatically detect
the new hardware and search for a suitable driver.
If no suitable driver is found, follow the steps below to manually install the USB drivers:
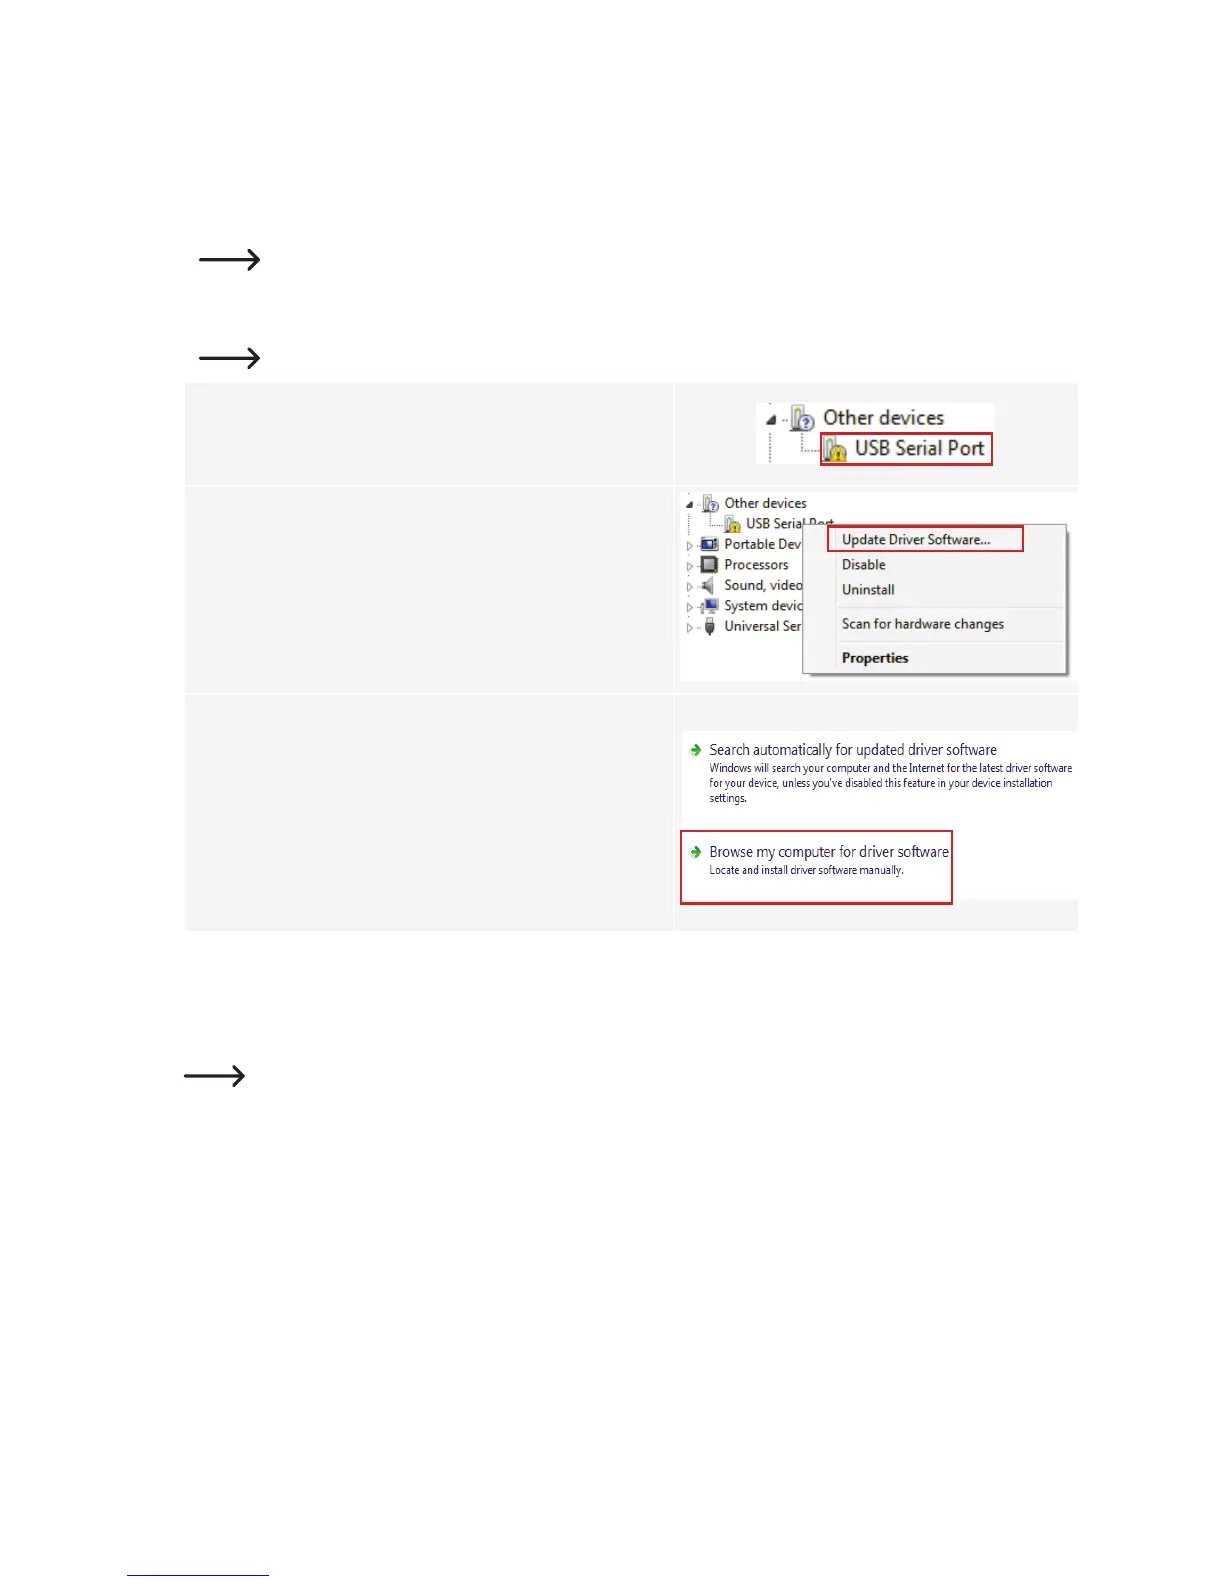
1 Open the device manager on your computer.
A new device will be displayed under "Other devices".
2 Right click on "USB Serial Port" and select "Update Driver
Software...".
3 Click on "Browse my computer for driver software".
The required driver is saved to the SD card in the "software/
ft232 usb UART driver" folder.
4 Follow the onscreen instructions to complete the update.
Starting the software
The conguration wizard will launch when the installation is complete. This provides step-by-step instructions for
conguring the 3D printer.
Enter the information specic to your 3D printer model (RF100 XL or RF100 XL Plus).