11
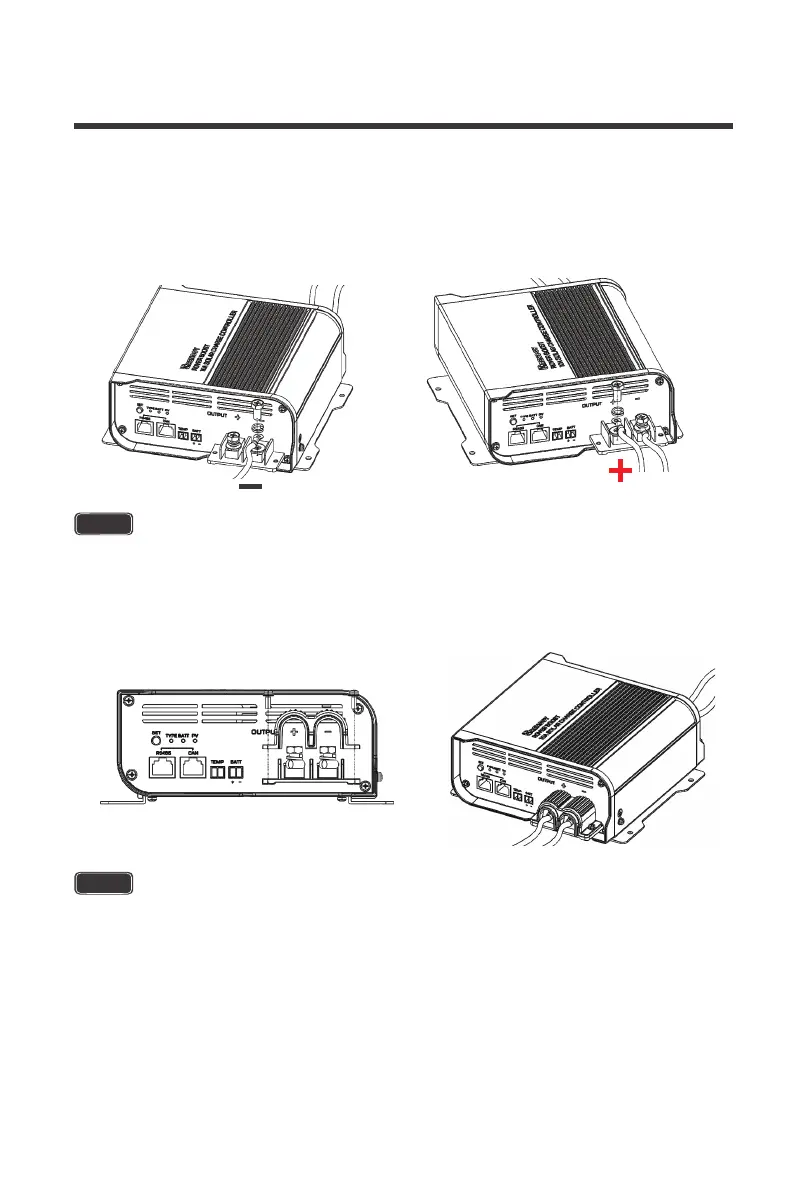
When finished, place the removable battery output cable housing back over your
connections. Make sure to not over-tighten the M3 screws.
3.
To ensure maximum safety, it is important to use correct wiring for either 36V or 48V battery
banks. Series connections are when batteries of the same size and type are combined, and
their voltages add up. The batteries Amp-Hour (Ah) Rating, however, remains the same.
Examples are below:
NOTE
The M6 screws have a recommended toque 4.1~5.0 N-m / 3~3.7 lb. ft.
NOTE
The M3 screws have a recommended torque of 0.5~0.8 N-m / 0.4~0.6 lb. ft.
Unscrew the negative M6 terminal stud, then place the negative Battery ring terminal onto
the negative port and screw the M6 terminal stud and washers together. Repeat the same
for the positive M6 terminal stud and positive Battery ring terminal.
2.