16
UEZ-IOM (07-23) 1034347-I
INSTALLATION—CONTINUED
Heater Suspension
⚠ WARNING ⚠
• Before suspending the heater, check the supporting structure to be used to verify that it has
sufficient load-carrying capacity to support the weight (refer to Weights section) of the unit.
• The heater must be level for proper operation. DO NOT place or add additional weight to a
suspended heater.
⚠ CAUTION ⚠
• Before lifting the heater, verify that any screws used for holding shipping brackets were re-
installed in the cabinet.
• Before lifting the heater, any unused suspension points MUST be plugged.
• When the heater is lifted for suspension, support the bottom of the heater with plywood or other
appropriately placed material. If the bottom is not supported, damage could occur.
NOTE: Four-point suspension is recommended. Two-point suspension is permitted only on unit
sizes 055–110 when installed without a downturn nozzle.
• A 3/8-16 threaded nut retainer is located at each suspension point. The heater may be suspended using either
3/8-inch threaded rods or a hanger kit option package.
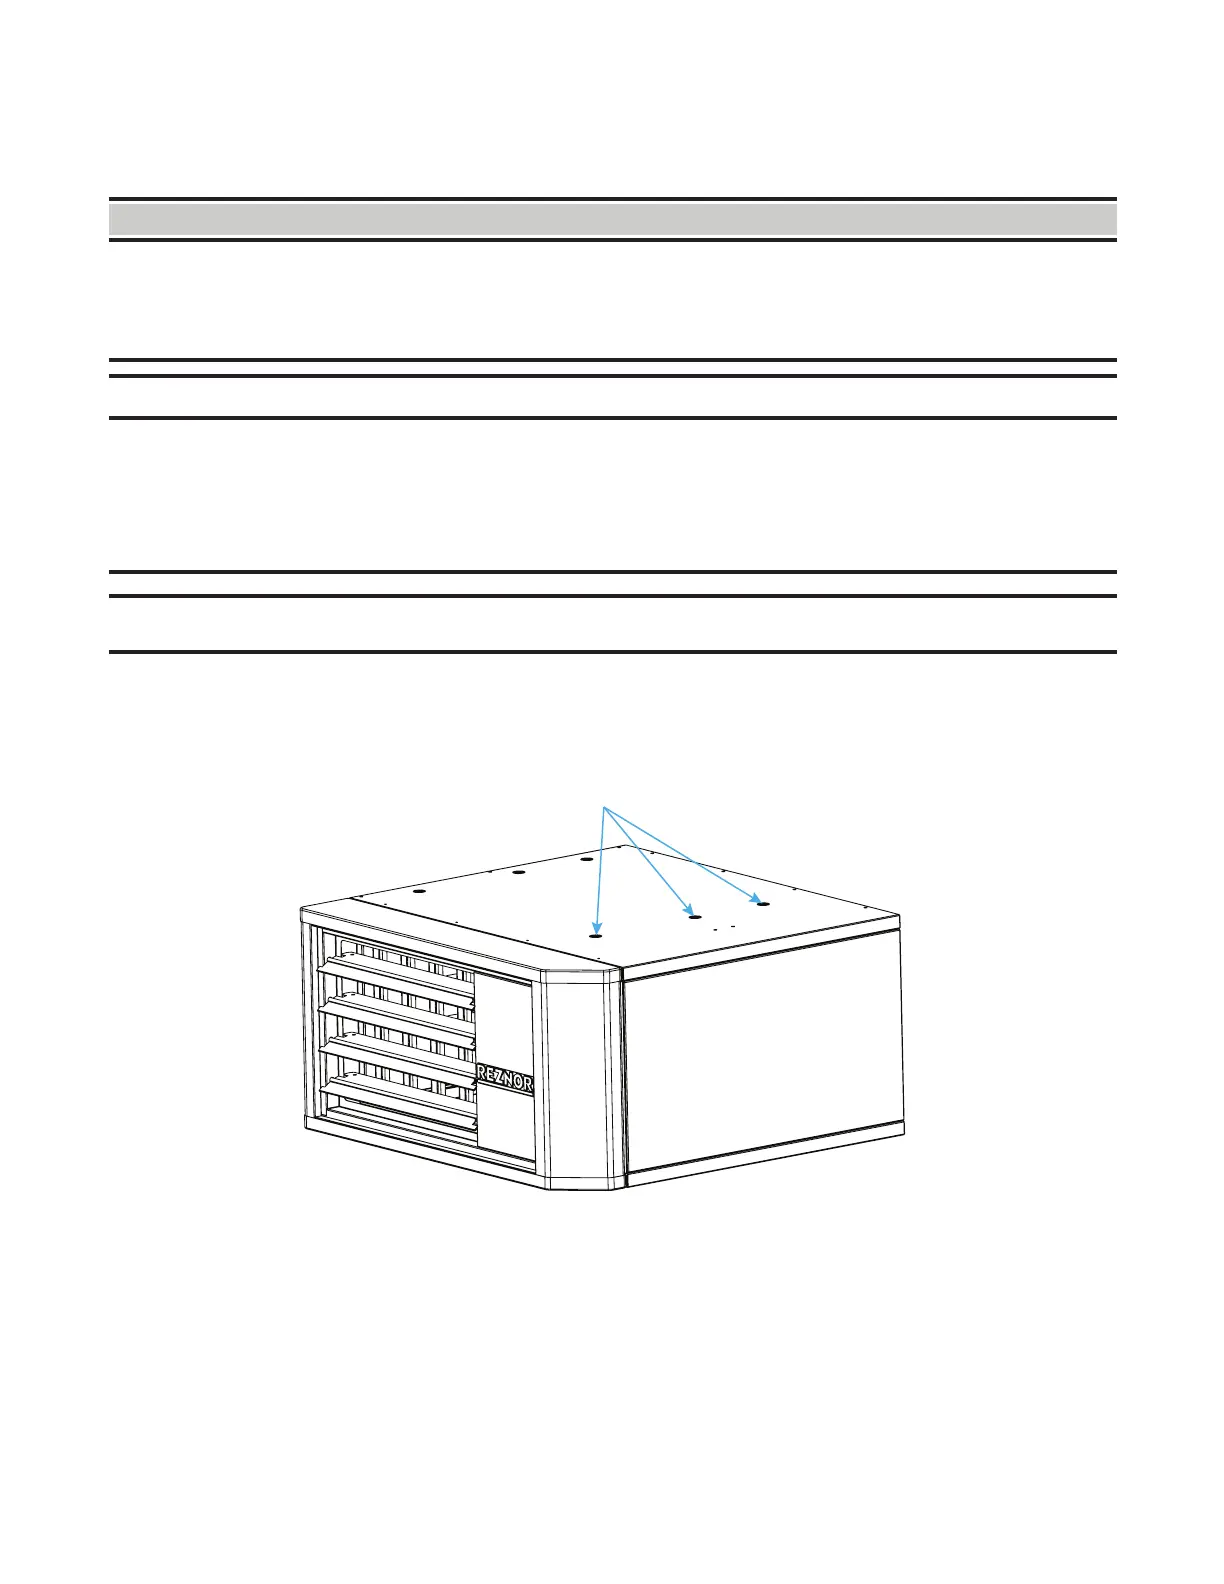
• Using capscrews and washers, seal any unused holes in the top of the heater after installing the hanging hardware
(see Figure 7).
PLUG ANY UNUSED SUSPENSION POINT(S)
Figure 7. Plugging Unused Suspension Points
Suspension of Heater Using Option CK8 or CK10 Hanger Kit
Options CK8 (two-point suspension, unit sizes 055–110) and CK10 (four-point suspension) are for suspending the
heater using swivel connectors connected to 1-inch pipe. Attach the swivel connectors at the 3/8-16 threaded nut
retainers. Ensure that the swivel connectors are locked to the heater as shown in Figure 8.

 Loading...