26
UEZ-IOM (07-23) 1034347-I
RAIN COLLAR
COMBUSTION AIR INLET
BIRD GUARD
INSTALLATION—CONTINUED
Vent Connections—Continued
Vertical Vent Terminal (Option CC2) Installation—Continued
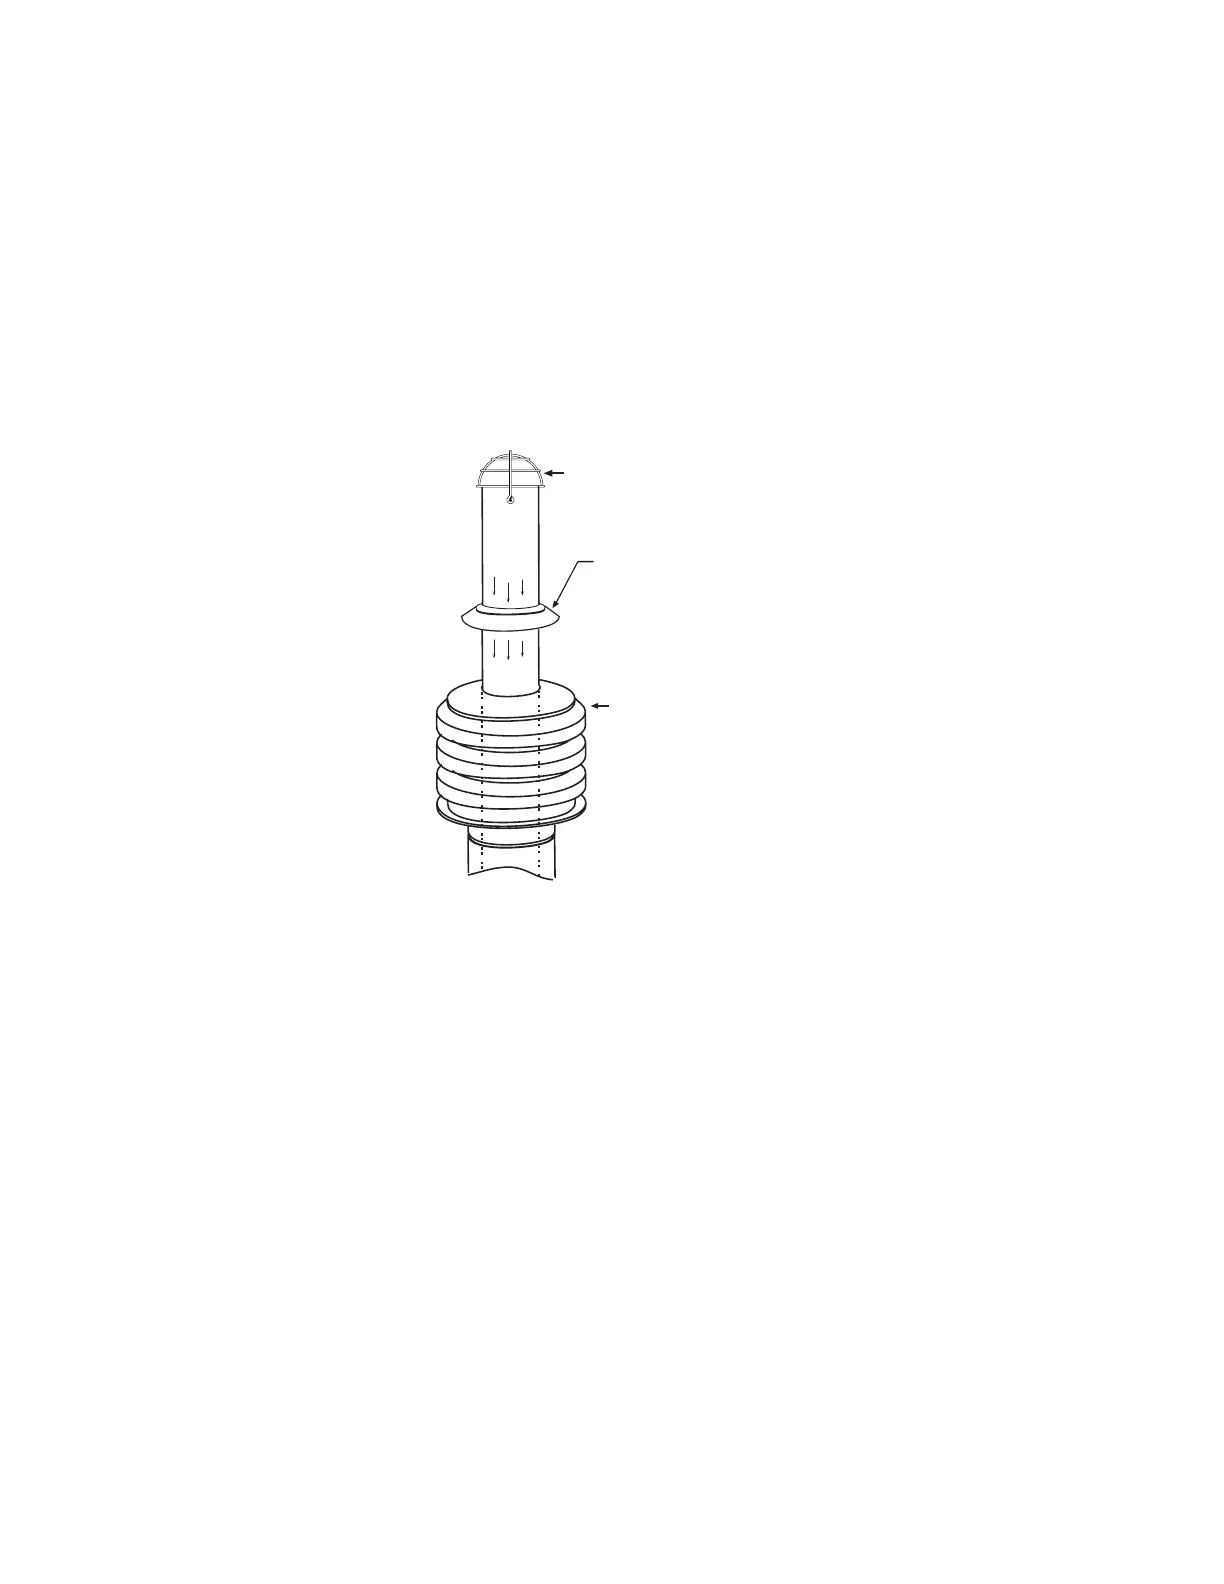
8. Install outdoor combustion air inlet, rain collar, bird screen, and field-supplied flashing (see Figure 17):
a. Slide combustion air inlet over vent pipe and secure collar to combustion air pipe using sheet metal screws.
b. Seal pipe joint using tape or sealant.
c. To prevent rainwater leakage, slide rain collar over end of 4-inch vent pipe and seat it flush on top of combustion
air inlet. Do not paint or use petroleum-based products on rain collar (silicone sealant is allowed).
d. Install bird guard and secure using two sheet metal screws provided.
e. Flash combustion air pipe on outside using field-supplied flashing.
Figure 17. Combustion Air Inlet, Rain Collar, and Bird Guard
9. Verify compliance with Figure 15 and with all specifications listed in VENTING AND COMBUSTION AIR
REQUIREMENTS and Hazards of Chlorine sections.
Horizontal Vent Terminal (Option CC6) Installation
• Field-supplied components required for installation of the horizontal vent kit are as follows:
a. Vent and combustion air piping: 6- and 8-inch single-wall galvanized pipe
b. 22.5-degree elbow (if available)
c. Flashing
d. Sheet metal screws, tape, and sealant, as required
• Factory-supplied components for installation of the horizontal vent kit are listed in Table 17 and shown in Figure 18.

 Loading...