56
UEZ-IOM (07-23) 1034347-I
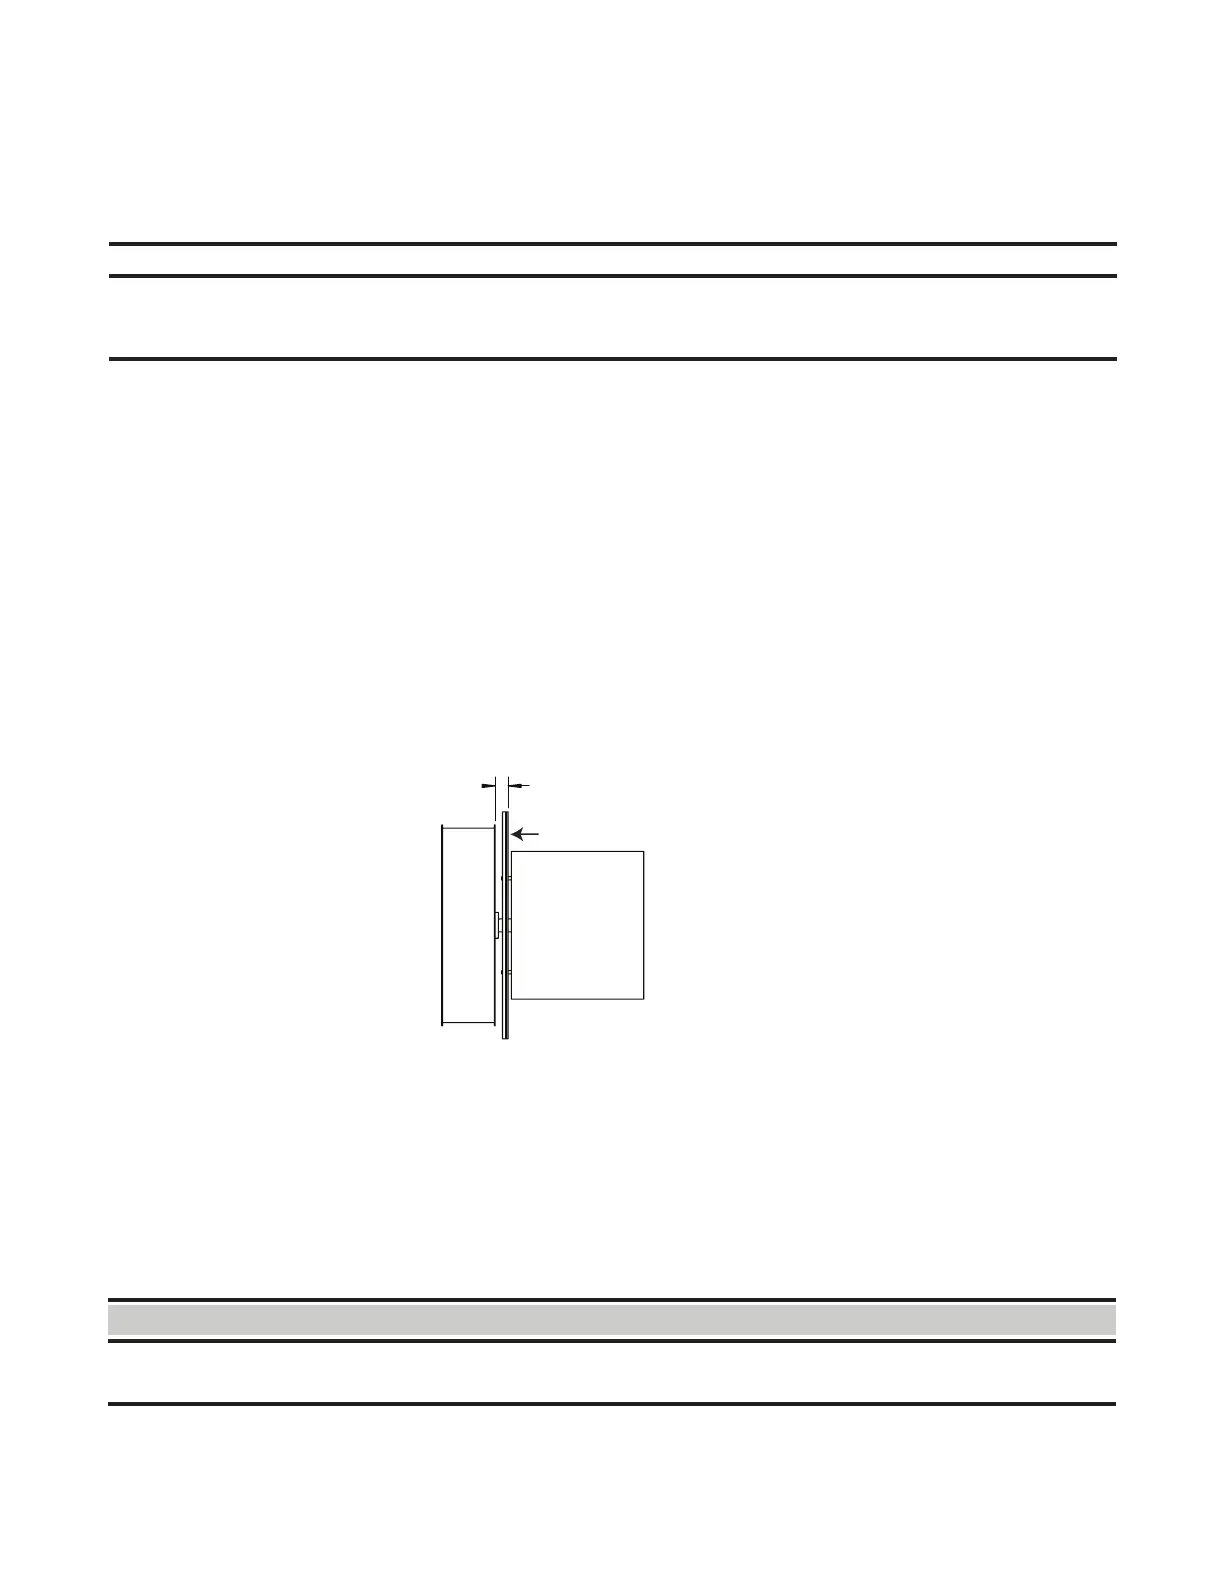
1/2 INCH (13 mm) FROM
MOTOR PLATE TO WHEEL
VENTER
MOTOR
VENTER WHEEL
MOTOR PLATE WITH GASKET
MAINTENANCE—CONTINUED
Maintenance Procedures—Continued
Venter Motor and Wheel Assembly Maintenance
NOTES:
• Venter motor bearings are permanently lubricated.
• Keep all hardware removed to be used in reassembling and installing the replacement parts.
Remove dirt and grease from the venter motor casing, venter housing, pressure sensing tap, and venter wheel.
Replace the venter motor and wheel assembly as follows:
1. Turn OFF gas and disconnect electric power.
2. Remove burner/control compartment access panel.
3. For unit sizes 055, 085, and 110, remove existing screws that secure existing motor and wheel assembly, loosen
vent clamp, and remove existing motor and wheel assembly. Install replacement motor and wheel assembly and
secure using existing screws.
4. For unit sizes 130–310:
a. Disconnect three venter motor wires at DSI control, capacitor wires at capacitor (if applicable), and ground
screw (located on control panel).
b. While holding venter motor, remove six screws that secure venter motor mounting plate to venter housing.
Remove motor and wheel assembly from heater.
c. Reassemble with replacement venter motor and wheel. Ensure that venter wheel is properly positioned on
shaft (see Figure 35).
Figure 35. Venter Wheel Position on Shaft—Unit Sizes 130–310
5. Reconnect venter wires in accordance with wiring diagram.
6. Install access panel.
7. Restore electric power to heater and turn ON gas.
8. Follow instructions on lighting instruction plate to light heater.
9. Check for proper heater operation.
Combination Gas Valve Maintenance
⚠ WARNING ⚠
The combination gas valve is the prime safety shutoff. All gas supply lines must be free of dirt or
scale before connecting them to the unit to ensure positive closure.

 Loading...