Page 18
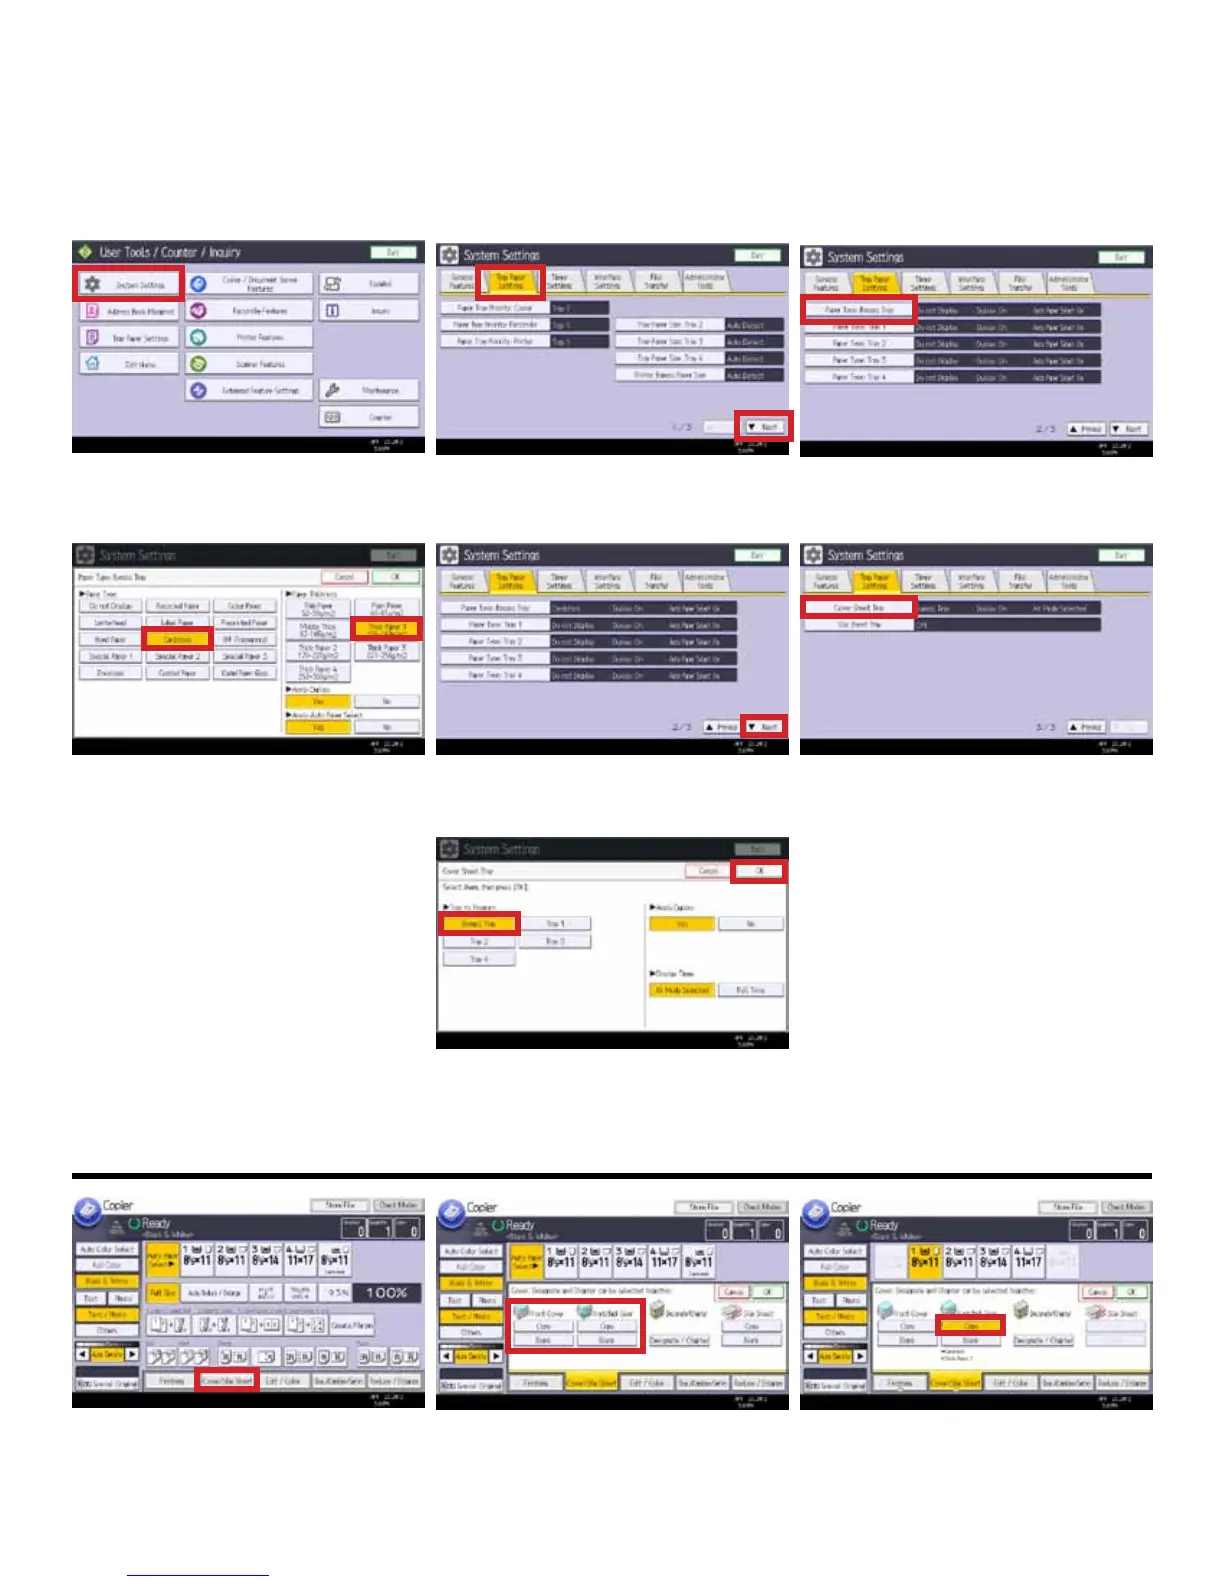
Adding Covers
There are two steps to adding covers to a document. First, you must dene the type of paper being used for the Cover in
User Tools, and next, you have to select the cover during the copy process. Both procedures are shown below.
1. In User Tools, select [System Settings]. 2. Select the [Tray Paper settings] tab,
and then [Next] to go to page 2.
3. Select the [Paper Type: Bypass Tray]
button (if that’s where your cover stock
is loaded).
4. Select Cardstock as the paper type,
and select the paper thickness of your
cover stock. For this example, we chose
Thick Paper 1. Then, select [OK].
5. To get to the next setting, select
[Next].
6. On page 3, select [Cover Sheet Tray].
7. Select [Bypass Tray] to dene the
Bypass Tray as the one with the cover
stock. Then, select [OK], and [Exit] User
Tools.
8. While copying, select [Cover/Slip
Sheet].
9. Depending upon whether or not you
want to copy onto the cover, you can
select [Copy] or [Blank].
9. For our example, we are copying
onto both front and back covers, so we
selected [Front/Back Cover Copy].