21
Configuring the IP Address Settings Using the Web Image Monitor
Starting Web Image Monitor
Launch the Web browser.
In the address bar, enter "http://(machine's IP address)/".
IPv4 Address•
Enter the IP address shown on the configuration page.
Use a computer using the IP address shown on the configuration page with its variable part modified.
IPv6 Address•
Enter the IP address shown in "Link-local Address" on the configuration page. Enclose the IP address in
square brackets, thus: "http:/[fe80:226:73ff:fe47:62e]/".
Configuring the Machine's IPv4 Address Automatically
Launch Web Image Monitor.
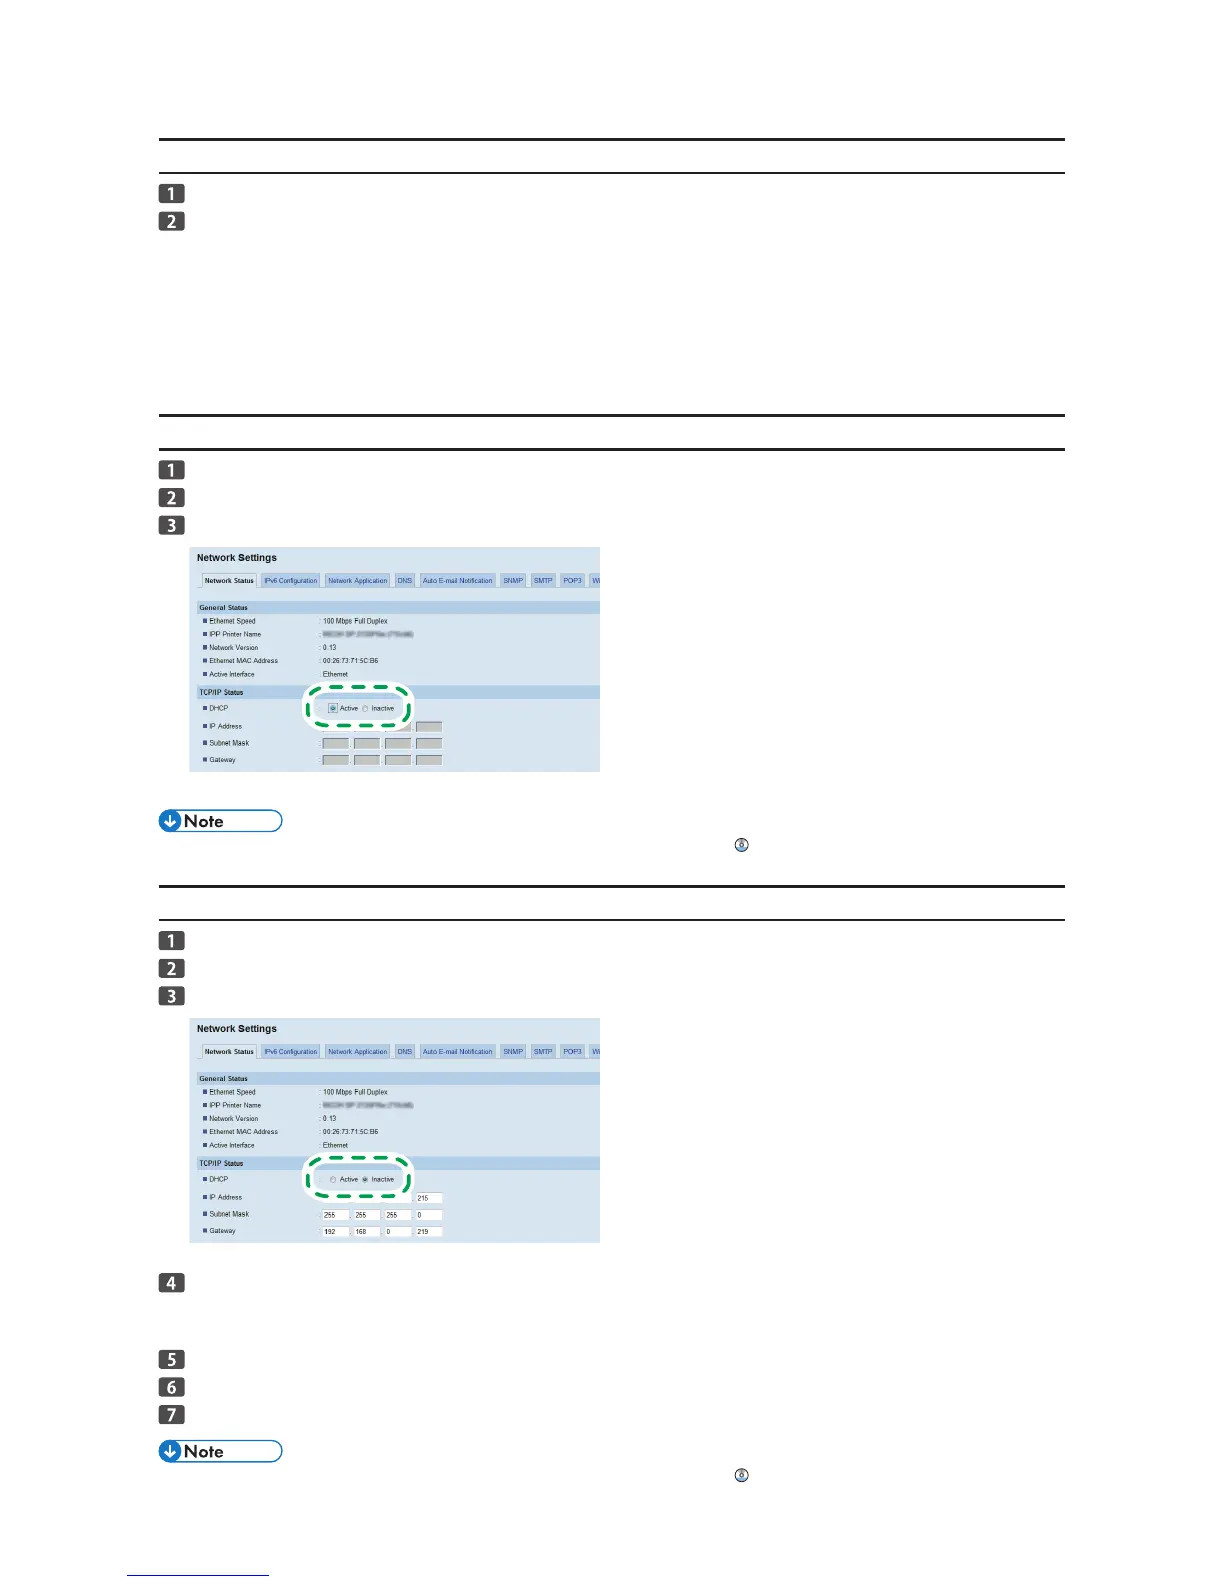
Click [Network Status].
Set [DHCP] to [Active].
For details about configuring the IPv6 address, see the User Guide• .
Configuring the Machine's IPv4 Address Manually
Launch Web Image Monitor.
Click [Network Status].
Set [DHCP] to [Inactive].
Specify the IP address in [IP Address].
Specify the subnet mask and default gateway address as required in accordance with the network environ‑
ment.
Specify other settings if necessary.
Enter the administrator password if required.
Click [OK].
For details about configuring the IPv6 address, see the User Guide• .
 Loading...