33
Bevel Cut (Fig. 41)
WARNING:
The saw is adjustable to only three positions (0°, 22.5°
or 45°). Any other bevel cut will cut into the work table.
1. Adjust bevel cut as described in the “Bevel Cut Adjust-
ment” on page 26.
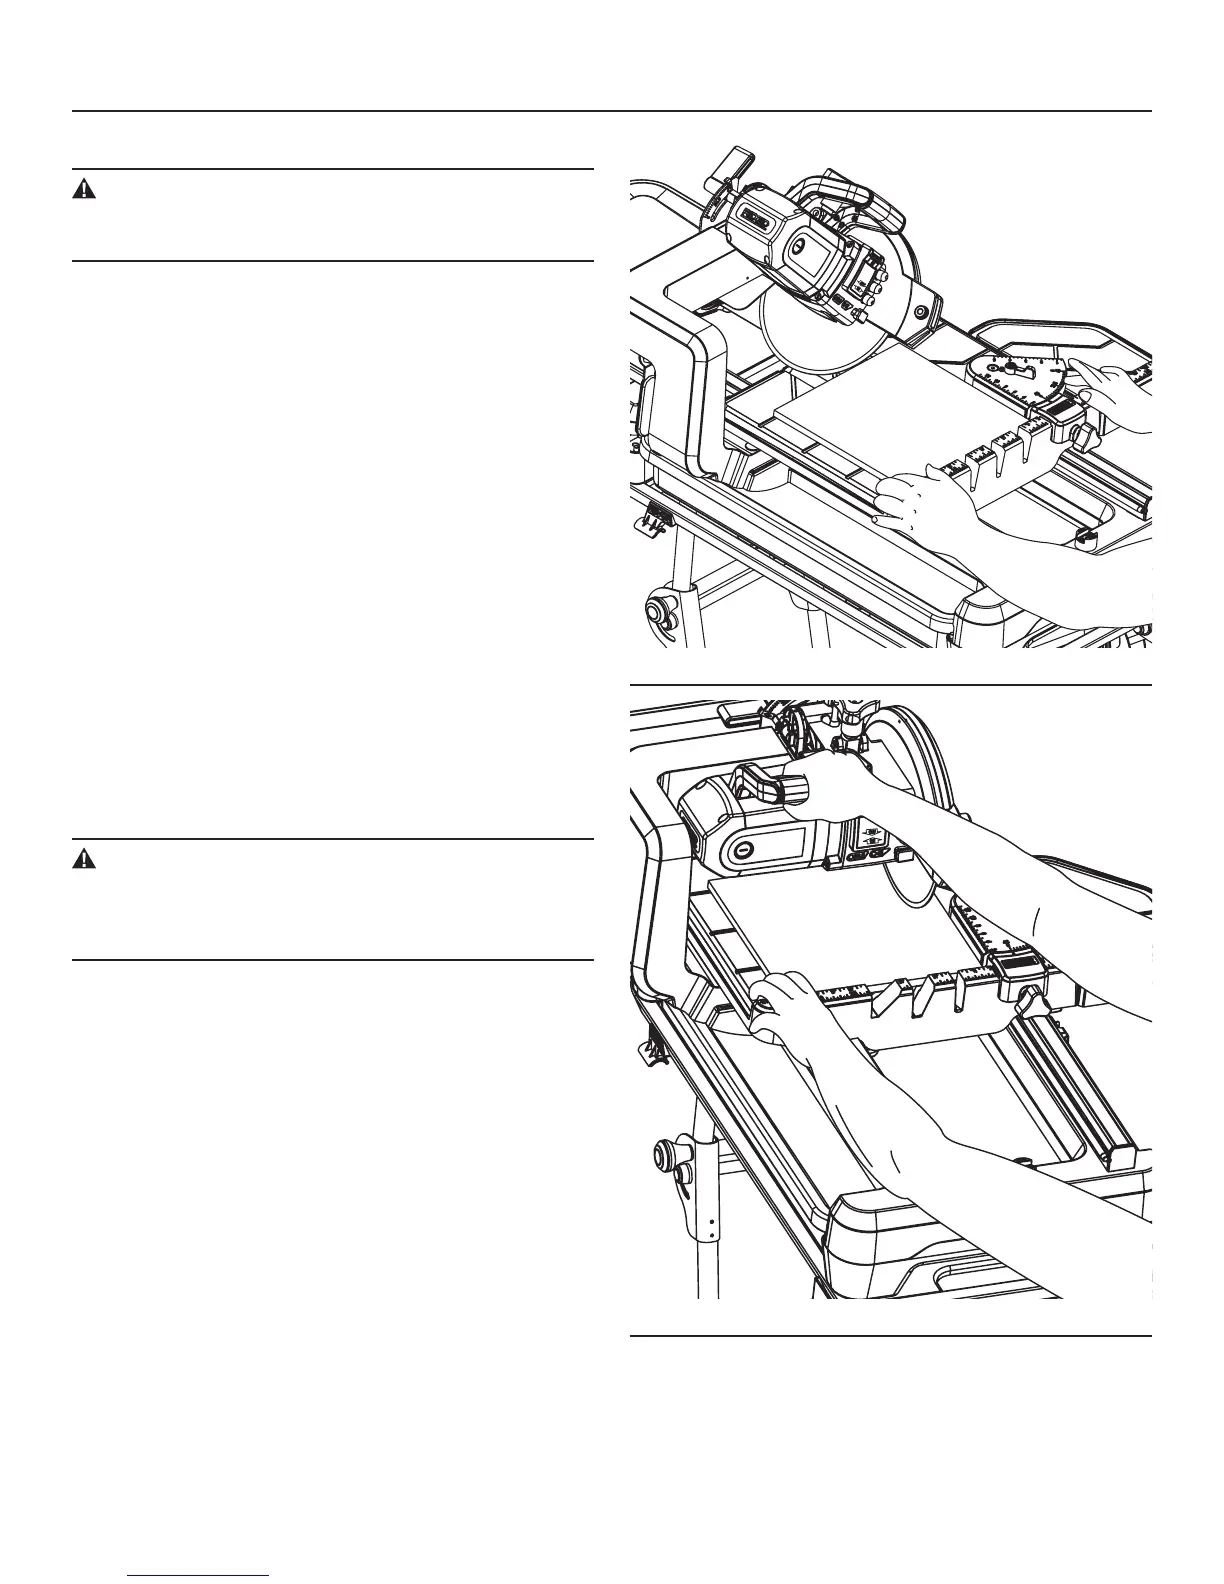
2. Position the tile on the work table, pressed against the
work-table fence.
3. To use the laser, rst calibrate the laser beam as
described in “Laser Beam Calibration” on page 28, and
make sure that the laser beam is aligned with the cut-
ting line.
4. Adjust the universal guide to the desired distance from
the blade. Use the scale rules on the work-table fence
for reference.
5. Lift the ON/OFF switch to turn the saw on.
6. Wait until the blade has come up to speed and is thor-
oughly wet.
7. Ease the work table towards the blade to slowly feed
the tile into the blade. Continue pushing until the blade
cuts completely through the tile (Fig. 46).
8. Turn off the saw, pull the work table back, and remove
the cut pieces and any debris.
Plunge Cut
WARNING:
Wear safety glasses for laser and do not look directly
into the laser-beam output aperture during plunge cut
operation. The laser beam can be harmful to the eyes.
1. Loosen the depth-adjustment knob and the depth-stop-
adjustment knob. Raise the saw. Set the desired lowest
point of blade using the depth-adjustment knob. (See
Depth Adjustment on page 25 of this manual.)
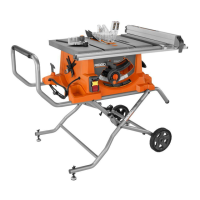
2. Position the tile on the work table, face down, pressed
against the work table fence.
3. To use the laser, rst calibrate the laser beam as
described in “Laser Beam Calibration” and make sure
that the laser beam is aligned with the cutting line.
4. Align the tile under the saw blade by moving the work
table to the desired position.
5. Lift the ON/OFF switch to turn the saw on, and wait
until the blade has come up to speed and is thoroughly
wet.
6. Plunge the blade into the tile. Do not force the saw or
move the blade too quickly into the tile (Fig. 47).
7. When the cut is complete, lift the saw from the tile.
8. Turn off the saw, pull the work table back, and remove
the cutting pieces and any debris.
OPERATION
Fig. 46
Fig. 47