RIGOL Chapter 1 Disassembly and Assembly
DG1000 Service Guide
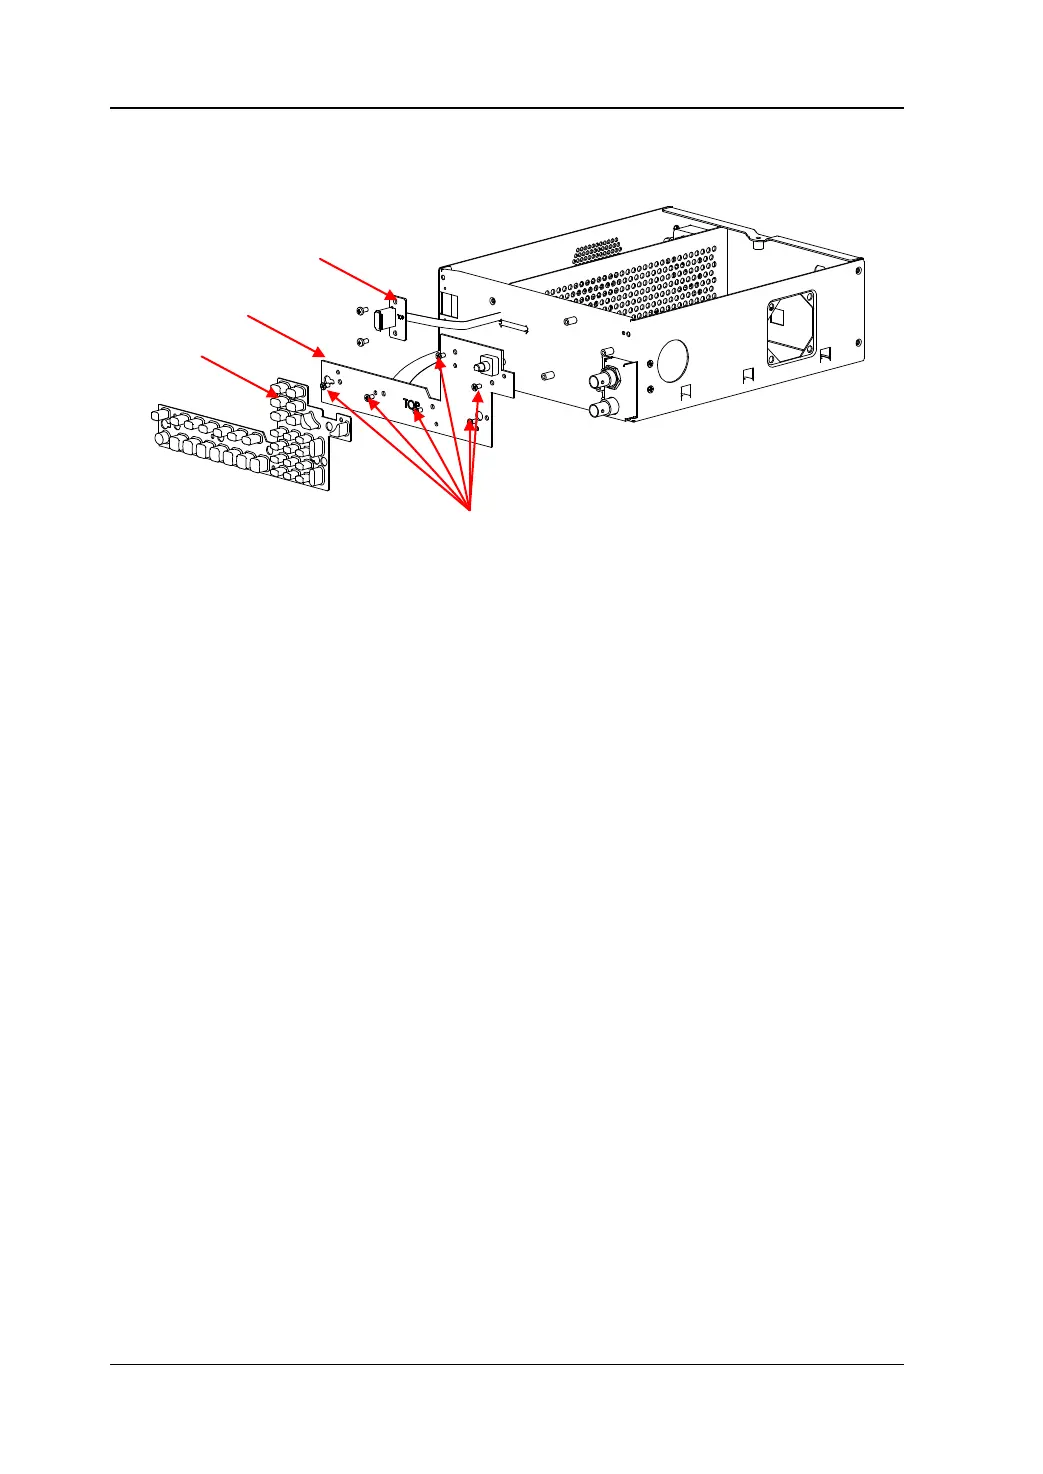
Disassemble the Keypad Board
Figure 1-9 Disassemble the Keypad Board
Part Description:
① 6 screws (M3×6 torx flat head countersunk screws, used for fastening the keypad
board to the metal chassis)
② 2 screws (M3×6 torx pan head combination screws, used for fastening the front
USB board to the metal chassis)
Disassembly Steps:
1. Take off the rubber keypad.
2. Remove 6 screws (①) that fasten the keypad board to the metal chassis using the
T10 screwdriver, then take off the keypad board.
3. Remove 2 screws (②) that fasten the front USB board to the metal chassis using
the T10 screwdriver, then take off the front USB board.
②
②
①
 Loading...