11
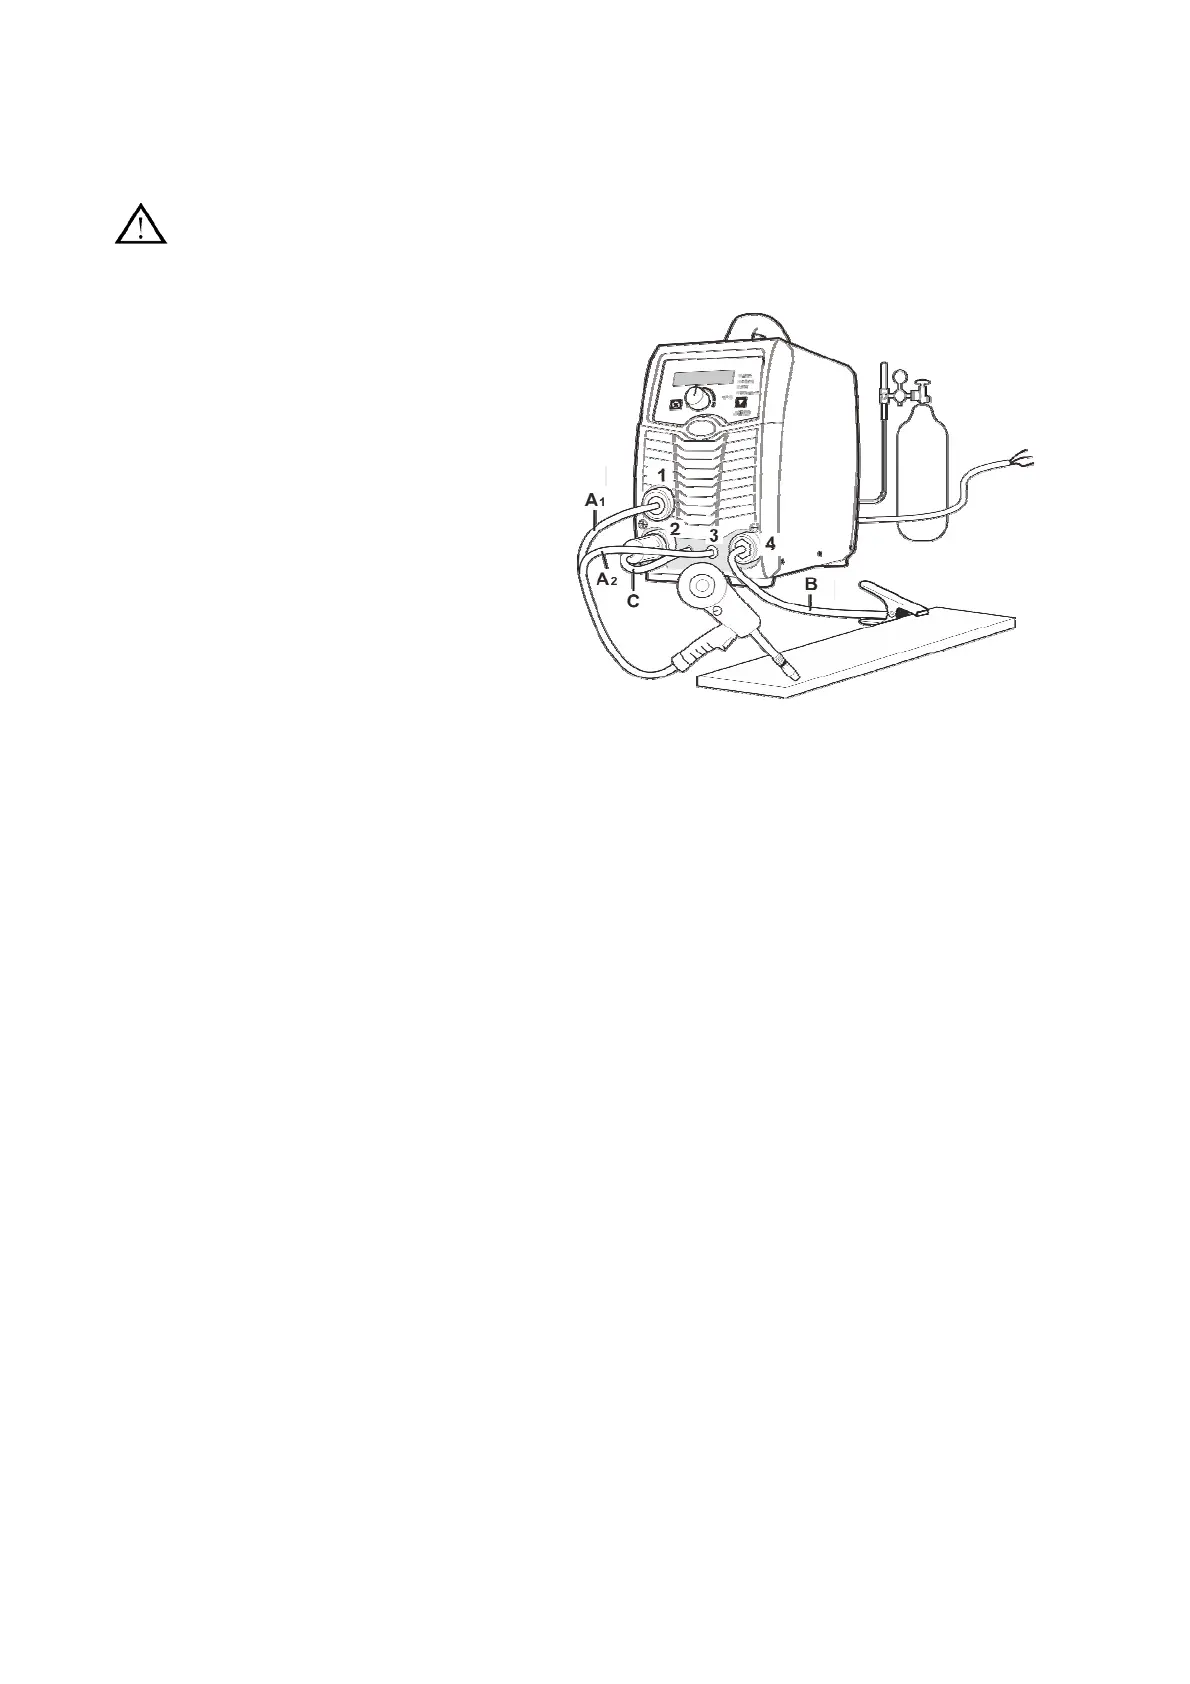
Installation for MIG setup with optional spool torch
NOTE: Ensure that all power to machine is turned off before connecting the spool torch.
1) Connect the gas cylinder to the regulator. Select correct shielding gas for the application.
2) Plug spool torch connection (A1)int
output connection (1).
3) Plug spool torch control cable (A2)int
control connection (3).
4) Fit wire spool to the spool torch.
- Lift cover up
- Remove retaining screw by turning
clockwise.
- Slide mini spool in
- Adjust spool tension using knurled ring o
the spool shaft
- Feed wire through front of the torch
-Closecover
5) Select the correct polarity for the type of wire used as indicated on the consumable packaging.
This is achieved by swapping the polarity terminal wires. For most solid wires the terminal should
be set as torch positive.
For torch positive, plug the short mechanical connector (C) on the front panel into the positive
terminal (2) and the work return lead (B) into the negative terminal (4).
For torch negative, plug the short mechanical connector (C) into the negative terminal (4), and
the work return lead (B) into the positive terminal (2).
6) Turn machine on.
The spool torch indicator light will illuminate.
Please note wire feed speed is only active from the spool torch.
Optional spool gun purchased separately