14
Operation instruction:
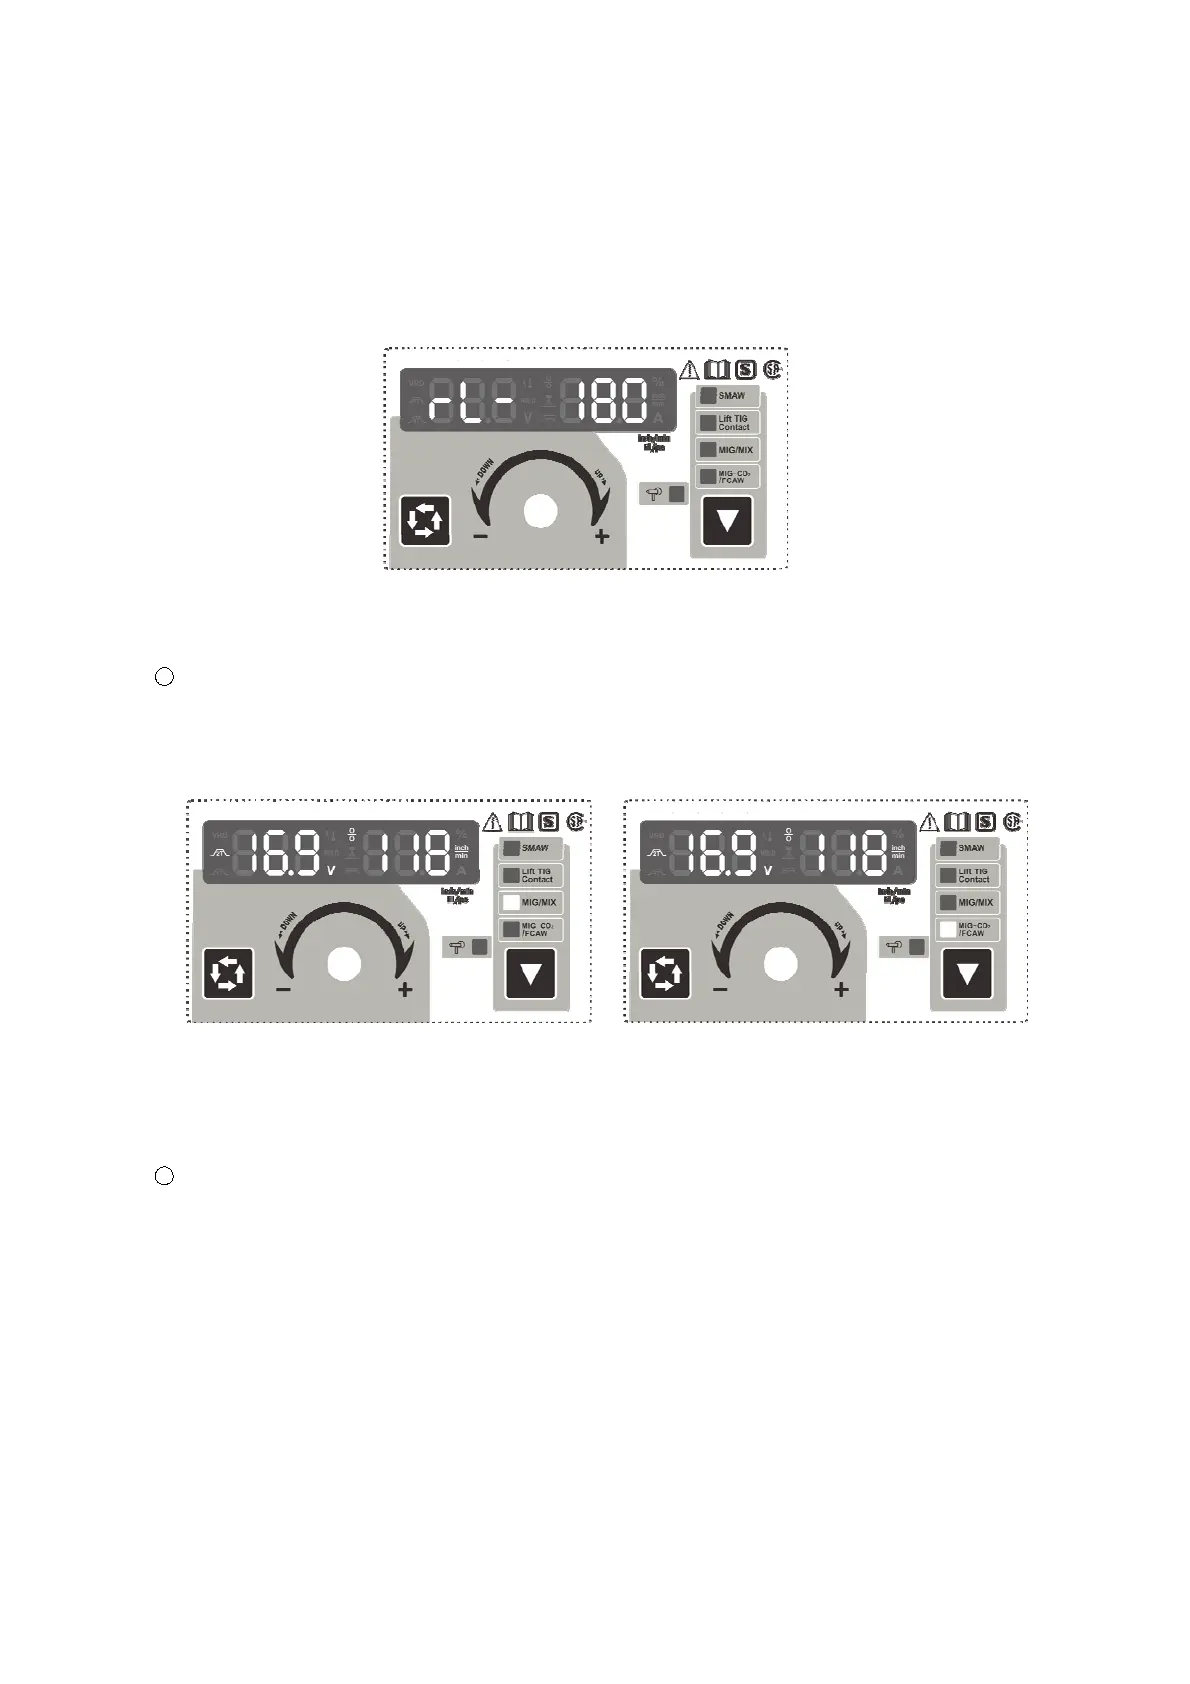
1) The starting up display
Switch on the welding power source, the front panel displays as Fig.1.AftertheMultifunctional
Data Display (or any key or knob on front panel) flashes for 5 seconds, the machine enters into the
welding mode that saved in the last shutdown.
Fig.1 Starting up Display Interface
2) Operation instruction under MIG mode
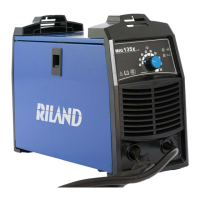
1 Set welding mode:
When welding stops, press the Function Switch Key to choose the welding mode, the
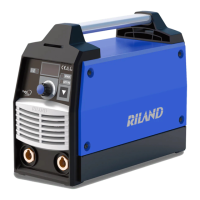
machine enters into MIG/MIX mode (Fig.2)whileMIG/MIX indicator lights up, and enters into
MIG-CO
2
/FCAW mode (Fig.3) while MIG-CO
2
/FCAW indicator lights up.
Fig.2 MIG/MIX Mode Fig.3 MIG-CO
2
/FCAW Mode
Under MIG mode, the wire can be fed at high speed by pressing the torch switch for a while
without welding. To stop wire feeding, press the torch switch again.
2 2T/4T mode:
Under MIG mode, press Data Selection Key for 2s to choose the 2T/4T mode.
2T icon in the Multifunctional Data Display lighting up means 2 step control way: press the
torch switch, feed the gas in advance, and perform welding normally; release the torch switch,
burn back and get rid of the ball on the end of wire, then stop feeding gas 3 seconds later.
4T icon in the Multifunctional Data Display lighting up means 4 step control way: press the
torch switch for the first time, feed the gas in advance, and ignite the arc to perform welding,
then release the torch switch and perform welding normally. Press the torch switch for the
second time, the welding current attenuates until to crater value and keep on, then release the
torch switch again, burn back and get rid of the ball on the end of wire, then stop feeding gas 3
seconds later.