5-4-3
PISTON and
PISTON
RING
1) If
no
ring expander is available, install the rings by placing the open ring ends over
the
first land of the
piston and spreading the rings only far enough to slip them over the correct ring grooves.
Note:
Pay
attention not to break the rings by twisting. Install the oil ring first followed by the second
ring and then top ring. Meantime, the surfaces of the second ring and the top ring with carved
carved marks are to be faced up.
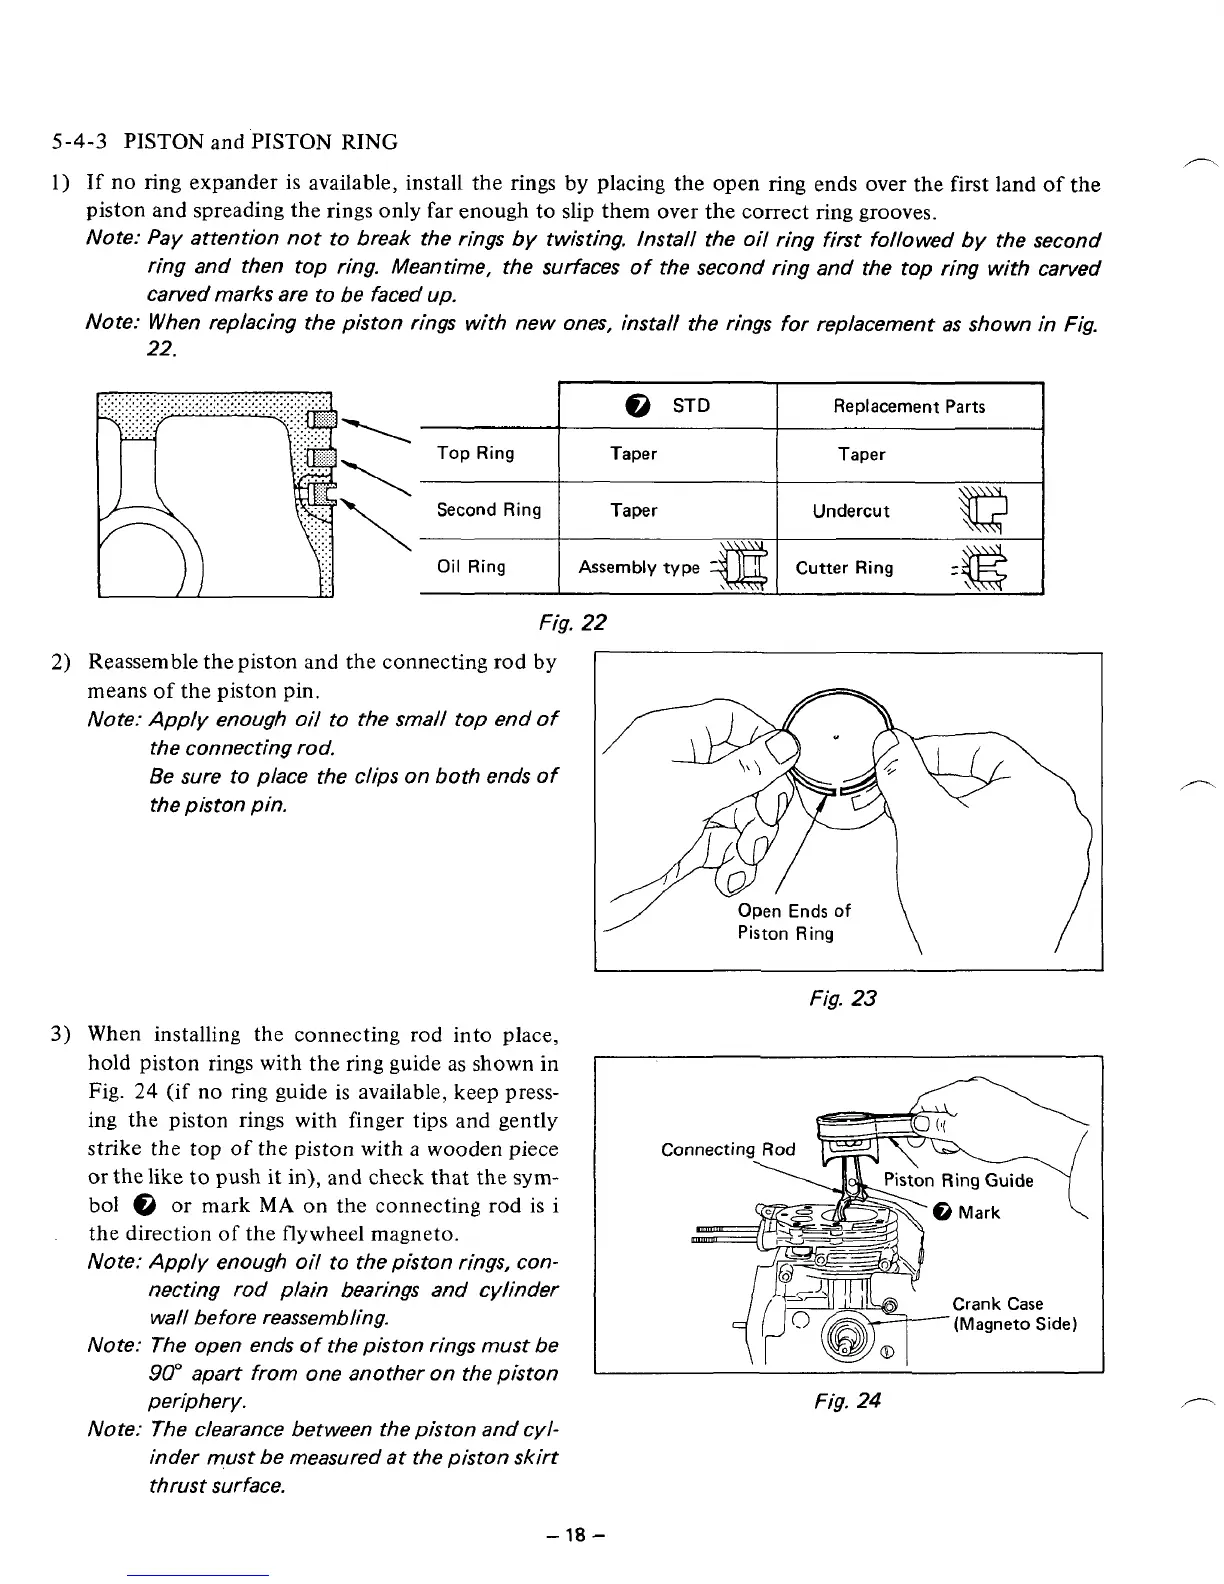
Note: When replacing the piston rings with new ones, install the rings
for
replacement
as
shown in Fig.
22.
n
I
@
STD
I
Replacement Parts
I
Top Ring Taper
I
I
Taper
Second Ring
Taper
Undercut
Ql
Oil
Ring
Cutter Ring
Assembly type
a
Fig.
22
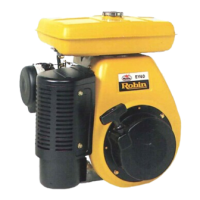
2)
Reassemble the piston and the connecting rod by
means of the piston pin.
Note: Apply enough oil to the
small
top end of
the connecting rod.
Be sure to place the clips on both ends of
the piston pin.
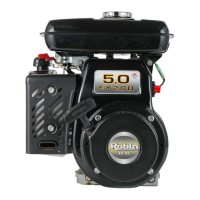
3)
When installing the connecting rod into place,
hold piston rings with the ring guide
as
shown in
Fig.
24
(if
no ring guide
is
available, keep press-
ing the piston rings with finger tips and gently
strike the top
of
the piston with a wooden piece
or the like
to
push
it
in), and check that the sym-
bol
@
or mark
MA
on the connecting rod
is
i
the direction
of
the flywheel magneto.
Note: Apply enough oil
to
the piston rings, con-
necting rod plain bearings and cylinder
wall before reassembling.
Note: The open ends of the piston rings must be
90"
apart from one another on the piston
periphery.
Note: The clearance between the piston and cyl-
inder must be measured
at
the piston skirt
thrust surface.
Fig.
23
Crank Case
(Magneto Side)
Fig,
24
-
18
-