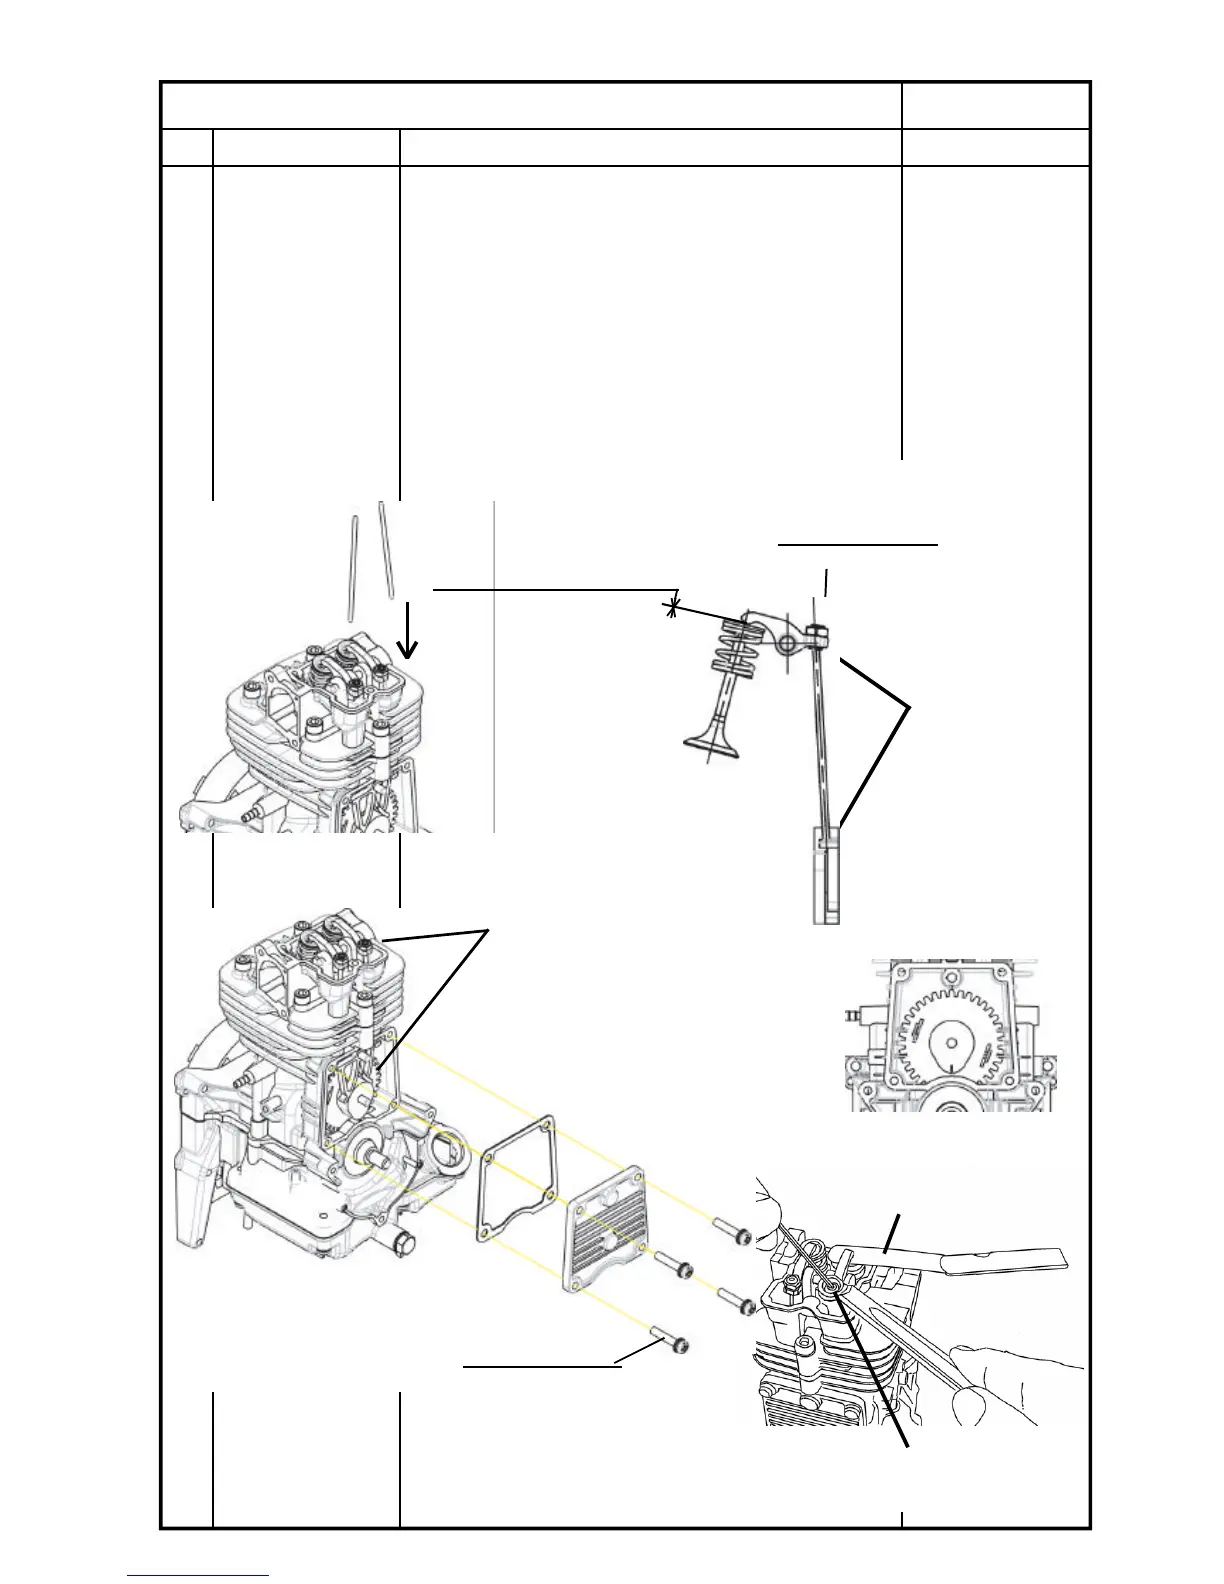
PresstheROCKERARMPresstheROCKERARM
andfitinthePUSHROD.andfitinthePUSHROD.
1)1)
③③
④④ ①①
②②
TighteningsequenceTighteningsequence
oftheSCREW.oftheSCREW.
3)3)
4)、5)4)、5)
ADJUSTSCREWADJUSTSCREW
ThicknessgaugeThicknessgauge
Applythe4-strokeengineoiloverApplythe4-strokeengineoilover
theCAMGEAR,CAMLIFTERandtheCAMGEAR,CAMLIFTERand
ROCKERARM.ROCKERARM.
3)3)
MakesurethattheMakesurethatthe
PUSHRODisputPUSHRODisput
intothesphericalintothespherical
grooves.grooves.
2)2)
4)4)
VALVECLEARANCEVALVECLEARANCE ::0.15mm0.15mm
NUTNUT
TighteningtorqueTighteningtorque 5050
++ 1515
kgf・cmkgf・cm
00
5)5)
SCREWSCREW
M5M5 ×× 16W,SW(4PCS)16W,SW(4PCS)
TighteningtorqueTighteningtorque 4040
++ 1515
kgf・cmkgf・cm
00
1)InsertthePUSHRODintothePUSHRODpassageofthe1)InsertthePUSHRODintothePUSHRODpassageofthe
CYLINDERHEAD.CYLINDERHEAD.
2)MakesurethatthePUSHRODisputintothesphericalgrooves2)MakesurethatthePUSHRODisputintothesphericalgrooves
oftheCAMLIFTERandROCKERARMadjustbolt.oftheCAMLIFTERandROCKERARMadjustbolt.
3)AttachtheCOVER,CAMGEAR.3)AttachtheCOVER,CAMGEAR.
4)LoosenNUTandadjustVALVECLEARANCEbyrotatingAD-4)LoosenNUTandadjustVALVECLEARANCEbyrotatingAD-
JUSTSCREWwithahexagonbarwrench.AdjustVALVECLEAR-JUSTSCREWwithahexagonbarwrench.AdjustVALVECLEAR-
ANCEatthecompressiontopdeadcenter(thepositionoftheANCEatthecompressiontopdeadcenter(thepositionofthe
CAMtopandFLYWHEELshouldremaininthesameoneatCAMtopandFLYWHEELshouldremaininthesameoneat
no.10).BesuretoclosetheCOVER,CAMGEARbeforetheclear-no.10).BesuretoclosetheCOVER,CAMGEARbeforetheclear-
anceadjustment.anceadjustment.
5)TightenNUTfirmlyaftertheadjustment.5)TightenNUTfirmlyaftertheadjustment.
PartnamePartname
AssemblingInstructionsAssemblingInstructions
MakesurethatthePISTONMakesurethatthePISTON
ispositionedtothetopdeadispositionedtothetopdead
centerbeforeinstallingthecenterbeforeinstallingthe
COVER,CAMGEAR.COVER,CAMGEAR.