vi) Press button 1 for selecting smart servo ID, then press button 2 or button 3 for smart servo
rotating direction.
vii) Press button P to save the “zero position”.
TIP.
=> Each smart servo is to be adjusted to conform
with zero position adjustment line.
But for ID02, ID03, ID07, ID08 is to conform with
Knee Frame, not a smart servo.
=> RQ-HUNO Body Frame should be conform with
the rear side of Foot after zero position.
Button 1 Button 2 Button 3
Every time you press button 1,
smart servo is selected in order.
“ID01, ID02, ID03…. ID15,
ID00”.
Smart servo moves
counter clockwise
direction.
Smart servo moves
clockwise direction.
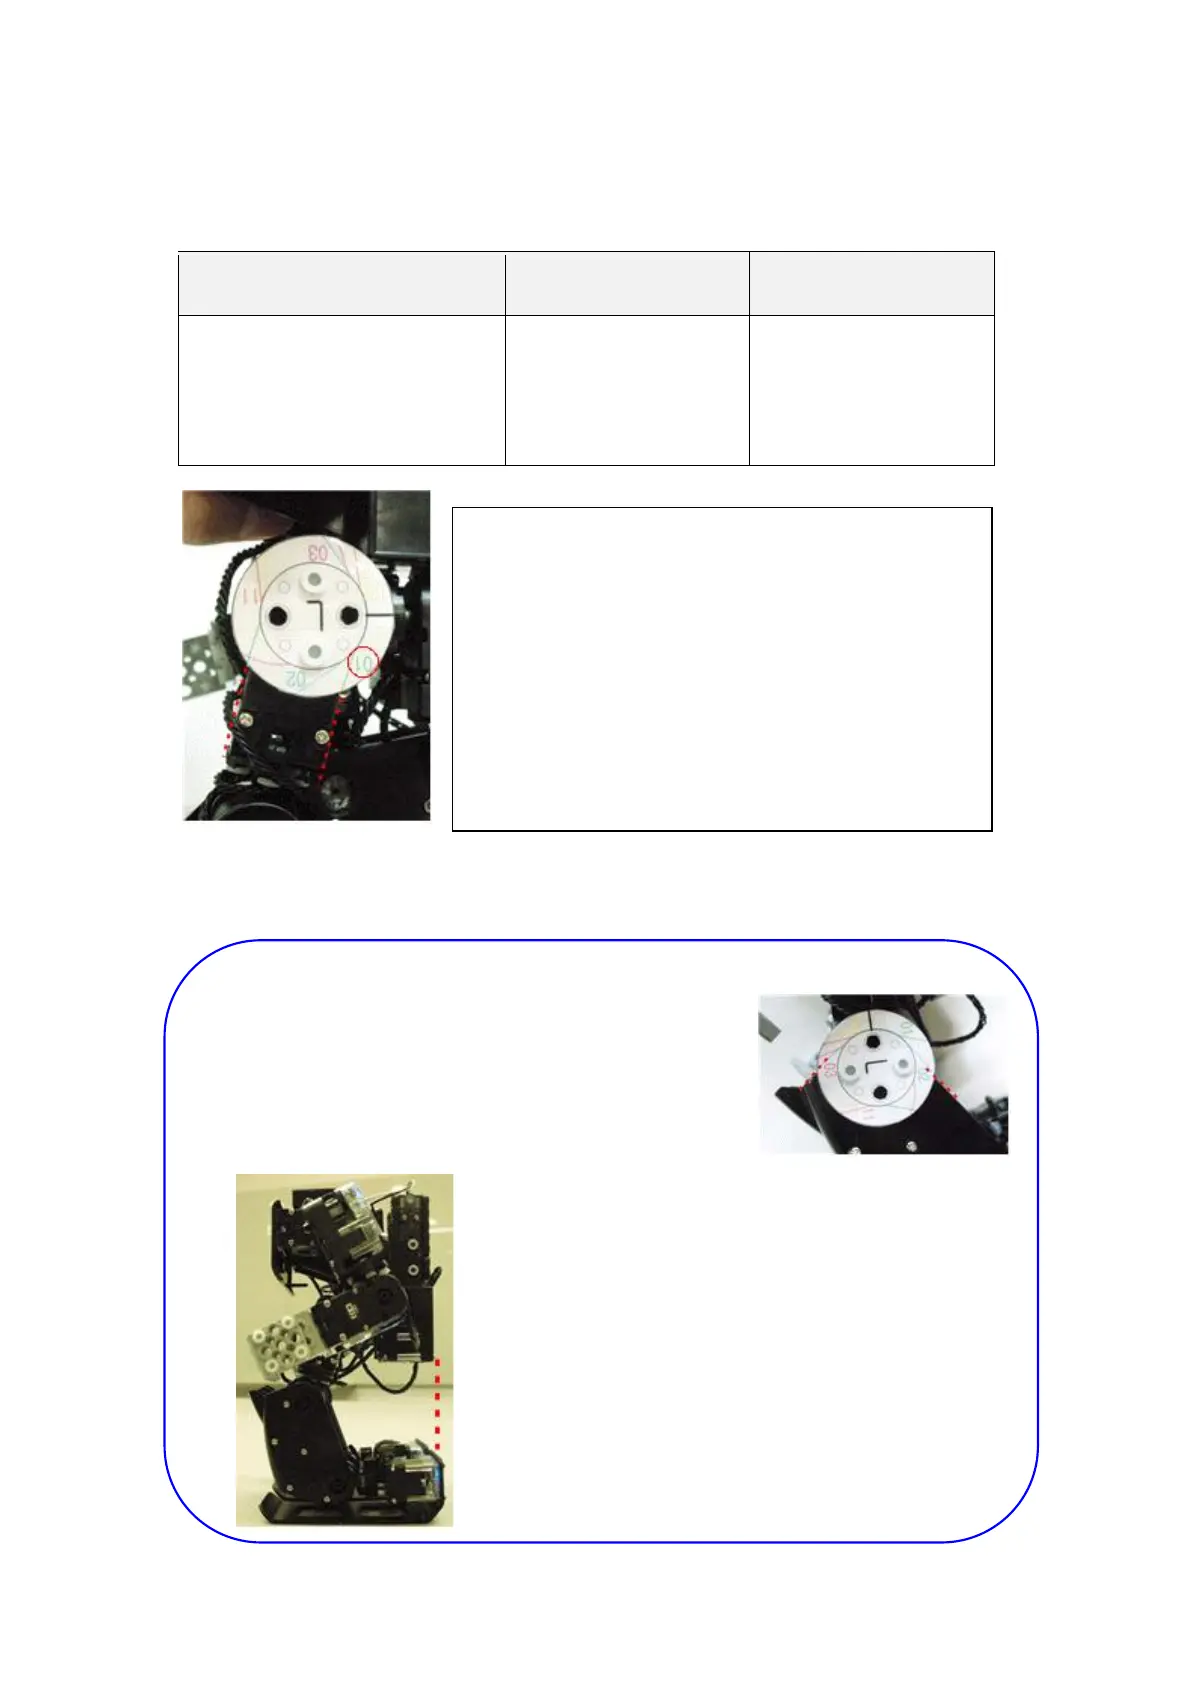
For example, smart servo ID01 blue LED lighs when
ID01 zero position adjustment is started.
ð Make sure that 01 adjustment line is matched
with smart servo ID01.
01 means smart servo ID01.
Adjust smart servo ID01 to fit with 01 number.