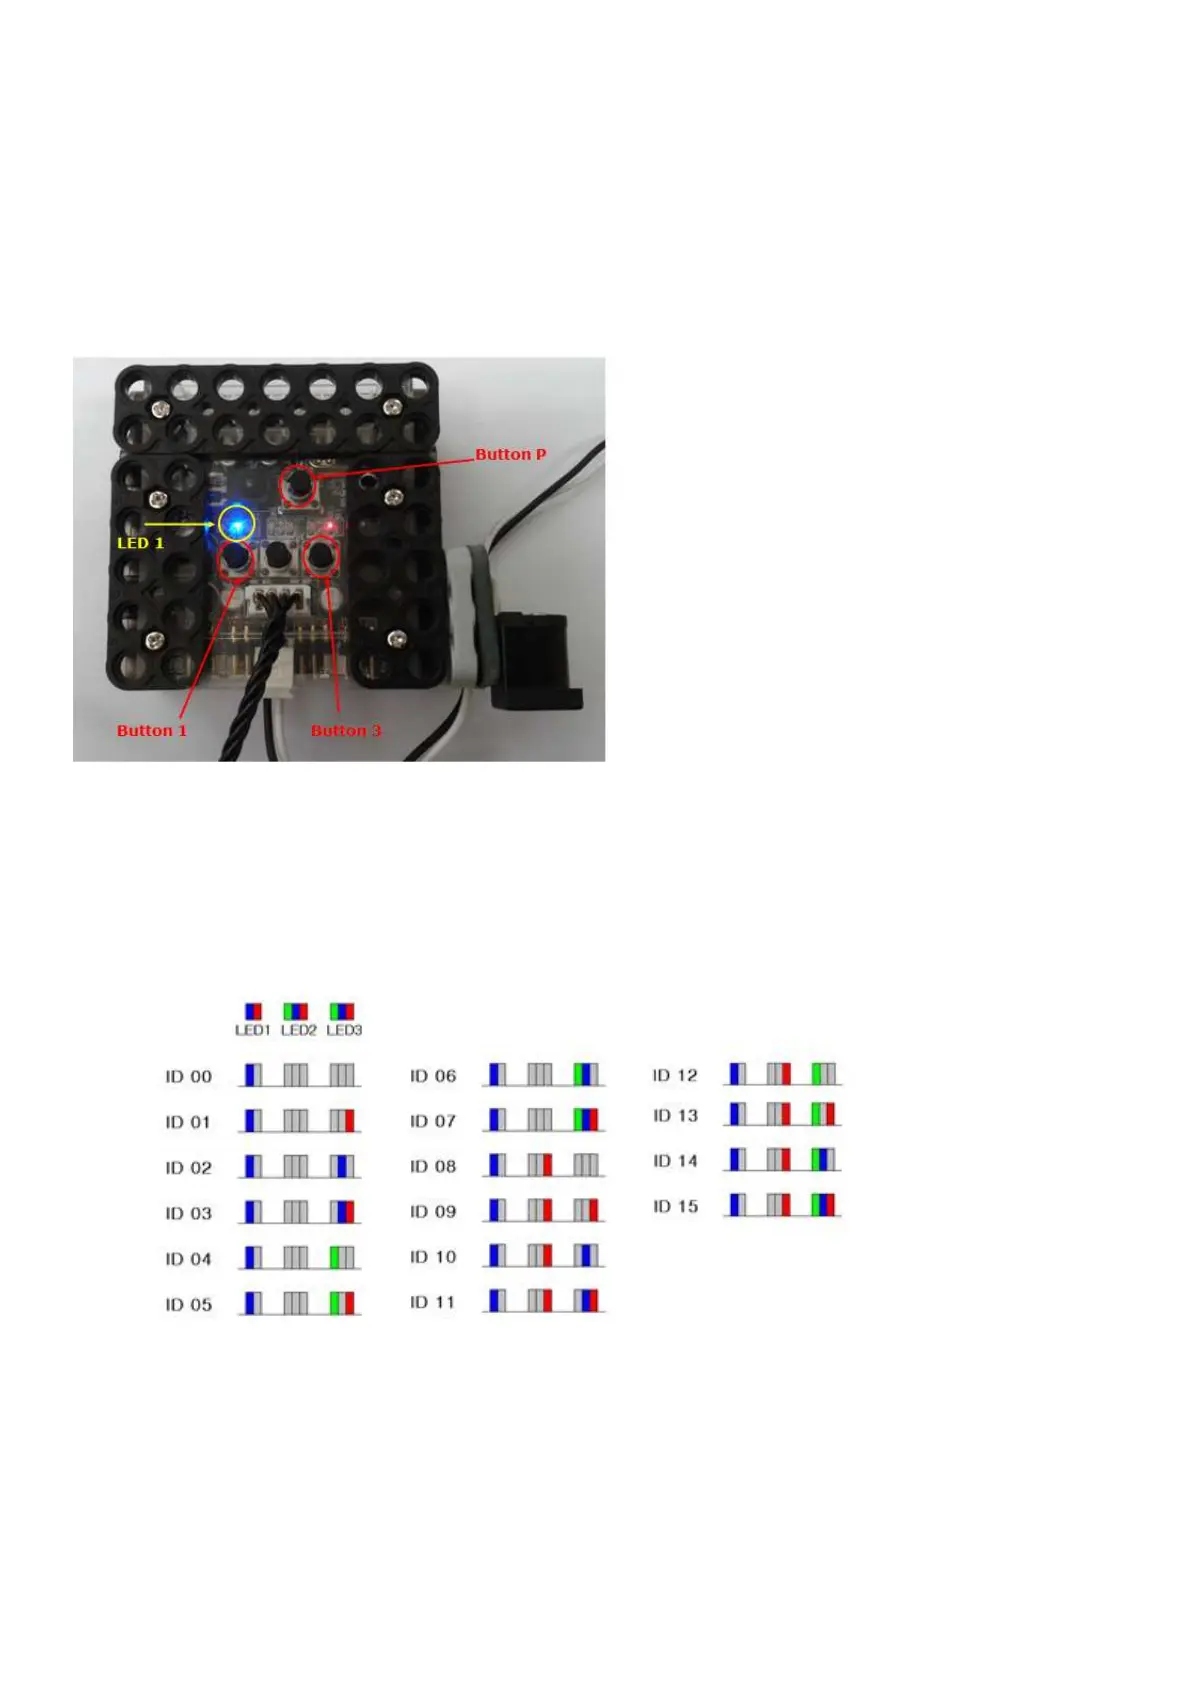
3) Press “Button P” as “Button 1” and “Button 3” are pressed together.
You can see “LED 1” is BLUE light. LED2 and LED3 indicates current Smart Servo ID. Yo
You can change Smart Servo ID by pressing “Button 1” or “Button 3”.
- Button 1 is to increase Smart Servo ID number.
- Button 2 is to cancel Smart Servo ID changes.
- Button 3 is to decrease Smart Servo ID number.
4) Press “Button P” to save current Smart Servo ID after change ID number.