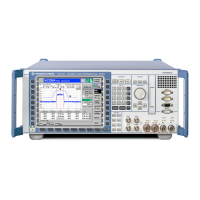
R&S CMU MODULE Replacement
1100.4903.82 3.43 E-5
Replacing the option
Unscrew the two countersunk screws on the cover of the Option FLOPPY DISK DRIVE R&S CMU–
U61 or PCMCIA INTERFACE and carefully pull out the option from the FRONT MODULE towards
the front.
Option FLOPPY DISK DRIVE: Unscrew the countersunk screws on the frame of the FLOPPY DISK
DRIVE and take out the FLOPPY DISK DRIVE.
Install the new FLOPPY DISK DRIVE or PCMCIA INTERFACE in the FRONT MODULE in the
reverse order.
Install the FRONT MODULE in the R&S CMU in the reverse order.
Note: Make sure to route the cables of the Option FLOPPY DISK DRIVE R&S CMU–U61 or
PCMCIA INTERFACE properly, not to catch them and insert them on the
MOTHERBOARD1 before sliding the FRONT MODULE completely into the R&S CMU.
Completing the instrument and putting into operation
Complete the instrument without causing damage to the cables.
Connect the instrument to the mains and switch on.
• If the Option FLOPPY DISK DRIVE R&S CMU-B61 is replaced by PCMCIA INTERFACE, the
following BIOS setup modification will be necessary:
Connect the external keyboard to the keyboard connector at the rear of the R&S CMU.
Switch the R&S CMU off and on.
Press the hardkey 'Delete' at the external keyboard to get in the BIOS setup.
Select Setup with cursor keys and confirm with ENTER.
Select 'Floppy A' with cursor keys and confirm with ENTER.
Select 'Not installed' with cursor keys and confirm with ENTER.
Quit BIOS Setup by pressing twice the hardkey ESC and confirm with ENTER. The R&S CMU
starts automatically.
• If PCMCIA INTERFACE is replaced by the Option FLOPPY DISK DRIVE R&S CMU-B61, the
following BIOS Setup modification will be necessary:
Connect the external keyboard to the keyboard connector at the rear of the R&S CMU.
Switch the R&S CMU off and on.
Press the hardkey 'Delete' at the external keyboard to get in the BIOS Setup.
Select Setup with cursor keys and confirm with ENTER.
Select 'Floppy A' with cursor keys and confirm with ENTER.
Select '1.44 MB 3 ½' with cursor keys and confirm with ENTER.
Quit BIOS Setup by pressing twice the hardkey ESC and confirm with ENTER. The R&S CMU
starts automatically.
The built-in FRONT MODULE CONTROLLER registers on the LCD and starts the operating software.
 Loading...
