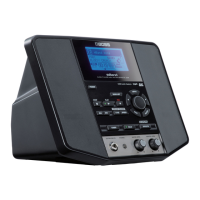
Rear panel
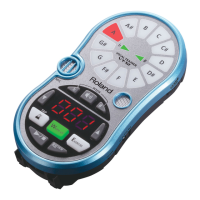
Backing Module BK-7m
r
13
Rear panel
A
USB COMPUTER port
Use a USB cable to connect the BK-7m to your com-
puter via this connector (page 17).
B
USB MEMORY port
Connect a optional USB memory here.
Note: Roland does not recommend using USB hubs, irre-
spective of whether they are active or passive. Please con-
nect only one USB memory to this port.
NOTE
Use USB memory sold by Roland. We cannot guarantee
operation if any another USB memory is used.
C
AUDIO INPUT R & L/MONO sockets
These sockets allow you to connect the audio outputs
of an external signal source (CD/mp3 player, synthe-
sizer, etc.).
(The [AUDIO IN] knob on the front panel allows you
to set the input level of the signals received via these
sockets.)
D
AUDIO OUTPUT R & L/MONO sockets
These sockets transmit all audio signals the BK-7m
generates as well as the signals you input to the
BK-7m.
NOTE
If you can/want to use only one channel on your external
amplifier, connect the L/MONO socket to its input. For opti-
mum sound quality, we recommend working in stereo,
though.
E
PHONES socket
This is where you can connect a pair of optional
headphones (Roland RH-series).
F
VIDEO OUTPUT socket
Connect this socket to the appropriate input of your
TV or external display.
NOTE
The signal format (PAL or NTSC) and aspect ratio selectable
(page 63).
G
PEDAL SWITCH/EXPRESSION socket
Connect a separately available pedal switch (Roland
DP-series), a separately available foot switch (BOSS
FS-5U) or a separately available expression pedal
(Roland EV-5) to this jack (page 17).
H
PEDAL FC-7 socket
This is where you connect an optional FC-7 pedal
unit. The functions of this unit are programmable on
the BK-7m. See “Pedal Controller FC-7” on p. 65.
I
MIDI IN & OUT sockets
You can connect MIDI devices to these sockets
(page 16).
J
POWER switch
Turns the power on/off (page 19).
K
DC IN socket
Connect the supplied AC adapter PSB-1U here
(page 15).
AB
CD E
FG H
I
J
K
BK-7m_UK.book Page 13 Tuesday, January 4, 2011 9:25 AM

 Loading...