14
About the Cutting Area
Pinch roller (Right)
About 15 mm
(about 9/16")
[CM-12]
Max.
280 mm (11")
Pinch roller (Right)
Initial cutting coordinate
origin point (0,0)
If there is no need to move the origin initially set, then it is not necessary to make the origin point setting immediately after loading a
material.
You can also set the origin to an uncut area of a material in order to use the material with maximum effectiveness.
* If a material has not yet been loaded, then before setting the origin point, refer to "3-5 Loading the Material" to load the
material correctly. Loading a material after the origin has been set (by pressing the SETUP key to extinguish the SETUP
LED) cancels the origin that has been set.
Max.
584 mm (23")
About 1 mm
(about 0.04")
Pinch roller
(Left)
Material
Cutting Area
Max.
24,998 mm (984-1/8")
(Accuracy assured within a
range of up to 1,600 mm (63"))
Max.
24,998 mm (984-1/8")
(Accuracy assured within a
range of up to 1,600 mm (63"))
[CM-24]
* The arrows in the figure indicating the X and Y directions indicate respectively
the positive directions of the X axis and Y axis when the Rotate function is off.
3-6 Setting the Origin Point
The CM-24/12 allows the origin point (0,0) to be set at any position in the cutting area.
Loading material and pressing the SETUP key causes the first origin point to be determined. The first origin point determined by
pressing the SETUP key varies according to the model and the DIP switch settings.
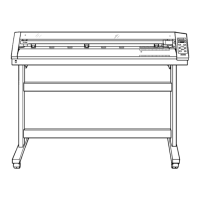
CM-24
CM-12
Position where the origin point is set
Set near the left-hand pinch roller
(When SW-6 has been set to ON (rotate) : set near the right-hand pinch roller)
Material size is detected and the origin is set at the lower-left area of the material
(When SW-6 has been set to ON (rotate) : material size is detected and the origin
is set at the lower-right area of the material)
Set near the left-hand pinch roller
(When SW-6 has been set to ON (rotate) : set near the right-hand pinch roller)
1
Use the , , , and keys to move the center of
the blade holder. Move it to the point where the origin
is to be set.
2
Press the ORIGIN SET key.
The SETUP LED flashes once and the origin point is
set.
DIP switch
SW-9: OFF (roll material)
SW-9: ON (piece material)
SW-9: OFF (This switch
should always be set to "OFF."
It is not necessary to make any
DIP switch settings.)

 Loading...