45
Convenient functions (Utility)
NOTE
Do not edit the data or les you’ve backed up.
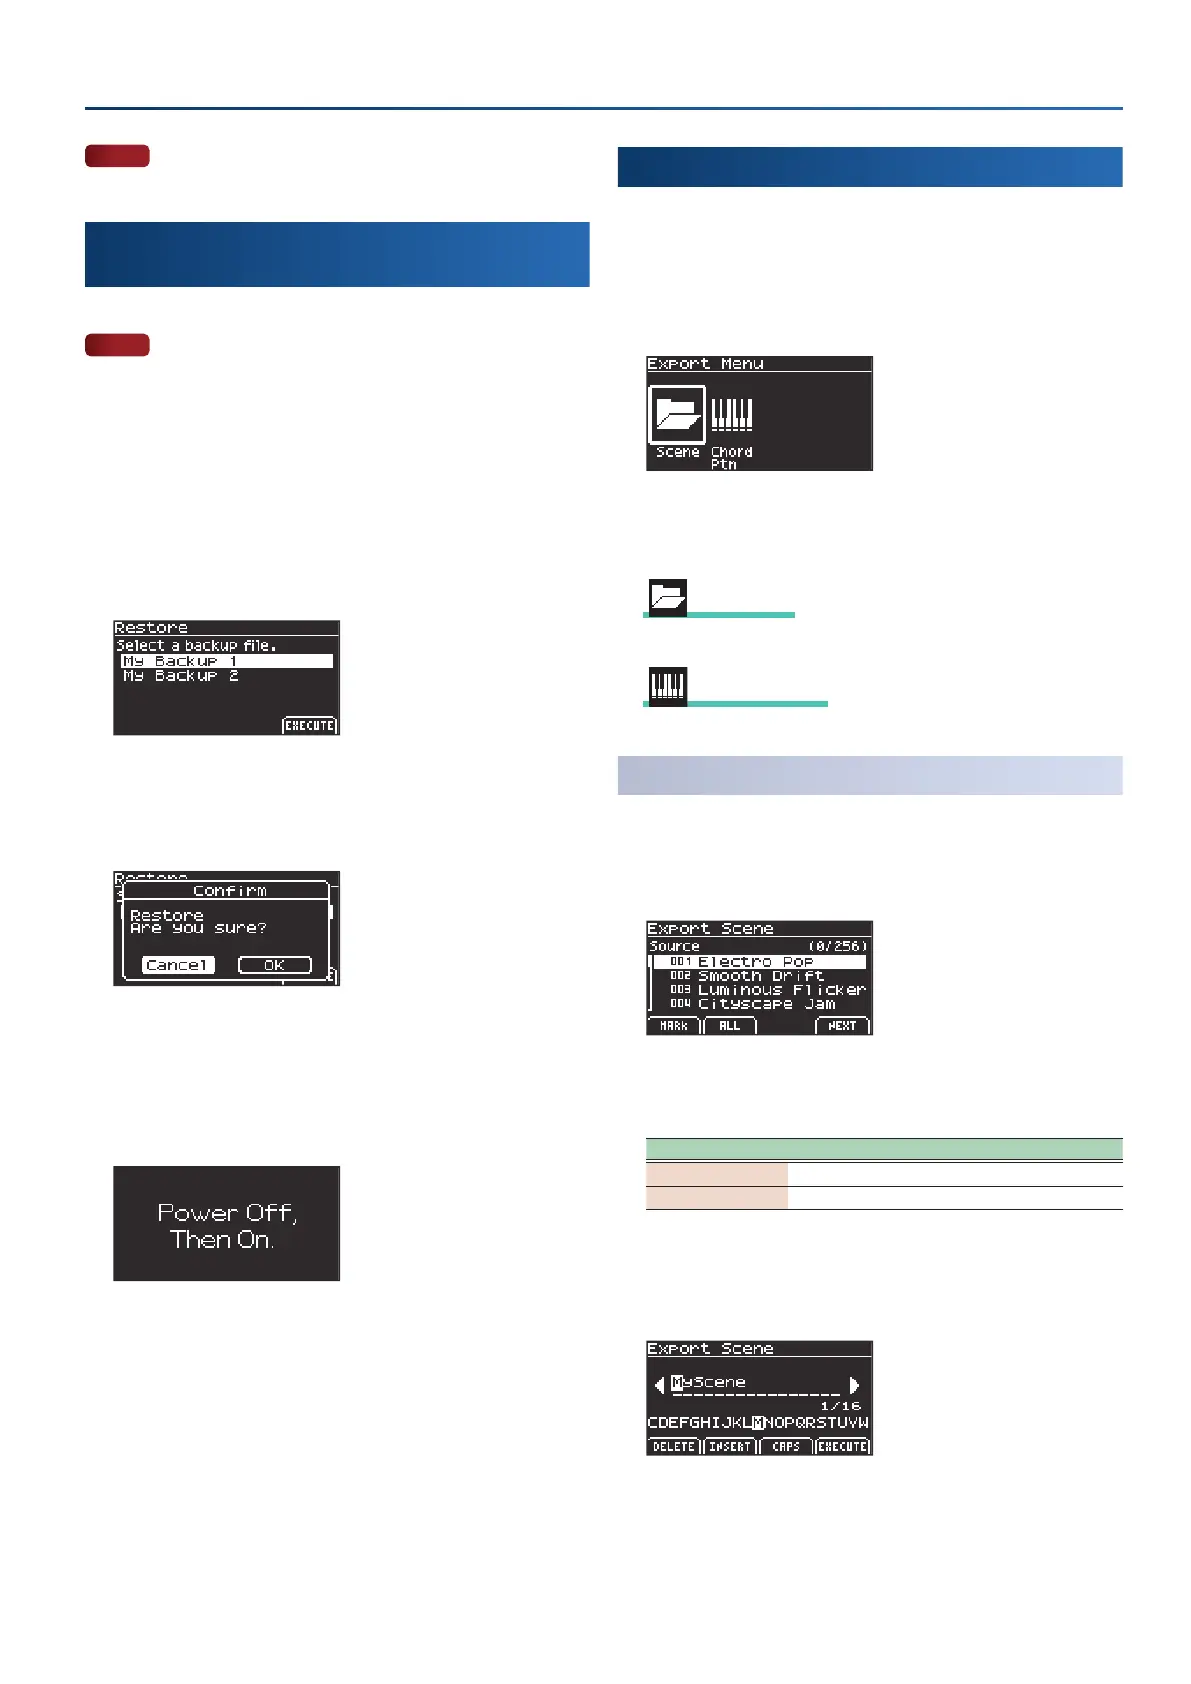
Loading a backup le into this instrument
(Restore)
Here’s how to load a backup le into this instrument.
NOTE
When you execute this operation, the settings that you saved (data
that was created) are overwritten.
If you’ve saved important data on this unit, assign it a dierent
name and back it up to a USB ash drive before restoring.
1.
Connect the USB ash drive to the USB memory port.
2.
On the Utility Menu screen, select “Restore” and press
the [enter] button.
The Restore screen appears.
3.
After you’ve selected the backup le to load by using
the dial, press the [f4]
(EXECUTE)
button.
A conrmation message appears.
4.
Use the cursor [Ì] [Ê] buttons to select “OK”, and press
the [enter] button.
If you decide to cancel, select “Cancel” and press the [enter] button.
When the restore operation is nished, “Power O, Then On.” is
shown onscreen.
5.
Turn the power of the GO:KEYS o and then on again.
Exporting data (Export)
1.
Connect the USB ash drive to the USB memory port.
2.
In the Utility Menu screen, select “Export” and press the
[enter] button.
The Export Menu screen appears.
3.
Use the cursor [Ì] [Ê] buttons to select the item you
want to export, and press the [enter] button.
Scene Scene
Ø
“Exporting a scene (Export Scene)” (p. 45)
Chord Ptn Chord Ptn
Ø
“Exporting a chord pattern (Export Chord Pattern)” (p. 46)
Exporting a scene (Export Scene)
1.
On the Export Menu screen, select “Scene” and press
the [enter] button.
The Export Scene screen appears.
2.
Add a check mark using the [f1] [f2] buttons to the
items you want to export.
Controller Explanation
[f1]
(MARK)
Marks the selected item and selects the next item.
[f2]
(ALL)
Marks all items.
3.
When you’ve marked the items, press the [f4]
(NEXT)
button.
A screen appears for naming the content.
4.
Edit the name as needed.
Ø
“Renaming a song or pattern (Rename)” (p. 12)
 Loading...