24
Connecting External Devices
Trig Type List
Used drum trigger Trig Type
Rim shot
Choke play
KD-A22 KDA22 – –
KD-200 KD200 – –
KD-140 KD140 – –
KD-120 KD120 – –
KD-85 KD85 – –
KD-10 KD10 – –
KD-9 KD9 – –
KD-8 KD8 – –
KD-7 KD7 – –
KT-10 KT10 – –
KT-9 KT9 – –
PD-128S, PD-128 PD128
(
–
PD-125XS, PD-125X PD125X
(
–
PD-125 PD125
(
–
PD-108 PD108
(
–
PD-105X PD105X
(
–
PD-105 PD105
(
–
PD-85 PD85
(
–
PDX-100 PDX100
(
–
PDX-12 PDX12
(
–
PDX-8 PDX8
(
–
PDX-6 PDX6
(
–
PD-8 PD8
( (
VH-11 VH11
( (
VH-10 VH10
( (
CY-16RT CY16RT
( (
CY-15R CY15R
( (
CY-14CT CY14CT
( (
CY-14C CY14C
( (
CY-13R CY13R
( (
CY-12C CY12C
( (
CY-12R/C CY12R/C
( (
CY-8 CY8
( (
CY-5 CY5
( (
BT-1
BT1 – –
BT1 SENS*1 – –
Generic pads
PAD1
( (
PAD2
(
–
PAD3
( (
RT-30K RT30K – –
RT-30HR RT30HR
(
–
RT-30H
RT30H SN*2 – –
RT30H TM*3 – –
RT-10K RT10K – –
RT-10S RT10S
(
–
RT-10T RT10T – –
*1: When using the BT-1, it is possible to further increase the sensitivity
for soft strikes, but this increases the possibility of unwanted
triggering by vibration from the surroundings.
*2: Select this if you attach an RT-30H to the snare.
*3: Select this if you attach an RT-30H to a tom.
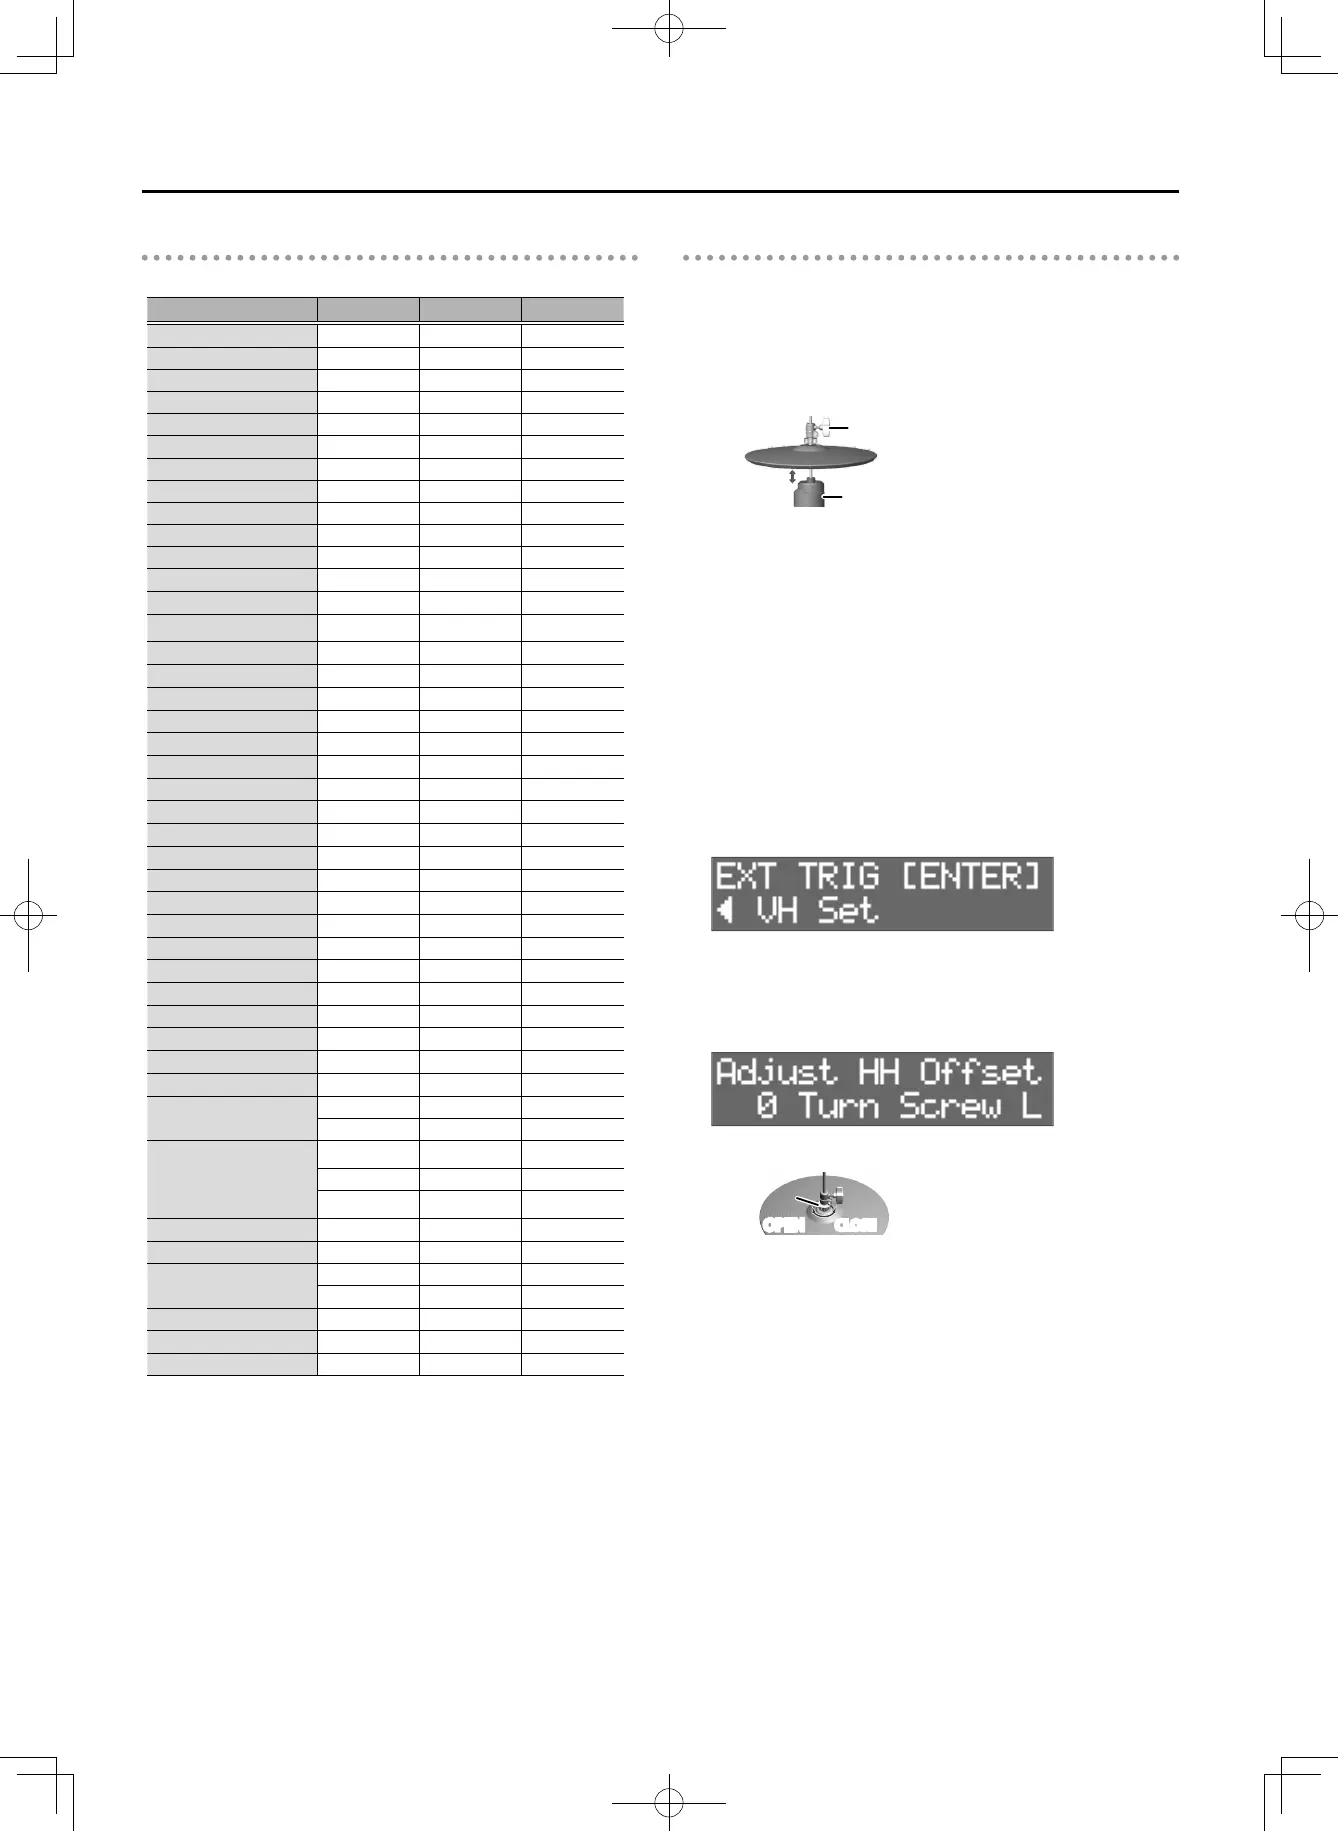
VH SET setting
Here’s how to adjust the oset of the hi-hat (VH-10/VH-11).
* This can be set only if TYPE is set to VH-11 or VH-10.
1. With the hi-hat completely separated from the
motion sensor unit, power-on the OCTAPAD.
motion sensor unit
Separated
clutch screw
2. Loosen the clutch screw and let the hi-hat rest
naturally on the motion sensor unit.
3. In the procedure “External Trigger Settings”
(p. 22), select “EXT TRIG” and then press the
[ENTER] button.
4. Strike the hi-hat to select the pad.
5. Set “TYPE” to “VH11” or “VH10.”
6. Use the [K][J] buttons to select “VH SET,” and then
press the [ENTER] button.
7. If the screen indicates “Turn screw L,” turn the oset
adjustment screw counter-clockwise. If the screen
indicates “Turn screw R,” turn it clockwise.
OPEN
CLOSE
oset
adjustment
screw
When the value shown on the screen is approximately 80 and the
“OK!” indication appears, the adjustment is complete.
8. Fasten the clutch screw so that the hi-hat opens to
the amount you prefer.

 Loading...