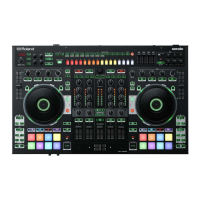
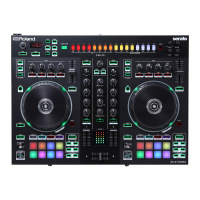
5
Panel Descriptions
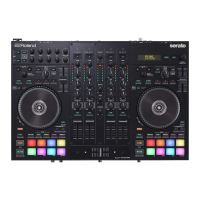
6
Tempo slider
Adjusts the playback speed of the song.
If the key lock function is on:
Changes the playback speed.
“–” side Lowers the playback speed.
“+” side Raises the playback speed.
If the key lock function is o:
Changes the playback speed and pitch.
“–” side Lowers the playback speed and pitch.
“+” side Raises the playback speed and pitch.
7
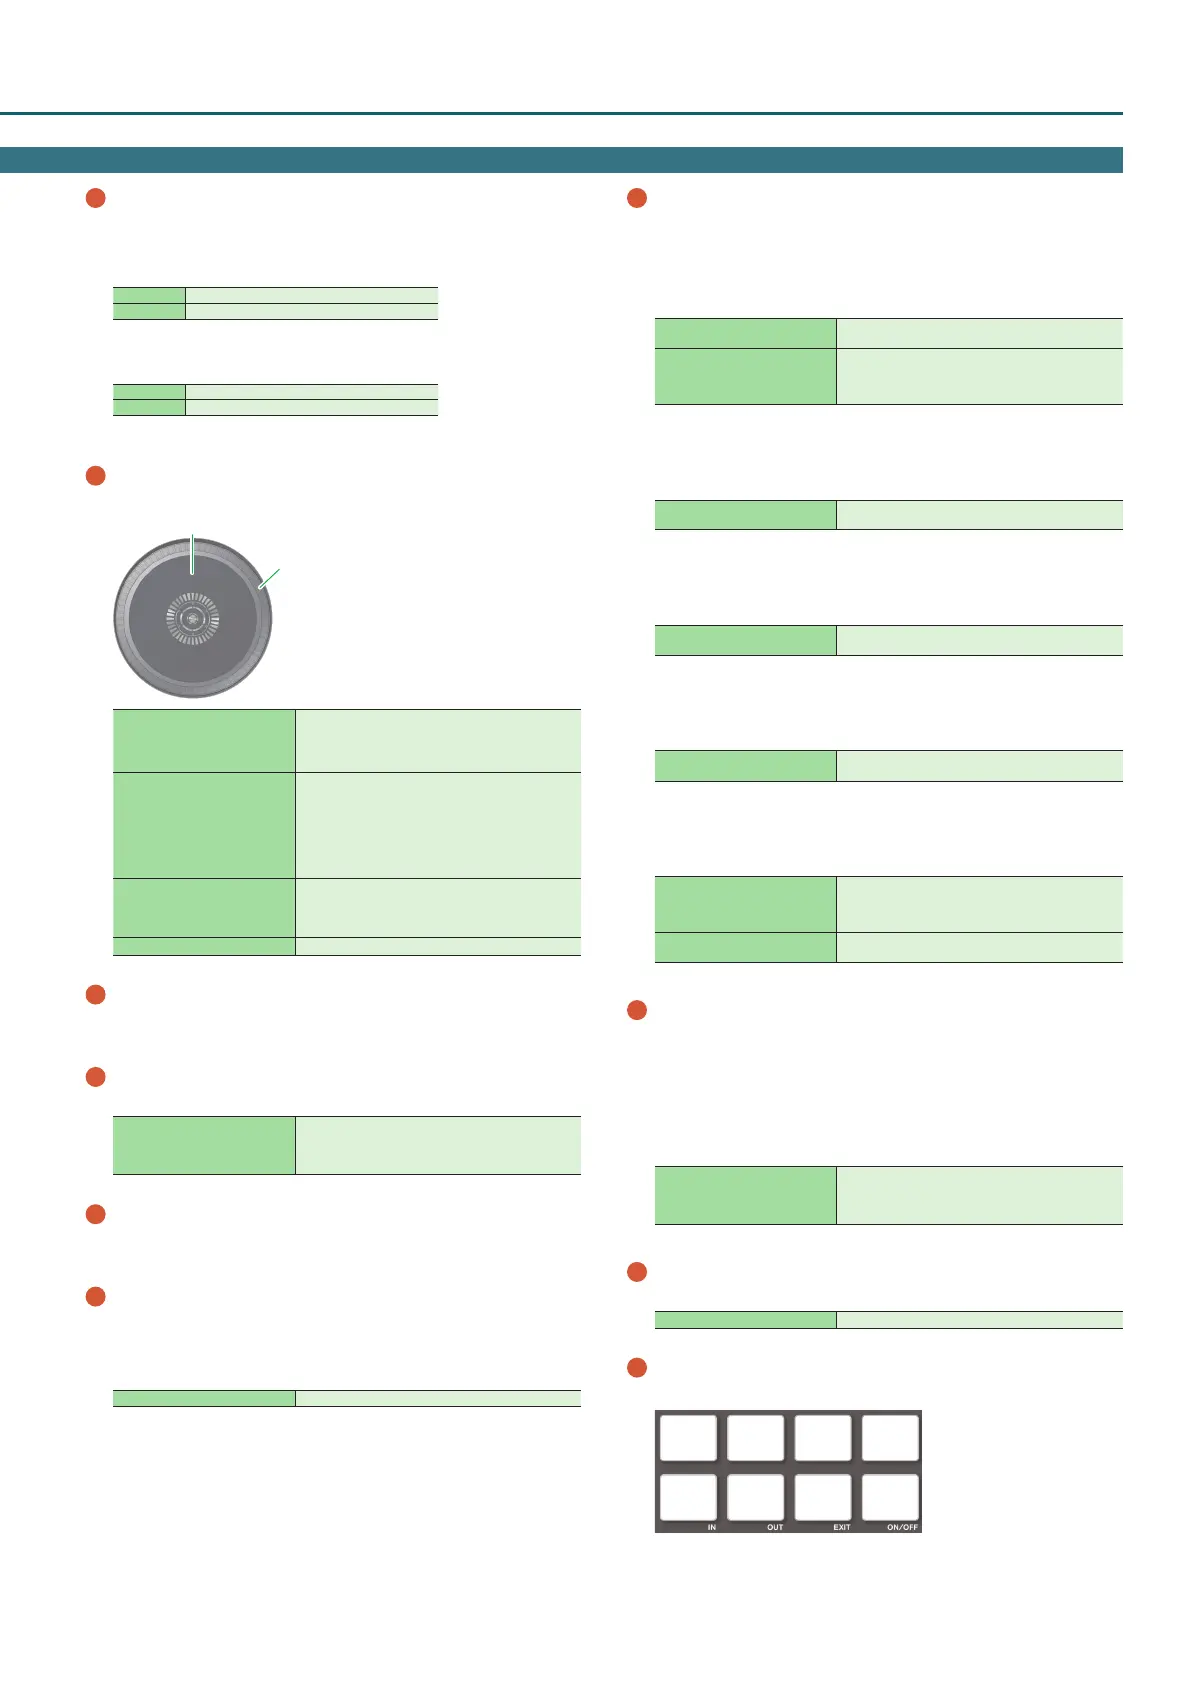
Jog dial
Controls scratch and pitch bend (playback speed adjustment).
Top surface
Outer edge
Rotate the top surface
If VINYL MODE is on:
Performs scratch operations.
If VINYL MODE is o:
Performs pitch bend (playback speed) operations.
Rotate the outer edge
If the key lock function is on:
Rotating to the right raises the playback speed;
rotating to the left lowers the playback speed.
If the key lock function is o:
Rotating to the right raises the playback speed and
pitch; rotating to the left lowers the playback speed
and pitch.
[SHIFT] + rotate the top surface
Rapidly moves the playback location (fast search).
Rotating to the left moves the playback location
forward; rotating to the right moves it backward.
* Search is possible if a grid is specied.
[SHIFT] + rotate the outer edge Moves the playback location (search).
8
[SHIFT] button
You can recall other functions by holding down this button and
pressing another button.
9
[RANGE] button
Species the variable range of the Tempo slider.
[SHIFT] + [RANGE]
Turns the key lock function on/o.
If the key lock function is on, the pitch does not
change even if you use the tempo slider to change the
playback speed.
10
PARAMETER [
–
] [+] buttons
Here you can specify the value of the parameter that’s operated by the
performance pads.
11
[SYNC] button
Automatically matches the tempo (pitch) or beat grid of multiple
songs. When you press this button, the tempo (BPM) changes to
match the tempo of the song on a deck other than the deck whose
button was pressed.
[SHIFT] + [SYNC] Cancels SYNC.
12
Pad Mode select
Here you can select the control mode of the performance pads.
[HOT CUE] button
Button illumination: White
Selects hot cue mode (p. 12).
[SHIFT] + [HOT CUE]
Button illumination: Blue
Selects cue loop mode (p. 12).
Press [HOT CUE] twice
Button illumination: Orange
Selects saved ip mode (p. 14).
* In order to use saved ip mode, you must purchase
a separate license.
[AUTO] button
Button illumination: Blue
Selects auto loop mode (p. 12).
[SHIFT] + [AUTO]
Button illumination: Light blue
Selects loop roll mode (p. 12).
[MANUAL] button
Button illumination: Yellow green
Selects manual loop mode (p. 13).
[SHIFT] + [MANUAL]
Button illumination: Yellow green
Selects saved loop mode (p. 13).
[SLICER] button
Button illumination: Red
Selects slicer mode (p. 13).
[SHIFT] + [SLICER]
Button illumination: Blue
Selects slicer loop mode (p. 13).
[SAMPLER] button
Button illumination: Magenta
Selects sampler mode (p. 14).
[SHIFT] + [SAMPLER]
Button illumination: Turquoise
Selects pitch play mode (p. 14).
* In order to use pitch play mode, you must purchase
a separate license.
Press [SAMPLER] twice
Button illumination: Purple
Selects velocity sampler mode (p. 14).
13
[CUE] button
Species, plays, or recalls a temporary cue point.
The rst time that you press the [CUE] button after switching the
playback song, the cue point is set.
After the cue point has been set, pressing the [CUE] button moves the
cue point to the location at which you pressed the button.
If playback is in progress, pressing this button moves to the temporary
cue point and stops playback.
[SHIFT] + [CUE]
If you press the buttons during the song, the location
returns to the beginning of the song.
If you press the buttons at the beginning of the song,
the previous song in the song list is loaded.
14
[
r
] button
Plays or pauses the song.
[SHIFT] + [
r
]
Returns to the temporary cue point, and plays.
15
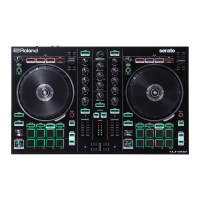
Performance pads
Use these pads to perform in the pad mode that you’ve selected.
Pad 1 Pad 2 Pad 3 Pad 4
Pad 5 Pad 6 Pad 7 Pad 8