Page | 46 DRM-3000 Operating Manual
calibrations. Click the save icon and name for later use.
7. If not already performed, repeat from step 6.5.3 and create the second table for dose rate
calibration points for the meter or detector head which ever was not performed first.
8. Select the Load Template Icon, then navigate to the storage location and select Open.
9. Expose the detector to a radiation field appropriate for the desired point.
10. In the associated point – click in the As Found Block. This will insert the dose rate
information.
11. If a value was incorrectly entered into the wrong block; the user may select a different
block and then click on the correct block again to update or the following icon may be
clicked Remove Measure Points (Caution – this removes all the data).
12. Complete steps 6.5.7 – 6.5.9 until all associated points are populated.
13. If the As Found data is within the sites requirement then the calibration is complete. If
Complete return to Step 6.5.6 and repeat the process for the meter or detector head if not
performed yet. If As Found is not within tolerance, then proceed to the next step.
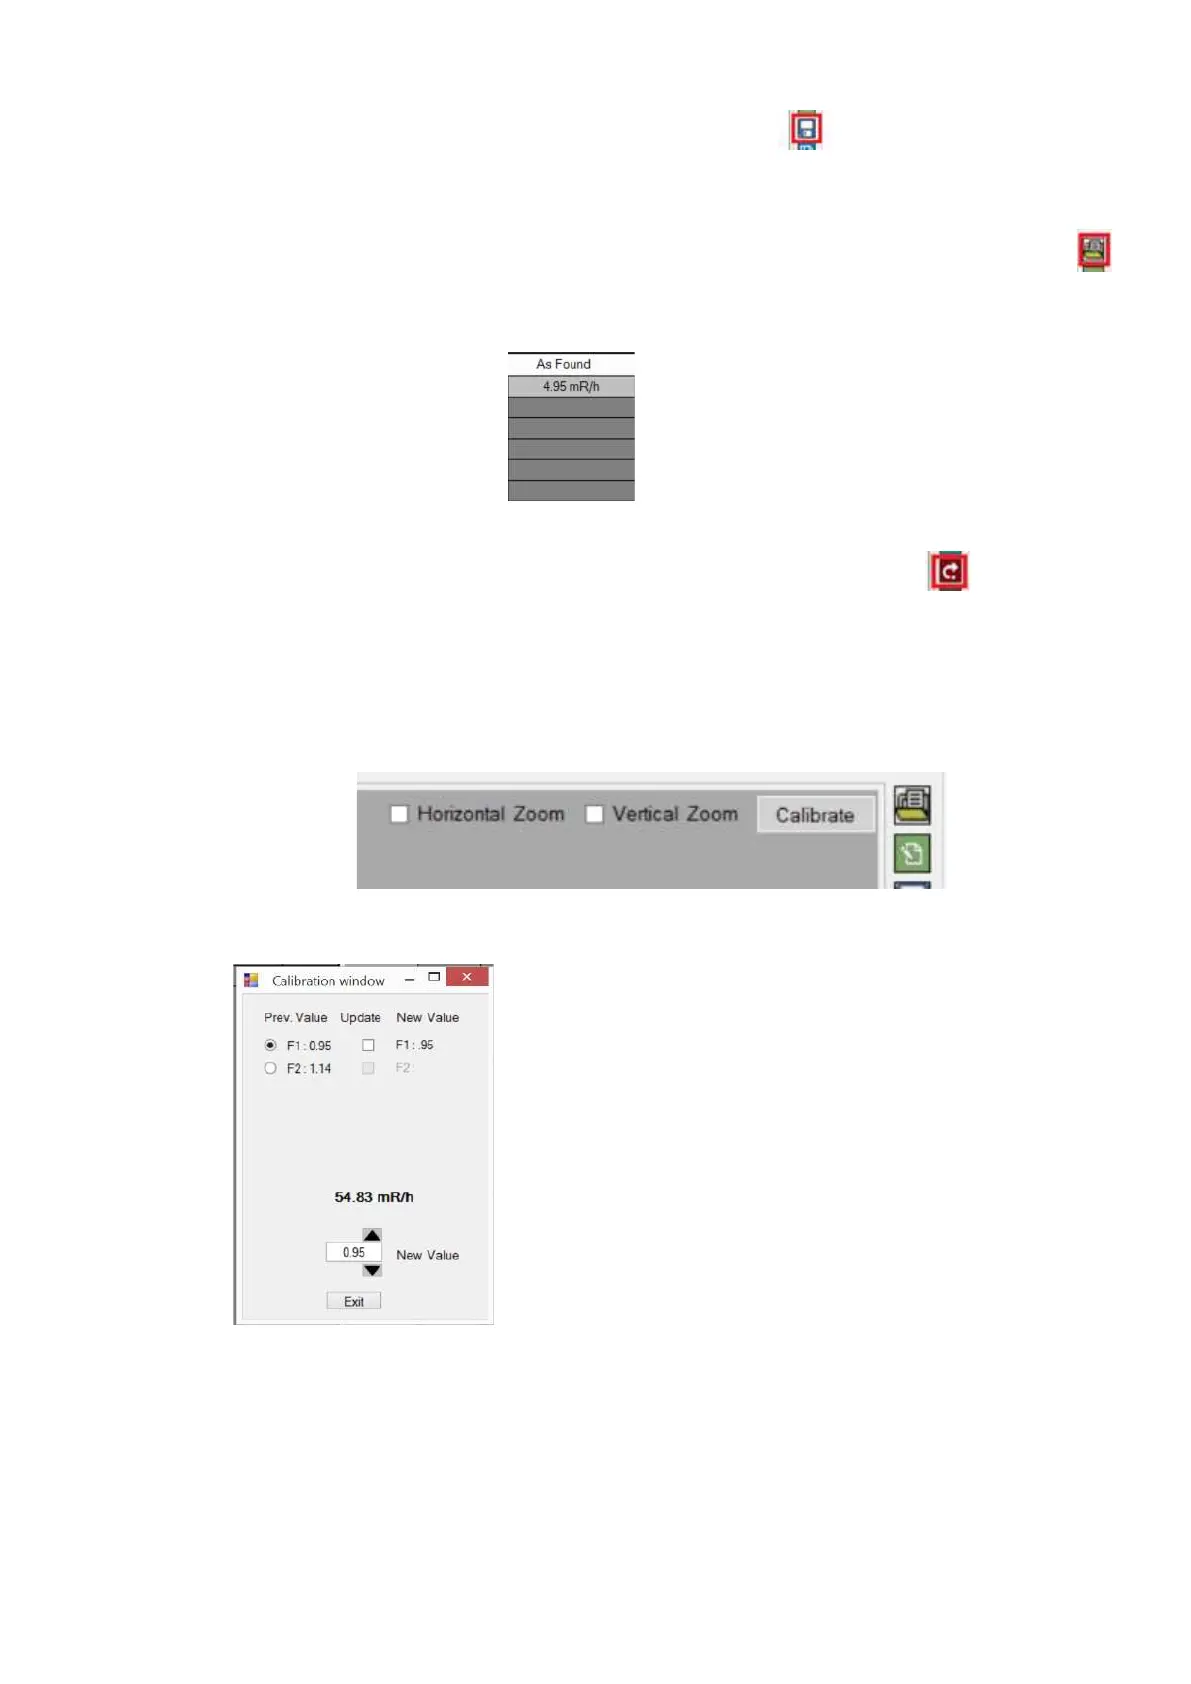
14. To adjust the F1 Factors – click the calibrate button.
15. The following will be displayed for meter calibration (the detector head will have values of
F1 – F5):
16. The dose rate value will be displayed above the adjustment bar(s). To adjust the meter to
the reference dose rate click on either the up or down arrows.
17. Once the desired meter dose rate is obtained; click on the associated Calibration Point
(e.g., F1) update and then exit.
18. The Cal. Point Value will populate when the update box is checked:
 Loading...