APPENDIX B - MB1 Switch Adjustment
1.0 MB1 Limit Switch Adjustment
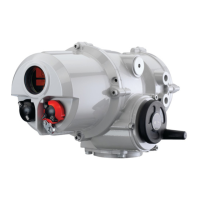
The MB1 is a Rotork Fluid Systems designed and manufactured switch enclosure suitable for use in harsh and/or hazardous
environments. It is available with either dry contact or proximity type switches. Consult the applicable job specific wiring
diagram for termination details. Contact Rotork Fluid Systems switch options and certification details.
Page 11 of 12
1.1 Setting Dry Contact Switches
1.1.1 Loosen the four screws (1) and remove the cover (2).
1.1.2 Setting the CLOSE limit switch.
1.1.2.1 Place the actuator/valve in the fully CLOSED position.
1.1.2.2 Locate the proper switch cam.
1.1.2.3 Loosen the setscrew (5) and rotate the cam (4) until
the switch operates. Tighten the setscrew. The
switch is now set.
1.1.3 Setting the OPEN limit switch.
1.1.3.1 Place the actuator/valve in the fully OPEN position.
1.1.3.2 Locate the proper switch cam.
Loosen the setscrew (5) and rotate the cam (4) until
the switch operates. Tighten the setscrew. The
switch is now set.
1.1.4 Replace the cover (2) and tighten the four screws (1).
1.2 Setting Proximity Type Contact Switches
1.2.1 Loosen the four screws (1) and remove the cover (2).
1.2.2 Setting the CLOSE limit switch.
1.2.2.1 Place the actuator/valve in the fully CLOSED position.
1.2.2.2 Locate the proper switch cam.
1.2.2.3 Loosen the setscrew (5) and rotate the cam (4) until
it is on the same axis as the switch and re-tighten the
setscrews.
1.2.2.4 Loosen the fixing nuts on the switch. Position the
switch the proper distance from the cam to activate
the switch. Re-tighten the fixing and lock nuts. The
switch is now set.
1.2.3 Setting the OPEN limit switch.
1.2.3.1 Place the actuator/valve in the fully OPEN position.
1.2.3.2 Locate the proper switch cam.
1.2.3.3 Loosen the setscrew (5) and rotate the cam (4) until
it is on the same axis as the switch and re-tighten the
setscrew.
1.2.3.4 Loosen fixing nuts on the switch. Position the switch
the proper distance from the cam to activate the
switch. Re-tighten the fixing and lock nuts.The
switch is now set.
1.2.4 Replace the cover (2) and tighten the four screws (1).
ITEM
1
2
3
4
5
DESCRIPTION
Screw
Cover
Microswitch
Cam
Dowel
INSTALLATION AND MAINTENANCE
GP RANGE
Publication F130E
Date of issue 04/08
 Loading...