Top Quality Valve Actuators
Made in Sweden
Manual
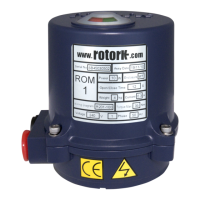
SA PCU
RCEL
- 1 -
www.rotork.com www.remotecontrol.se
ELECTRICAL SHOCK HAZARD.To avoid serious personal injury,
property damage, turn off ALL power to the actuator before remov-
ing the cover.
Before installation or use, verify the nameplate information infor-
mation to insure the correct model number, torque, voltage and
enclosure type.
Be sure to completly review the actuator manual prior to operation.
Final limit switch adjustment MUST be done after mounting the ac-
tuator to the valve. Incorrect adjustment may cause actuator failure.
Over torque switches are factory set, tampering with the over
torque switch settings may damage the actuator and void the war-
ranty.
The actuator must be properly grounded. Use the grounding lugs
provided on the inside and outside of the actuator body.
To minimize the possible damage caused by condensation, be sure
to energize the heater.
CAUTION
Specications
Input Power
90~230V AC ±10%, 50/60Hz
DC 24V / AC 24V
Input Power must match motor Ratings
Command Signal
4~20mA DC (Default), 0~5VDC,
0~10VDC, 1~5VDC, 2~10VDC
Dead Band 1 ~ 7,5% (1 scale 0,5%)
Output Signal
4~20mA DC
Load Resistance
750
Ω
Wiring Terminals YW 396 2P(3EA), 3P, 5P connector
Visual Indicators
4 LEDS,
Power (Blue), Fault (Yellow),
Open (Red), Close (Green)
Calibration Method ASCN (Autoscan) Button
Output Contact
Relay Contact 250V AC 16A MAX.
(Inductive Load)
User Adjustable Delay Time: 0.5 Sec (Step)
Parameters
Dead Band: 0.2mA(Step)
Fail operation (during loss of command
signal) Select input signal. A FULL Set
or Clear
Resolution Min 1/1,000
Ambient Temperatur -10 ºC ~ +60 ºC
Ambient Humidity 90% RH MAX. (Non-Condensing)
Dielectric Strenght
1,500V AC 1 MIN.
(Input to Output to Power to Ground)
Insulation Resistance 500V DC 30MΩ MIN.
Warranty Information
The warranty will be void under the following conditions:
1. Failure or damage caused by misuse or abuse.
2. Failure or damage caused by unauthorized modications or repairs done to the actuator.
3. Failure caused by the unauthorized modication / change or the wiring.
4. Failure caused by a reverse phase mis-wire when using three phase power.
5. Failure caused by water leakage due to the improper sealing of the actuator conduit entries or by failure
to install the cover properly.
6. Failure caused by improperly set limit switches.
7. Failure caused by re, ood damage or other natural disasters.
8. Failure occuring more than one year after shipment date.