RUGGEDCOM RSG2488
Installation Guide
Chapter 2
Installing the Device
Installing the Power Supplies 7
• The socket outlet/disconnect device must be installed near the device and be easily accessible.
• Equipment must be installed according to applicable local wiring codes and standards.
The following sections describe how to install, remove and wire the power supplies:
• Section 2.2.1, “Installing the Power Supplies”
• Section 2.2.2, “Removing the Power Supplies”
• Section 2.2.3, “Wiring Power Supply Terminal Blocks”
Section 2.2.1
Installing the Power Supplies
To install the power supplies, do the following:
1. Make sure power to the device has been disconnected and wait approximately two minutes for any
remaining energy to dissipate.
2. Remove the dust cover or, if equipped, the currently installed power supply. For information about removing
power supplies, refer to Section 2.2.2, “Removing the Power Supplies”.
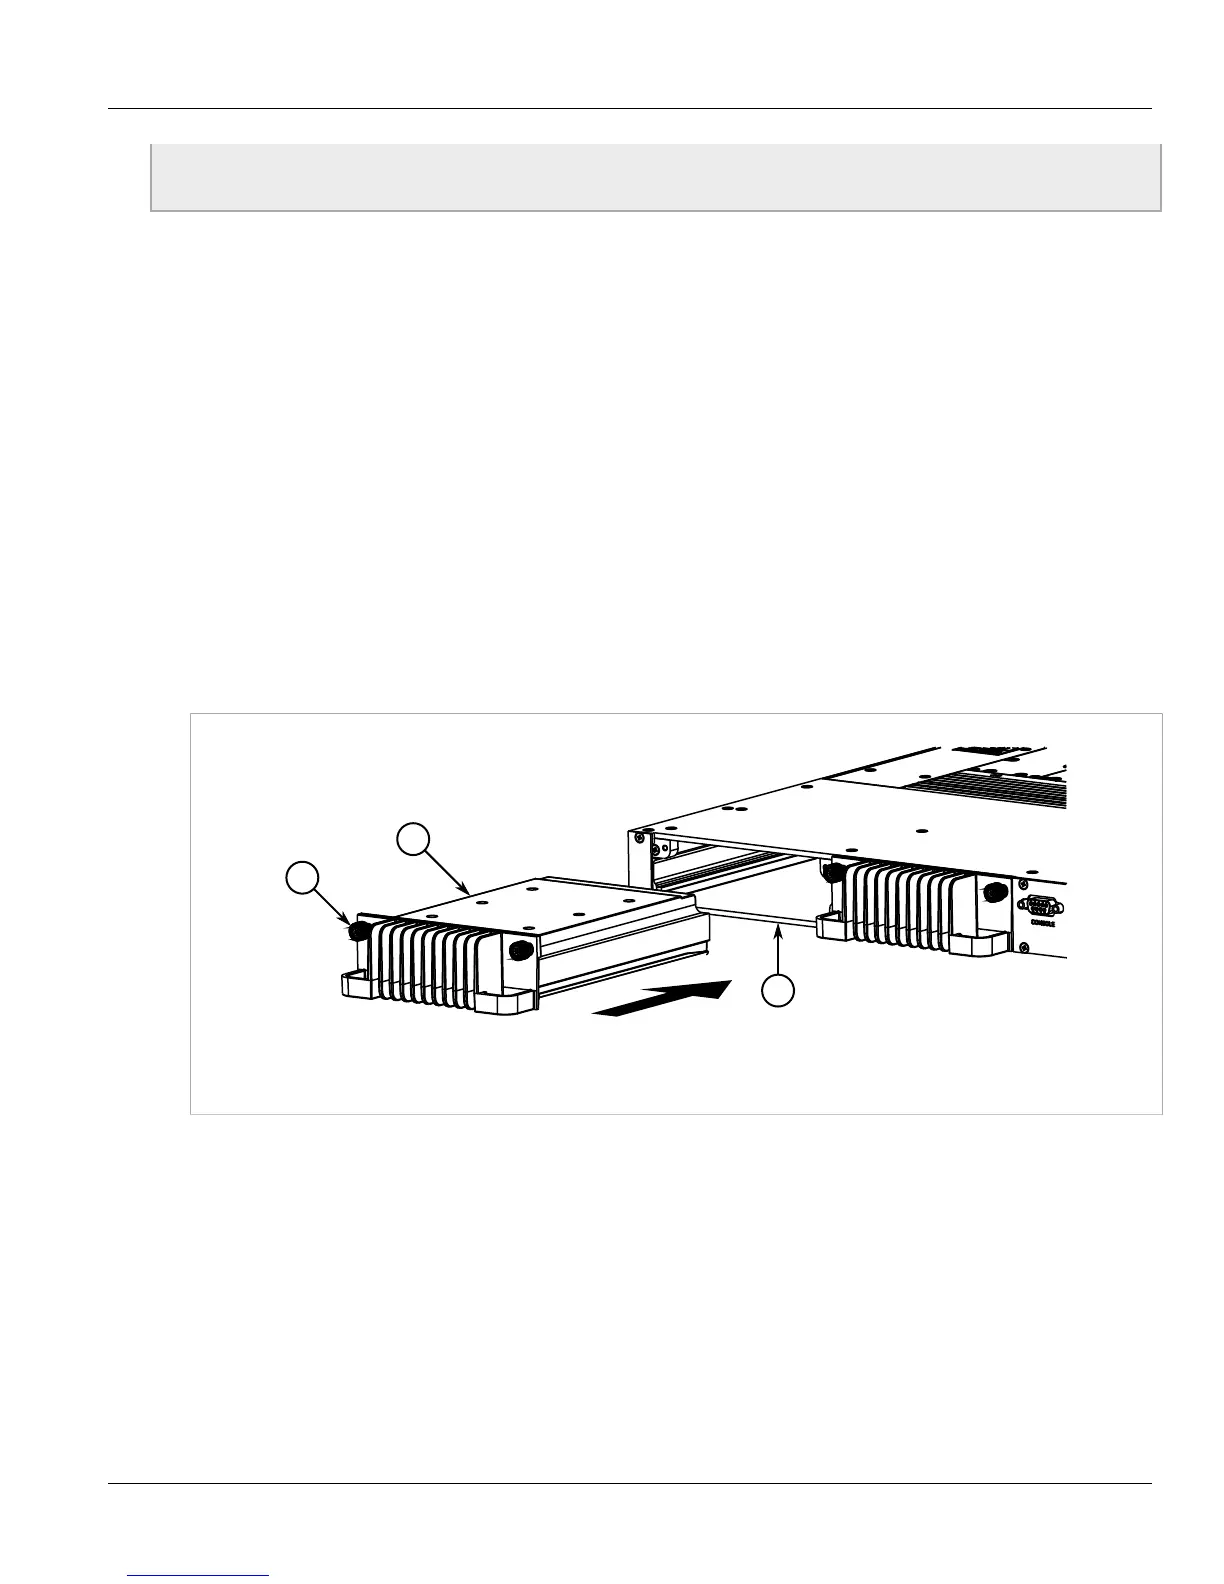
3. Insert the power supply into the empty slot.
Figure 5:
1. Screws 2. Power Supply 3. Slot
4. Hand-tighten the screws to secure the module.
5. If necessary, connect the required terminal block to the chassis. For more information, refer to Section 2.2.3,
“Wiring Power Supply Terminal Blocks”.
6. Supply power to the device. The top and bottom LEDs on the power supply should be green, indicating that
power is being received and supplied to the device.
Section 2.2.2
Removing the Power Supplies
To remove the power supplies, do the following:
 Loading...