Hardware Installation and Reference Guide Installing the Router
23
3.4.2 Simple Installation Steps
(1) Plan the available space before installing the cabinet. Reserve enough space for the front and rear doors for
device maintenance.
(2) Install and fasten the cabinet in the designed position as planned.
(3) Install the appropriate cable troughs and cables.
(4) Install the tray and cable management brackets on the rack according to the number of devices installed into
the cabinet.
3.5 Installing the Device
3.5.1 Mounting the Device into a Cabinet
Caution
RG-EG305GH-P-E and RG-EG310GH-P-E routers cannot be installed into a cabinet.
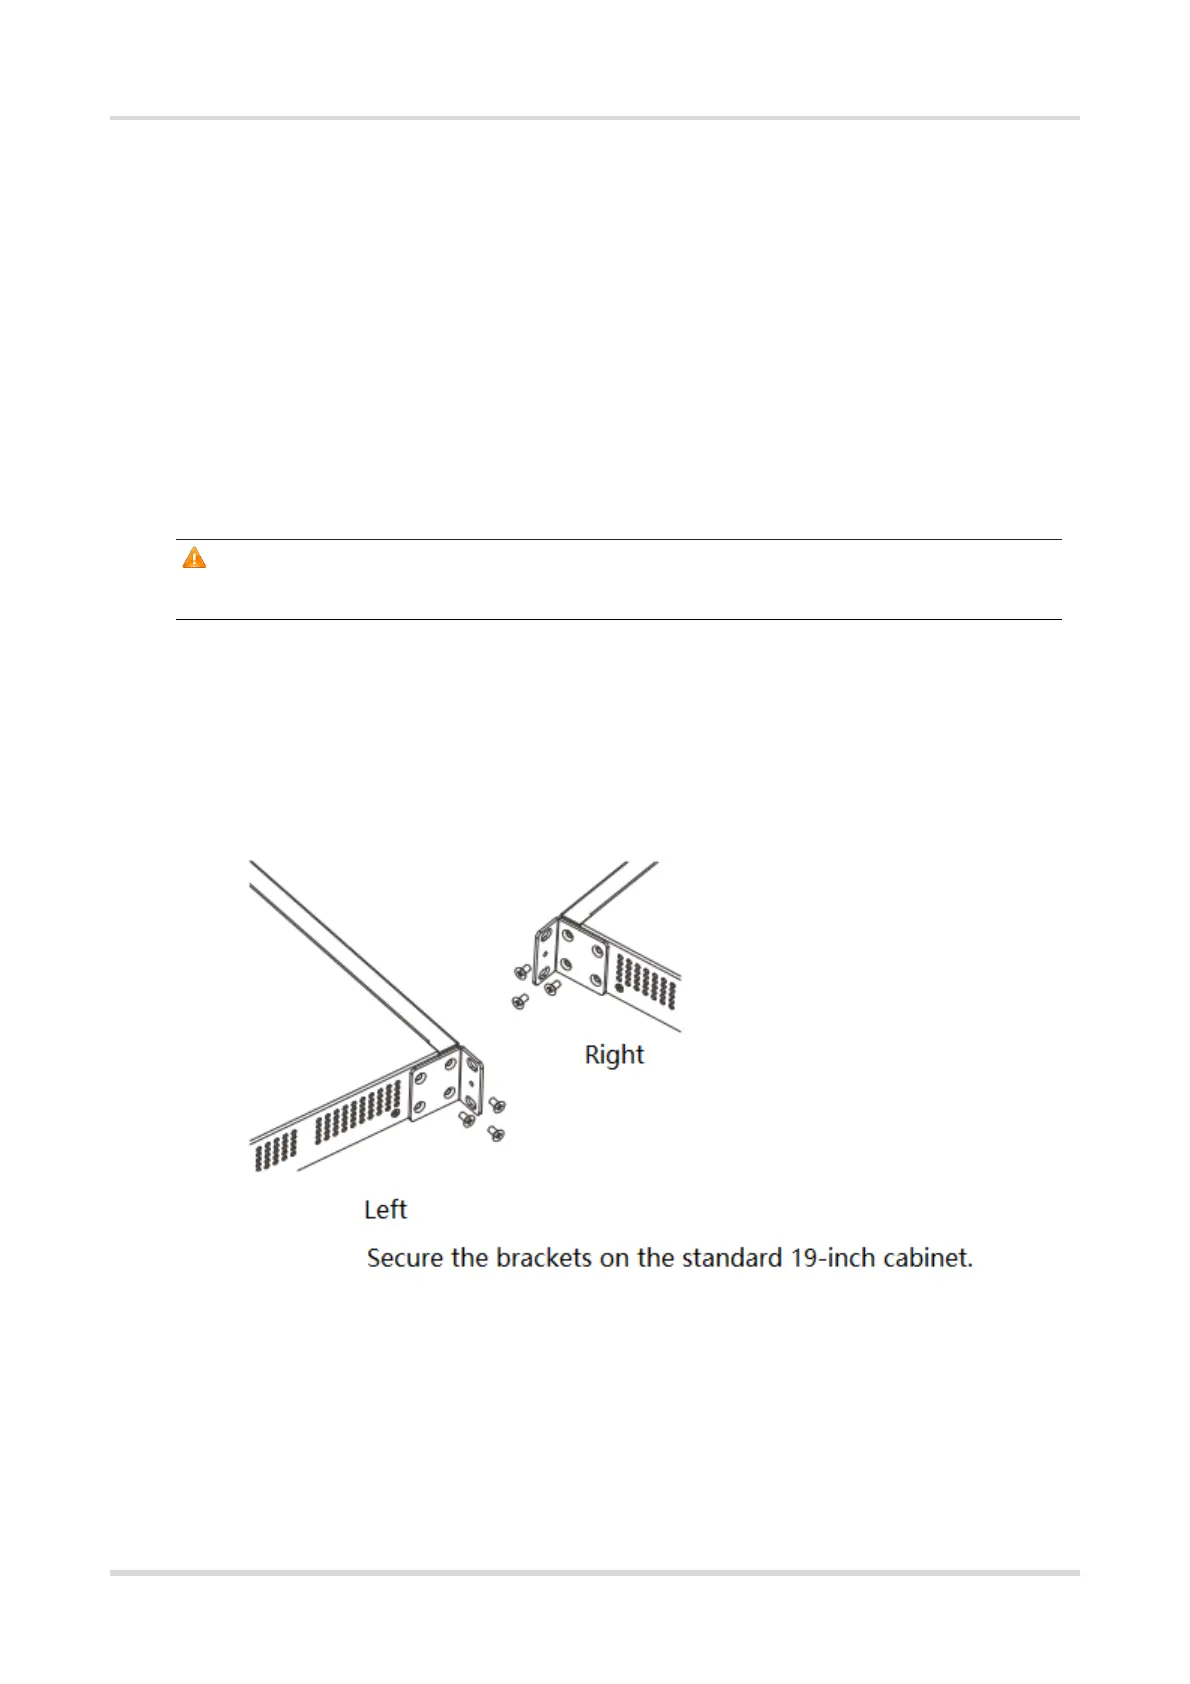
The RG-EG310GH-E router can be installed in a 19-inch EIA cabinet. The installation steps are as follows:
(1) Take out the M4 x 8 mm screws (delivered with the brackets). Secure one bracket to each side of the device
using three M4 x 8 mm screws.
Figure 3-2 Installing the Brackets
(2) Mount the device into the cabinet and secure the other end of the brackets to square hole posts of the cabinet
using the cage nuts and M6 screws.
3.5.2 Mounting the Device on a Workbench
If a standard 19-inch cabinet is unavailable, you can mount the device on a workbench.
(1) Attach the four foot pads to the four corners on the bottom of the device.

 Loading...