START-UP
Axio Lab.A1 Installing standard components Carl Zeiss
04/2013 430037-7144-001 55
3.1.8.4 Removing the stage clips and mounting the detachable specimen guide Pol
x Remove the stage clips (Fig. 3-12/9) from the rotary stage Pol.
x Insert the specimen guide Pol (Fig. 3-12/2) with the two cylindrical pins on the underside into the holes
provided (Fig. 3-12/3) and tighten the clamp screw (Fig. 3-12/1).
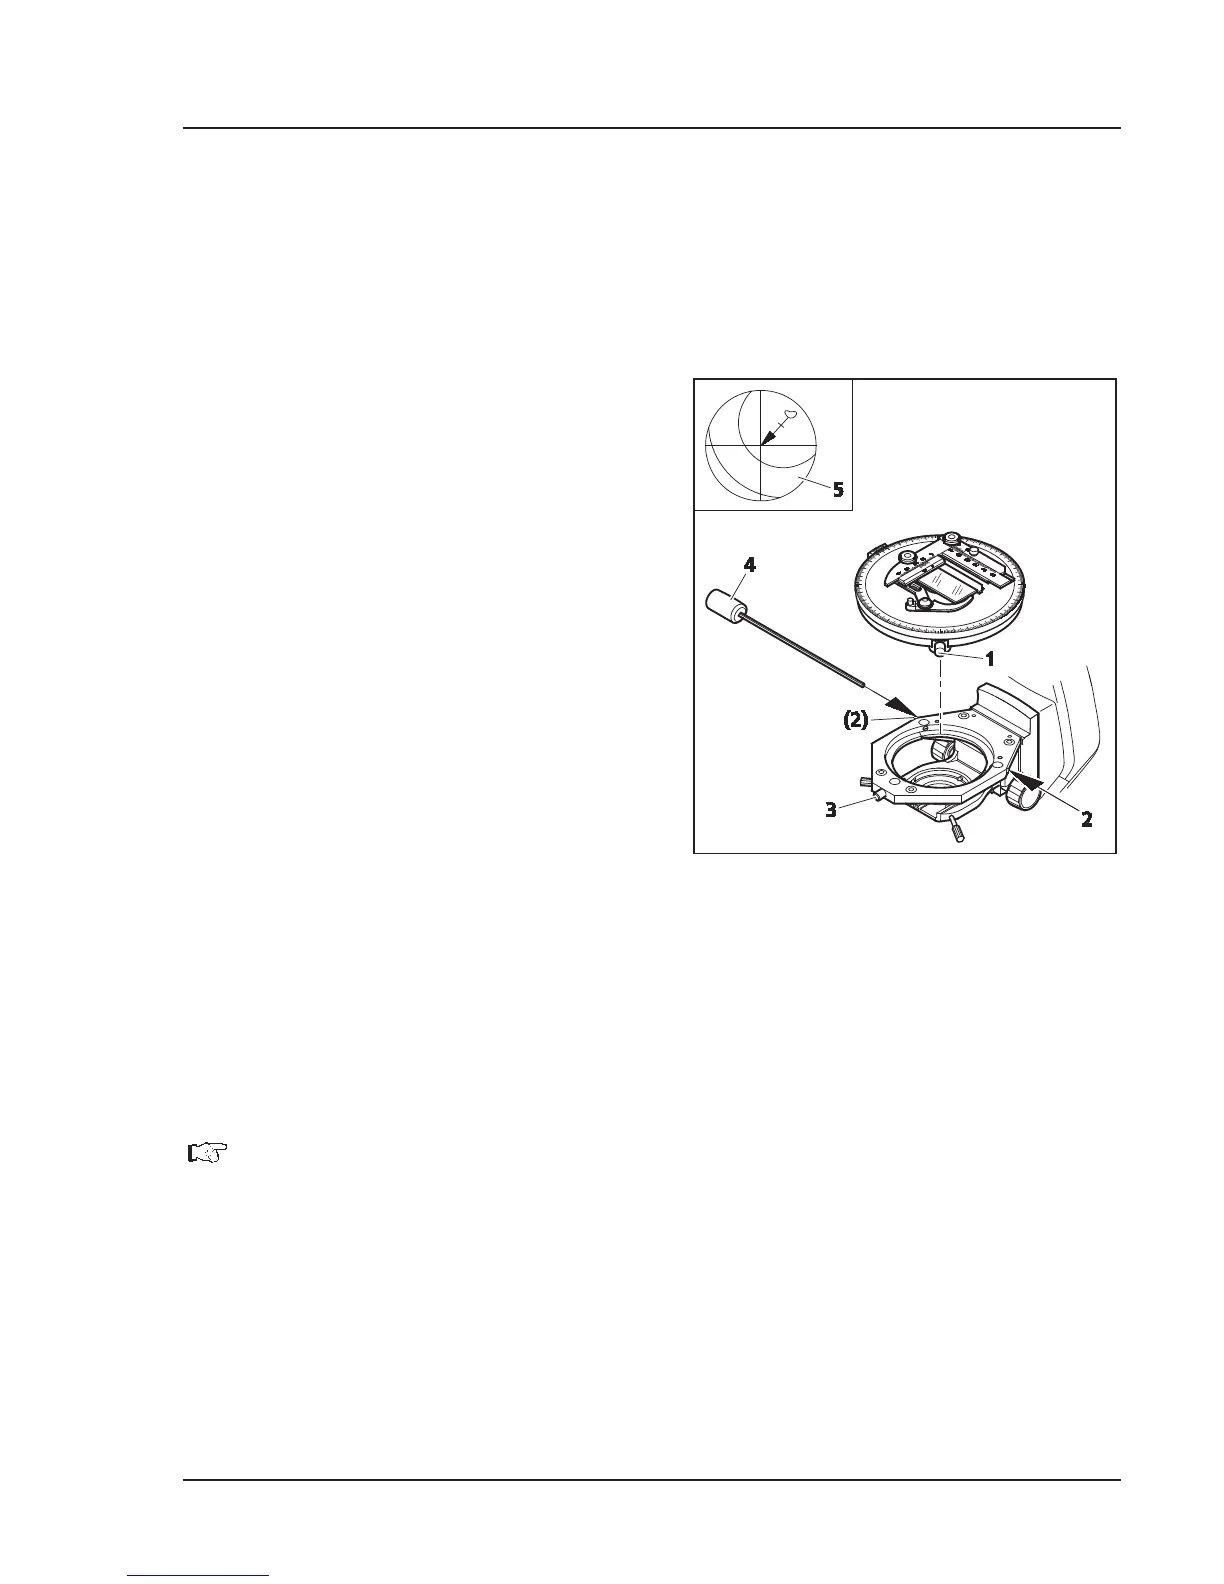
3.1.8.5 Centering rotary stage Pol
With high-power objectives centering can be exact
only for one selected objective.
All stages are factory-precentered, i.e. while
rotating the stage the specimen feature set to the
center will remain in the center. If the specimen
feature moves off the center of the field of view
(Fig. 3-13/5), while rotating the stage, the stage
should be re-centered by following this procedure:
x The KÖHLER illumination on the microscope
must be adjusted before centering the stage
(see Section 4.1.1).
x Turn the nosepiece to swing the non-centring
objective mount.
x For centering the stage, use a contrasting
specimen and an eyepiece with crossline reticle.
x Loosen the stage clamping screw (Fig. 3-13/1)
and screw cap on the stage carrier (Fig. 3-13/3).
x Rotate the stage to determine the position of
maximum offset of the specimen feature
(Fig. 3-13/5, origin of arrow) from the center of
the eyepiece reticle.
x Reset the two centering screws on the stage carrier (Fig. 3-13/2) using a SW 1.5 socket wrench
(Fig. 3-13/4) to move the specimen detail by half an arrow length in the direction of the crossline
center. Check whether the specimen detail moves when the stage is rotated again; repeat the
procedure, when required.
The SW
1.5 socket wrenches are located in the storage compartment on the rear side of the
microscope stand.
x When centering is finished, re-tighten screw cap (Fig. 3-13/3).
Fig. 3-13 Centring rotary stage Pol