START-UP
Axio Lab.A1 Installing standard components Carl Zeiss
04/2013 430037-7144-001 57
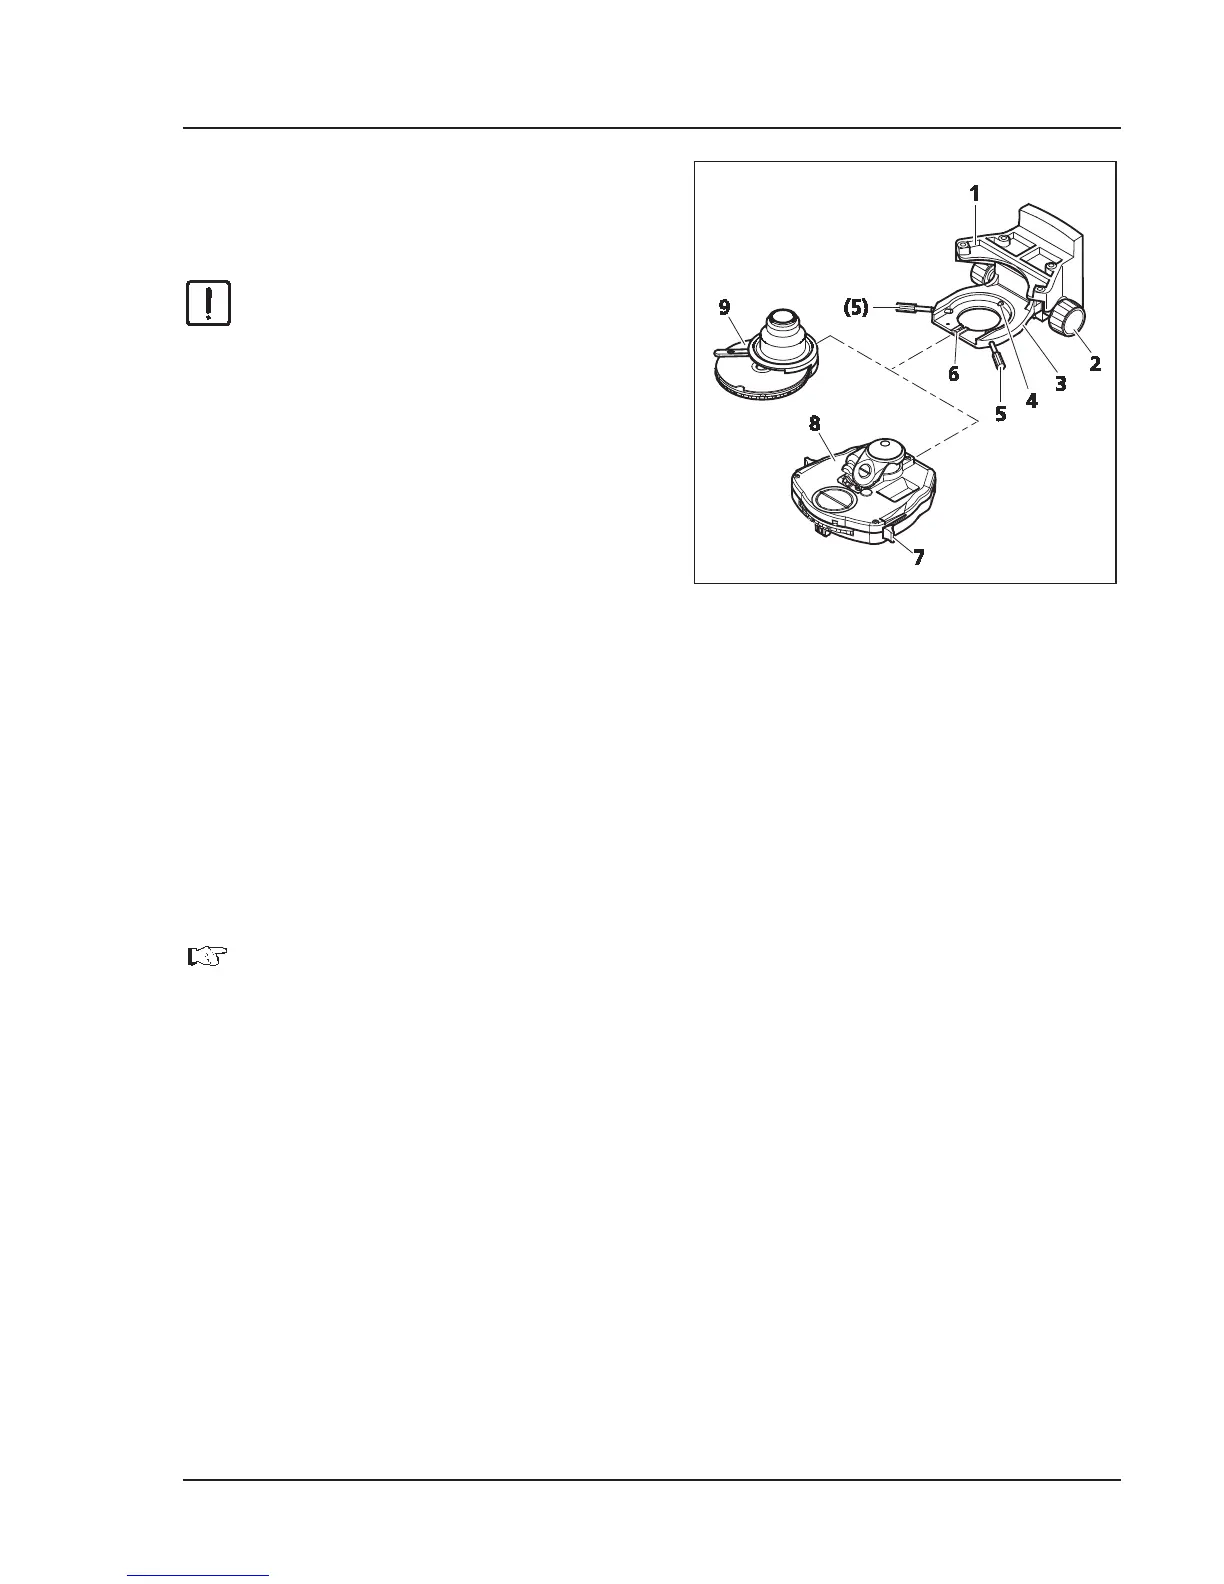
3.1.9 Attaching condenser
x Move the stage carrier with focusing drive to
the higher stop position.
CAUTION
The objectives should not collide with
other parts.
x Swivel out front lens (if shiftable) on condenser
using lever (Fig. 3-15/7).
x Remove both centering screws (Fig. 3-15/5) on
the condenser carrier until their ends are no
longer visible.
x Push the condenser carrier (Fig. 3-15/3) with
drive knob for vertical adjustment (Fig. 3-15/2)
down as far as it will go.
If using an overview fixture, make sure that this
does not come to rest on the luminous-field
diaphragm.
x Insert the condenser (Fig. 3-15/8 or 9) between the condenser carrier (Fig. 3-15/3) and the stage
carrier (Fig. 3-15/1). In doing so, align the screwed stud bolt on the underside of the condenser with
the groove (Fig. 3-15/6).
x Press the condenser with the dovetail ring against the mainspring (Fig. 3-15/4) of the condenser carrier
until the condenser sits horizontally on the condenser carrier.
x Position the condenser on the carrier so that the screwed stud bolt sits against the groove (Fig. 3-15/6)
at the front.
x Insert the centering screws until they engage with the dovetail ring of the condenser.
For mounting other types of condensers, proceed analogously.
Fig. 3-15 Attaching condenser