INSTALLATION
Please read the important safety information at the start of this manual before you begin to install
the device. The ideal position to locate the SP220 programmable heating controller is about 1.5m
above floor level. It should be mounted in a location where the controller is easily accessible,
reasonably lit and free from extremes of temperature and draughts. Do not mount the controller on
an outside wall, above a radiator or in a location where it may be subjected to direct sunlight.
The SP220 should be mounted in a location where it will not come into contact with moisture or
condensation, as this can affect the Touch Ring operation.
To ensure trouble free reception for both the Radio Controlled Clock (RCC) and the Radio Frequency
(RF) signal, always ensure that the programmable thermostat is mounted away from any possible
sources of interference (such as radios, TV sets, computers, etc.), and is not mounted on or in close
proximity to large metal objects. Installing the SP220 in enclosed areas such as cellars and basements
is not recommended.
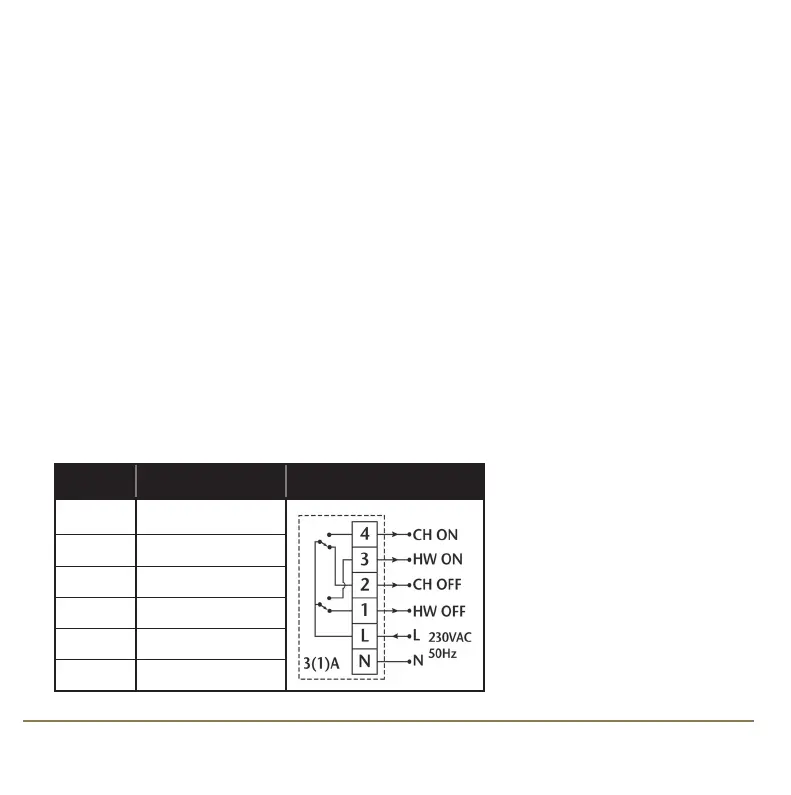
The electrical connections to the SP220 are made to the terminal strip within the controller itself.
Connection details are shown below - no Earth connection is required for the correct and safe
operation of the SP220.
230V AC Connections
Terminal Description Terminals
4 Central Heating On
3 Hot Water On
2 Central Heating Off
1 Hot Water Off
L Mains Live
N Mains Neutral
5SP220 INSTRUCTION MANUAL
SP220 Manual Ver 005.qxd:Layout 1 5/1/11 10:54 Page 5